A smooth office headshots setup needs three things locked in before anyone touches a camera: a quiet room with about 12 by 20 feet of space and reliable power, a schedule that budgets 7 to 15 minutes per person, and a prep email sent to employees days in advance. Reserve the room and send that email first. Everything else in this guide builds on those two moves.
TL;DR:
- Using a room of at least 10 by 15 feet, ideally 12 by 20 feet, ensures proper background blur and prevents flat, harsh images.
- Schedule 7 to 10 minutes per employee for one look, with built-in buffers, to maintain a smooth, predictable shoot flow.
- Conduct group shots early in the day to leverage peak energy before shifting to individual headshots to avoid delays.
- Send a concise prep email with attire, grooming, and schedule details to reduce confusion and ensure employees arrive prepared.
- Controlled studio lighting is recommended over natural light for consistency, especially when shooting large groups or multiple employees.
Table of Contents
- What Room Setup Do You Need for Office Headshots?
- How Long Should You Schedule per Employee?
- What Does the Day-of Workflow Look Like?
- What Should Employees Do Before the Shoot?
- Should You Use Studio Lighting or Natural Light?
- How Should Selections and Retouching Work?
- How Do You Make the Shoot Accessible to Everyone?
- What Poses Actually Look Good on Camera?
- What Should Employees Wear and How Should They Groom?
- How Do You Handle Group Shots Alongside Individual Sessions?
- Why Metroplex Headshots Recommends This Approach
- Ready to Book Your Office Headshot Day?
- Sources
- FAQ
What Room Setup Do You Need for Office Headshots?
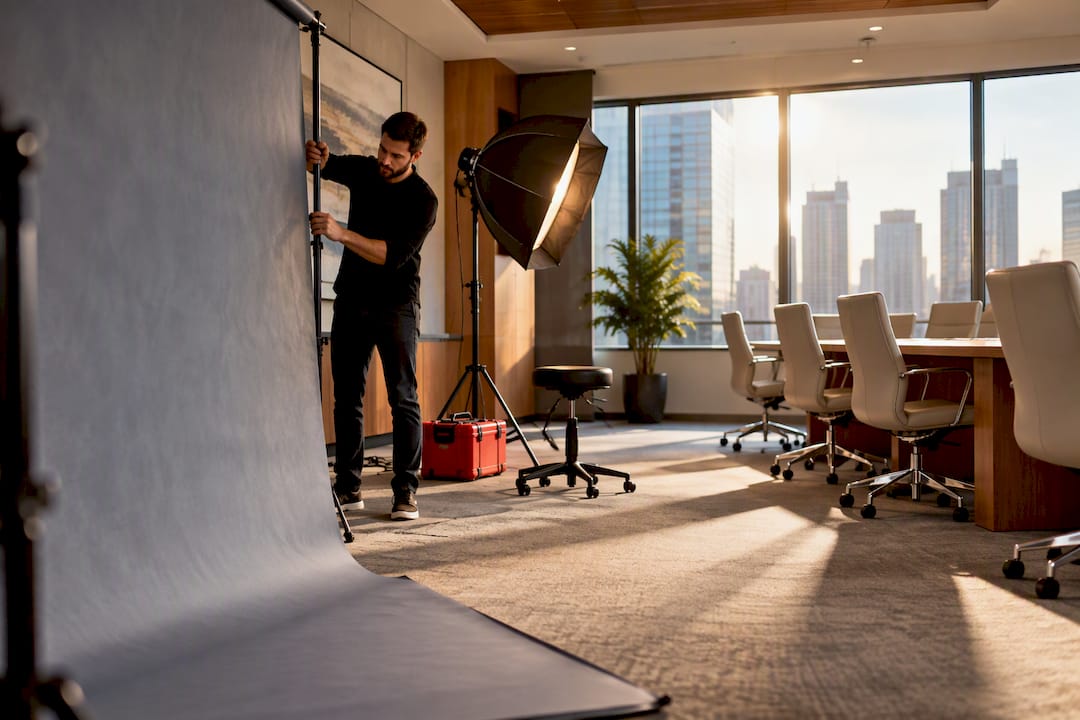
The room makes or breaks your day. You want at least 10 by 15 feet, with 12 by 20 feet as the sweet spot, because the photographer needs distance between the subject and the backdrop to blur the background properly. Cramped rooms flatten that separation and every shot looks the same, harsh way.
Beyond square footage, pick a space with low foot traffic, minimal noise, and easy access near restrooms and parking. Reliable power access matters too. Lighting gear pulls real current, and taped-down cables keep the walkway safe. Planning ahead for parking, room appearance, and equipment access cuts down on day-of scrambling.
For the backdrop, decide between a neutral seamless setup or an environmental one with office elements visible behind the subject. Either works, but clear the clutter first: stray cables, signage, and rolling chairs all creep into frame if nobody checks.
- Minimum 10×15 ft; ideal 12×20 ft for proper subject-to-background depth
- Quiet, low-traffic location near an entrance, restroom, and parking
- Dedicated power circuit with cables taped or routed away from footpaths
- One booth for teams under 40; consider two stations for larger headcounts
Pro Tip: Walk the room at the same time of day you plan to shoot. Afternoon sun through a nearby window can wreck a seamless backdrop that looked perfect at 9 a.m.
How Long Should You Schedule per Employee?
Budget 7 to 10 minutes per person if everyone gets one polished look, or 10 to 15 minutes if you’re offering two expressions or outfit changes. That range comes straight from professionals who run these days regularly, and it holds up whether you have 15 employees or 150. Building your schedule around it, rather than guessing, is what keeps a 9 a.m. start from turning into a 4 p.m. scramble.
- Block time in 7 to 15 minute increments per person, depending on how many looks you’re offering.
- Add a 5 to 10 minute buffer every hour to absorb late arrivals or a stubborn tie.
- Set up sign-ups with a tool like Calendly or a shared Google Sheet, collecting name, department, email, glasses (yes/no), and preferred vibe.
- Batch similar roles together, sales in one block, leadership in another, so the photographer isn’t resetting lighting or coaching style every ten minutes.
A simple sign-up system that flags glasses and preferred vibe in advance lets the photographer prep instead of improvising, which shaves real minutes off each session. If you’re coordinating a large corporate team, build the batching plan before the sign-up sheet goes out, not after.
What Does the Day-of Workflow Look Like?
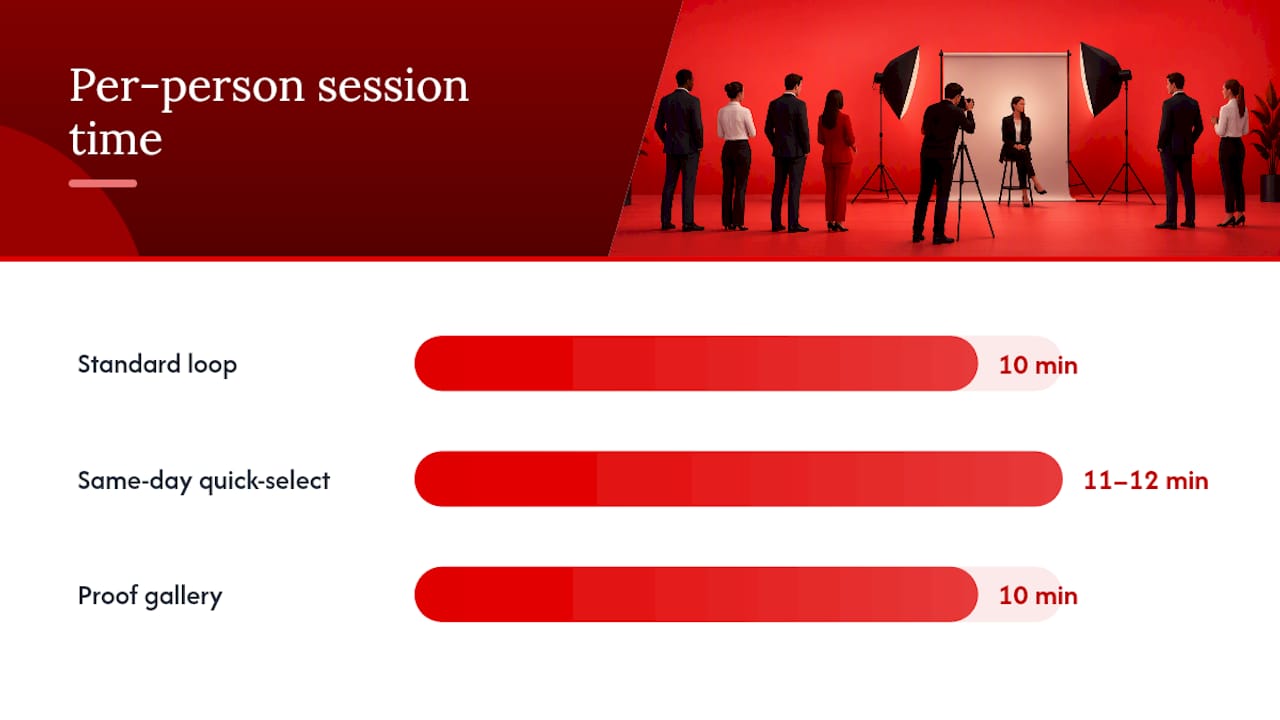
A repeatable run of show keeps every session roughly the same length, which is the whole point of an office headshots setup: consistency, not chaos. Think of it as a ten-minute loop that repeats all day.
- Check-in (0 to 1 minute): Greeter confirms name, department, and any noted preferences from the sign-up form.
- Micro-groom (1 to 2 minutes): A quick mirror check, lint roller pass, or hair fix before stepping in front of the camera.
- Shoot with coaching (2 to 6 minutes): The photographer gives simple posing direction and captures several frames.
- Quick select (6 to 8 minutes): Either the subject or a designated decision maker picks the winning frame on the spot.
- Wrap (8 to 10 minutes): Subject exits through a separate path while the next person checks in.
That one-way flow, check-in to waiting area to shoot to exit, prevents bottlenecks and awkward hallway run-ins. Post small signs marking each stage so people don’t need to ask. Assign clear roles ahead of time: one person greets and manages the line, the photographer shoots and directs, and someone (often HR) makes the final call on close picks so the subject isn’t stuck deliberating.
Pro Tip: Same-day quick-selects speed up adoption because employees leave knowing which photo is theirs. But they add a minute or two per person. If your headcount tops 100, a proof gallery sent afterward may keep the line moving faster.
What Should Employees Do Before the Shoot?
Send a short prep email at least a few days out. Keep it skimmable: date and time, exact room location, attire guidance (solid colors, avoid busy patterns), a couple of grooming reminders, the expected time commitment (7 to 15 minutes), and a plain-language note on how the photos will be used. A short, clear prep email covering those points reduces confusion and keeps people from showing up unprepared or anxious.
Stock a small grooming kit at the check-in table so nobody has to run to their desk mid-session:
- Mirror and lint roller
- Blotting sheets for shine
- Tissues and a small sewing kit
- Hair clips and a comb
Keep consent language simple. A line like “these photos will be used on our website, LinkedIn, and internal directories” is enough. Note where follow-up images will be sent, usually a shared drive link or individual email, so nobody chases HR a week later. If you want a ready-made version of this checklist for individual executives, Metroplex Headshots’ preparation guide covers attire and grooming detail you can adapt for a group email.
Should You Use Studio Lighting or Natural Light?
For office settings, controlled lighting beats natural light almost every time you’re shooting more than a handful of people. Sunlight shifts throughout the day, changing color casts and exposure from one session to the next, so the person shot at 9 a.m. looks noticeably different from the one shot at 2 p.m. Controlled, portable studio lighting removes that variable and keeps every headshot in the batch looking like it belongs to the same set.
Here’s the trade-off in plain terms:
- Seamless with controlled lighting: Consistent across dozens or hundreds of employees, and the easiest to standardize for internal systems and marketing use, but it strips out any sense of the actual workplace.
- Environmental setups: Show off your office and add context, but lighting conditions vary by location within the building, making large groups harder to match.
Tell your photographer upfront which one you want and how many employees you’re shooting. That single conversation shapes their equipment list and setup time. Ask about file formats too. Web crops, print-ready files, and transparent PNGs for internal templates all serve different purposes, and it’s easier to request them before the shoot than to reprocess afterward.
How Should Selections and Retouching Work?
Decide your retouch policy before the first photo is taken, not after employees start asking why their skin looks different from a coworker’s. A typical corporate retouch handles natural skin toning, stray flyaway hairs, and light under-eye softening without pushing into overprocessed territory that looks fake on a company directory page.
- Same-day quick-selects speed adoption but add time per session; proof galleries move faster on-site but delay final delivery by a few days.
- Request both web and print files, along with LinkedIn-ready crops sized for that platform specifically.
- Standardize file naming as First_Last_Department to make bulk uploads to your intranet or HR system painless.
- Build a short rollout email template in advance so managers know exactly how to swap old photos for new ones.
Pro Tip: Send one internal reminder about the retouch policy before the shoot. Employees who know what to expect (natural, not airbrushed) are far less likely to request redo sessions later.
How Do You Make the Shoot Accessible to Everyone?
Not every employee moves through a ten-minute session the same way, and a good office headshots setup plans for that instead of treating it as an exception. Offer a chair near the check-in table and build in extra time for anyone who needs it, no questions asked.
- Provide a private entry and exit path for employees who prefer not to wait in a visible line.
- Respect cultural clothing choices and natural hair textures; never suggest a last-minute change that makes someone uncomfortable.
- Coach on glasses glare gently, tilting the frames slightly usually solves it, without turning it into a big production.
- Run sessions one person at a time with the door closed, and keep usage consent language visible and easy to understand.
A little flexibility here costs almost nothing in schedule time and prevents the day from feeling like an assembly line.
What Poses Actually Look Good on Camera?
Most employees don’t need modeling direction, they need two or three simple, repeatable cues. Ask the subject to turn their shoulders slightly away from the camera while keeping their face forward. This “shoulder twist” slims the frame and looks natural instead of stiff. It’s the single most useful posing trick for a corporate headshot day.
Chin position matters more than people expect. A chin tucked slightly down and forward avoids the double-chin effect that straight-on angles create, but overdoing it looks aggressive. The photographer should watch for that balance shot by shot rather than giving one static instruction and moving on.
Encourage a genuine reaction instead of a held smile. Simple prompts work better than “say cheese”: ask about weekend plans, crack a light joke, or just say “give me a real laugh” right before the shutter clicks. Micro-grooming items and a short coaching script save retouching time and improve comfort, and casual direction consistently outperforms rigid, model-style posing for this kind of session.
Hands are the other trap. If hands appear in frame, give them something to do, resting lightly on a knee or crossed arms, rather than hanging awkwardly. For seated shots, a slight forward lean toward the camera adds energy that a straight-backed pose lacks.
What Should Employees Wear and How Should They Groom?
Solid colors photograph best. Small patterns, like fine stripes or tight checks, create a strobing effect on camera that looks distracting in a still image. Jewel tones and neutrals both work well against most backdrops; pure white can wash out under studio lighting, and pure black can absorb too much light and lose detail.
Tell employees to avoid anything brand-new on shoot day. New shirts often have visible fold lines from packaging, and stiff new blazers photograph less naturally than something already broken in. A quick steam or iron the night before solves most wrinkle problems.
For grooming, simple reminders go a long way: a fresh haircut or trim a few days before (not the morning of, in case of a bad cut), minimal shine on the forehead and nose (blotting sheets at check-in handle this fast), and glasses cleaned right before stepping in front of the camera. Facial hair should be trimmed and even, not freshly shaved if that’s a departure from someone’s usual look, since the goal is a headshot that still looks like them next week.
Mention accessories briefly. Large, dangling earrings or thick necklaces can catch light oddly or shift during the shot. Small, simple pieces photograph more reliably.
How Do You Handle Group Shots Alongside Individual Sessions?
Group and individual shots pull in different directions, and trying to run both back-to-back without a plan is where most office headshots setup days lose time. Individual sessions move fast once your 7 to 15 minute rhythm is dialed in. Group shots do not follow that same rhythm because they depend on gathering multiple people in the same place at the same time, which is nearly always the hardest logistical piece of the day.
Schedule group shots first, while energy and turnout are highest, then move into individual sessions once the group has dispersed. Trying to squeeze a 20-person department photo in the middle of an individual rotation stalls everyone waiting behind it.
For group photography, assign a single point person to physically arrange people (taller in back, shorter in front, avoiding a rigid grid) since photographers directing from behind the camera can’t always see spacing issues from their angle. Keep group sessions to one setup and one backdrop matching the individual shots, so the final gallery feels cohesive rather than like two separate projects. Budget extra buffer time here specifically. Fifteen minutes for a 20-person group shot is realistic; five minutes is not.

Why Metroplex Headshots Recommends This Approach
A headshot is a brand extension, not just a personnel file update. Running a planned, repeatable process, matched time slots, controlled lighting, one retouch standard, delivers consistent team presentation across every department and cuts the retouching backlog that comes from inconsistent lighting or last-minute poses. Faster adoption follows naturally when employees trust the process instead of dreading it.
— Traci Schowmeyer
Ready to Book Your Office Headshot Day?
Using a mobile studio that brings controlled lighting to your office can help achieve a consistent polished look for employee headshots without the need to assemble your own equipment or rent space. The On Location: Company Headshots package is available for a fee; current prices for additional services like hair and makeup and extra retouched images are listed on the client’s packages page.

When you request a quote, have four details ready: your headcount, preferred shoot dates, the general look you want (seamless studio or environmental), and your room’s approximate dimensions. That last one lets us confirm your space works before we ever show up with gear. For teams spread across multiple offices or a headcount in the hundreds, our remote team headshot coordination option keeps one point person managing the whole rollout.
Visit the packages page to see full pricing details, or reach out directly to lock in a date before your team’s calendar fills up.
Sources
FAQ
How Much Time Should I Schedule per Employee?
Plan for 7 to 10 minutes per person for one polished look, or 10 to 15 minutes if you’re offering two expressions or outfit options. Add a 5 to 10 minute buffer every hour to absorb late arrivals without derailing the rest of the schedule.
What Size Room Do We Need for an Office Headshot Day?
A minimum of 10 by 15 feet works, but 12 by 20 feet is ideal because it gives the photographer enough depth to separate the subject from the background. The room should also be quiet, low-traffic, and near reliable power.
How Much Does an On-Location Office Headshot Session Cost?
Metroplex Headshots’ On Location: Company Headshots package is priced at 1250 $ for the full session. Hair and makeup can be added for 95-160 $ per person, and extra retouched images run 150 $ each.
Should We Do Group Photos or Individual Headshots First?
Schedule group shots first while attendance and energy are highest, then move into individual sessions once the group disperses. Trying to insert a large group photo mid-rotation stalls the individual line behind it.
What Should Go in the Prep Email to Employees?
Include the date, time, exact room location, attire guidance (solids over busy patterns), grooming tips, the expected time commitment, and a plain note on how photos will be used. A short, clear prep email like this cuts down on day-of confusion significantly.