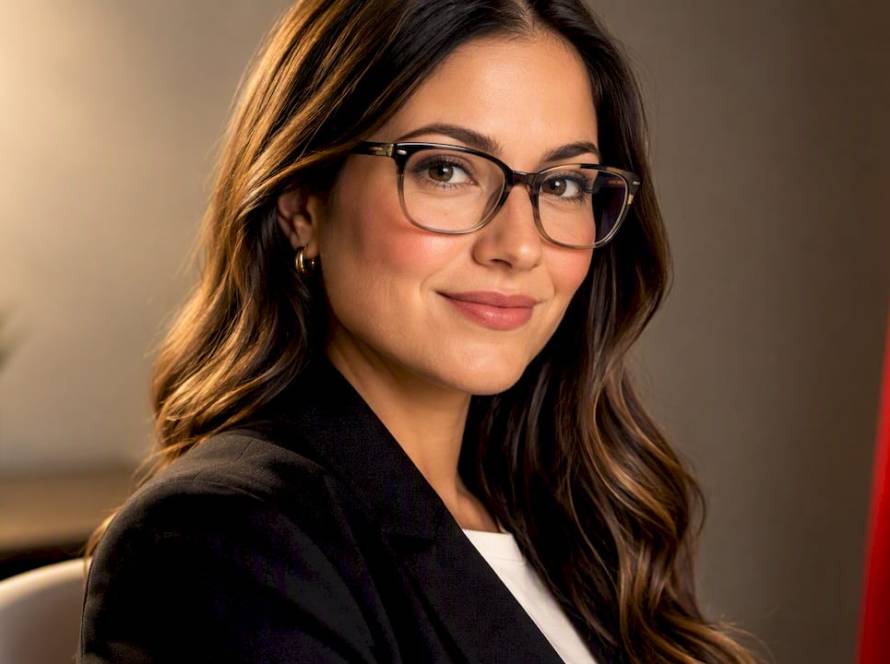
In this guide, “content for photography” means professional headshot photographs produced by a studio for LinkedIn profiles, company websites, and corporate use. If you’re a Dallas–Fort Worth executive, practice owner, or HR manager ready to book, Metroplex Headshots is the local studio built for exactly that. Start with a consultation or prepare your shot list, and your team’s brand alignment begins before the camera clicks.
Key Takeaways
Professional headshot content for LinkedIn, websites, and corporate use requires the right session type, deliberate wardrobe choices, a clear brand brief, and a photographer with a structured delivery workflow.
| Point | Details |
|---|---|
| Session type drives logistics | Choose in-studio for individuals, on-location for branded context, and mobile studio for large team rollouts. |
| Wardrobe controls the outcome | Avoid pure white and busy patterns; navy, charcoal, and jewel tones photograph well across skin tones. |
| Preparation protects your investment | Bring 2–3 outfit options, reference images, and corporate brand standards to every session. |
| Confirm scope before booking | Session length, retouching inclusions, licensing rights, and turnaround time all affect price and scheduling. |
| Metroplex Headshots | Serves DFW executives, teams, and professionals with studio, on-location, and mobile studio sessions plus real-time review. |
Table of Contents
- What does “content for photography” actually mean for professionals?
- Which session type is right for your situation?
- What to wear for a corporate headshot session
- Your day-before and day-of preparation checklist
- What happens during a session and what you receive afterward
- How headshot session pricing works in Dallas–Fort Worth
- How to choose the right headshot photographer
- Which headshot style fits your use case?
- How to communicate your brand identity to the photographer
- Common mistakes to avoid during a headshot session
- How to review and select your final images
- What the best headshot content actually requires
- Metroplex Headshots: polished headshot content for DFW professionals
- Sources
What does “content for photography” actually mean for professionals?
Here, the phrase covers one thing: paid, studio-quality headshot images used as business branding assets. That includes executive portraits, corporate team photos, LinkedIn profile images, website bios, healthcare staff galleries, legal directory photos, and real estate agent headshots. It does not cover influencer content, product photography, or social-media creator shoots.
What falls inside this guide:
- In-studio sessions with controlled lighting and backdrop options
- On-location shoots at your office or event space
- Mobile studio setups for large corporate rollouts
- Specialty headshots for executives, medical professionals, attorneys, therapists, and real estate agents
Metroplex Headshots covers every one of those categories across the Dallas–Fort Worth Metroplex, treating each portrait as a strategic brand asset rather than a simple photo.
Which session type is right for your situation?
| Session Type | Best For | Key Advantage | Watch Out For |
|---|---|---|---|
| In-studio | Individuals, small groups, executives | Controlled lighting, consistent backgrounds | Travel time for large teams |
| On-location | Office environments, branded settings | Authentic context, no travel for staff | Variable lighting, setup time |
| Mobile studio | Large corporate teams, events | Consistency at scale, no staff travel | Requires adequate space and power access |
In-studio sessions give you the most lighting control and the cleanest background options. A single executive or a small leadership team gets the most from this format because every variable is managed.
On-location works well when your office or workspace is part of the brand story. An attorney photographed in front of a law library or a physician in a clinical setting adds context that a plain backdrop cannot. The trade-off is variable ambient light and longer setup time.

Mobile studio is the right call for a company-wide rollout. The photographer brings the equipment to you, which removes the logistical burden of shuttling 30 employees across town. You’ll need a room with enough space for a backdrop, two lights, and a camera position of roughly 10–12 feet.
Pro Tip: Ask your photographer how many subjects per hour the mobile setup can realistically handle. A well-run mobile studio typically moves through 8–12 people per hour with a tight posing workflow.
What to wear for a corporate headshot session
Wardrobe is the single most controllable variable in a headshot, and it’s also where most professionals make avoidable mistakes.
Avoid pure white and extremely busy patterns. Pure white blows out under studio lights, and tight patterns create a moiré effect on digital sensors that makes fabric look distorted and distracting. Large logos pull the viewer’s eye away from your face, which is the opposite of what a headshot should do.
Recommended colors: navy, charcoal, jewel tones like emerald, burgundy, and deep teal photograph well across skin tones and backdrops. They hold their depth in thumbnails and read as authoritative in full-size images on company pages.
Additional wardrobe guidance:
- Fit matters more than brand. A well-fitted mid-range blazer photographs better than an expensive ill-fitting one.
- Necklines: V-necks and open collars tend to elongate the neck. Turtlenecks can shorten it.
- Accessories: Keep them minimal. One statement piece is fine; three competing pieces are not.
- Grooming: Schedule haircuts 5–7 days before the session, not the day before. Bring a small touch-up kit (powder, lip balm, a comb) for on-set adjustments.
Pro Tip: The phone thumbnail test works every time. Photograph your outfit in the mirror, shrink the image to thumbnail size on your screen, and check whether your face is still the focal point. If the fabric competes with your face at that size, swap the outfit.
For deeper wardrobe guidance tailored to studio sessions, Metroplex Headshots has a dedicated resource worth reviewing before you pack your bag.
Your day-before and day-of preparation checklist
A little preparation before your session protects your investment and keeps the shoot moving efficiently.
Three weeks out:
- Confirm your session type (studio, on-location, or mobile) and the number of looks you want.
- Pull 2–3 outfit options and check them against the wardrobe rules above.
- Gather reference images that reflect the tone and style you want.
One week out:
4. Schedule your haircut (5–7 days before, not the day before).
5. Confirm any corporate brand standards with HR (background color, crop requirements, file format).
6. Review the session prep checklist specific to Dallas–Fort Worth corporate shoots.
Session day:
7. Arrive 10–15 minutes early to settle in and do a quick touch-up.
8. Bring your outfits on hangers, not folded. Wrinkles in fabric photograph sharply.
9. Bring reference images on your phone so you can show the photographer exactly what you have in mind.

Tov Studio’s session prep guide recommends bringing three to four looks for a standard 45-minute session, with each outfit serving a distinct platform purpose: one for LinkedIn, one for a speaker bio, and one for your website header. That variety gives you usable assets across every channel from a single booking.
What happens during a session and what you receive afterward
A well-run headshot session follows a predictable arc. You check in, the photographer adjusts lighting and backdrop to your coloring and outfit, and posing directions begin. Real-time image review on a tethered screen or tablet means you see images as they’re captured. Studios that build real-time review into their workflow produce faster approvals and shorter turnaround times because selects are chosen on set rather than days later via email.
What your deliverables typically include:
- A set number of retouched final images (commonly 1–3 per look for individuals, more for team packages)
- Professional retouching: skin smoothing, blemish removal, stray hair cleanup, and background refinement
- High-resolution files suitable for print and web, plus web-optimized versions
- Background editing or replacement where applicable
Usage and licensing: Personal use (LinkedIn, your own website bio) is standard in most packages. Company-wide use across a corporate website, printed materials, or paid advertising usually requires a broader license. Confirm this before you book, because session scope and licensing directly affect pricing and scheduling. Standard turnaround for retouched images runs 3–7 business days; expedited delivery is often available for an additional fee.
How headshot session pricing works in Dallas–Fort Worth
Headshot pricing is not one flat number. It’s built from several components, and knowing them prevents sticker shock.
- Session fee: Covers the photographer’s time, studio or travel, and equipment.
- Per-image licensing: Some studios charge per final retouched image; others bundle a set number into the session fee.
- Retouching packages: Basic skin retouching is usually included; advanced compositing or background replacement may cost extra.
- On-location or travel fees: Mobile studio setups and on-location shoots add setup time and equipment transport costs.
- Group discounts: Corporate team bookings often carry a per-person rate that decreases with volume.
Factors that push the price up: expedited turnaround, extended licensing rights, large team size, and advanced retouching. Scheduling lead time for a corporate team shoot in Dallas–Fort Worth typically runs 2–4 weeks, longer during peak demand periods in spring and fall. Book early if you’re coordinating a company-wide rollout.
How to choose the right headshot photographer
- Review full-session galleries, not just hero shots. A portfolio of 3 curated images tells you nothing about consistency. Ask to see a complete session for a client in your industry.
- Confirm corporate and team experience. Individual portrait work and corporate team logistics are different skills. Ask how many people they’ve photographed in a single day.
- Ask about real-time review. On-set image review is a sign of a professional workflow and saves you revision rounds later.
- Clarify retouching scope in writing. “Professional retouching” means different things to different studios. Get specifics: how many images, what’s included, what costs extra.
- Confirm licensing before you sign. If your company needs images for a website, printed collateral, and recruiting materials, you need broader rights than a personal LinkedIn license covers.
Red flags: vague turnaround promises, no full-session portfolio examples, and unclear pricing. Trust signals: published testimonials, cohesive corporate photography examples, transparent pricing pages, and a clear on-boarding process.
Which headshot style fits your use case?
Classic studio: Clean backdrop, controlled light, head-and-shoulders crop. The default for LinkedIn, legal directories, and healthcare staff pages. Timeless and easy to update without visual drift across a team.
Environmental: Shot in your office, lobby, or workspace. Works well for website bios and “About” pages where context adds personality. Requires more setup time and careful attention to background clutter.
Branded: Uses your company’s color palette in the backdrop or wardrobe. Ideal for corporate team pages where visual consistency across 20–50 headshots matters more than individual expression.
Crop guidance by platform:
- LinkedIn profile: Square crop, head to mid-chest, face filling roughly 60% of the frame.
- Website bio: Wider crop with breathing room on the sides; works for both square and rectangular layouts.
- Corporate grid: Consistent head-and-shoulders crop across the entire team so the page reads as unified.
Brief your photographer with the exact pixel dimensions your website or CMS requires. Shooting slightly wider than you think you need gives your design team flexibility without a reshoot.
How to communicate your brand identity to the photographer
Your photographer cannot read your brand guidelines unless you share them. Before the session, send or bring:
- Your company’s color palette (hex codes or Pantone references help with backdrop and wardrobe coordination)
- Examples of headshots you admire and, equally important, ones you want to avoid
- Your LinkedIn profile and website bio so the photographer understands the context where images will live
- Any corporate standards from HR (required background color, crop dimensions, file naming conventions)
A visual identity checklist can help you organize these brand elements before the briefing conversation. The clearer your brief, the less time the session spends on trial and error, and the more looks you can cover in the time you’ve booked.
Common mistakes to avoid during a headshot session
Most session problems are preventable. The ones that show up most often:
Wearing the wrong outfit. Packing only one option leaves you with no fallback if the fabric reads poorly under studio lights. Bring at least two looks.
Skipping the pre-session consultation. A five-minute call before shoot day aligns expectations on style, crop, and deliverables. Without it, you may arrive expecting an environmental shot and find a plain backdrop.
Forcing an expression. Stiff smiles read as uncomfortable on screen. Ask your photographer for direction on natural expression rather than holding a pose for too long.
Ignoring grooming details. Flyaway hairs, visible lint, and uneven collar lines are all fixable on set if you catch them. Do a full-length mirror check before the first frame.
Rushing the selection process. Picking your final images in 90 seconds under pressure leads to regret. Build time for a proper review into your session schedule.
How to review and select your final images
Real-time review during the session is your first filter. As images appear on the tethered screen, flag obvious favorites and eliminate clear misses immediately. This narrows the final gallery before you leave the studio.
For the formal selection review:
- View images at full size on a monitor, not on your phone. Small screens hide the details that matter at web resolution.
- Evaluate expression first, technical quality second. A slightly softer image with a genuine expression usually outperforms a technically perfect shot with a flat look.
- Select one primary image per look, then one backup. Avoid selecting near-identical frames; variety across your selects gives you more deployment options.
- If the images are for a corporate team, have one person (HR lead or brand manager) do the final review for consistency rather than letting each employee choose independently. Visual drift across a team page undermines the brand.
What the best headshot content actually requires
Most professionals underestimate how much the pre-session work determines the final result. The session itself is almost the easy part. What produces a headshot that works on LinkedIn, your website, and a corporate team page is the combination of the right session type, deliberate wardrobe choices, a clear brand brief, and a photographer whose workflow includes real-time review and professional retouching. Cutting corners on any one of those elements shows up in the final image, and it shows up every time someone clicks your profile.
The studios that consistently deliver strong results are the ones that treat the portrait as a brand decision, not a photography transaction.
Metroplex Headshots: polished headshot content for DFW professionals
Dallas–Fort Worth professionals who need headshots that hold up on LinkedIn, company websites, and corporate directories get exactly that from Metroplex Headshots. The studio offers in-studio sessions, on-location shoots, and a mobile studio for team rollouts, all with professional retouching, real-time image review, and fast delivery built into the workflow. Whether you’re an executive updating a single portrait or an HR manager coordinating 40 employees, the process is designed to produce consistent, brand-aligned images without the back-and-forth.

View headshot examples and session options, or go straight to the session prep guide to start planning your booking today.
Sources
- Indeed
- What to Wear for Headshots (2026 Outfit + Color Guide) – Tov Studio Photo