

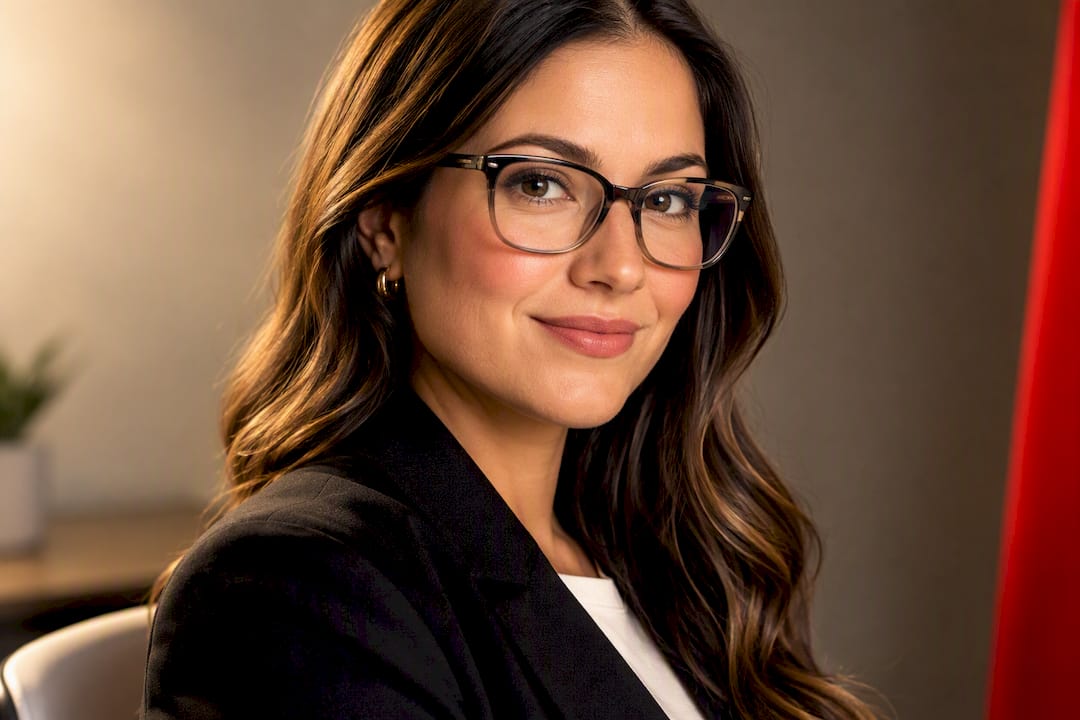
Yes. If you wear glasses every day, keep them on for your headshot. Removing them creates a version of you that clients and colleagues will not recognize in the lobby, on a video call, or across a conference table. Glare is a real problem, but it is a solvable one, and the fixes below are exactly what a photographer should already know how to do.
TL;DR:
- Wearing glasses during the shoot is recommended if you wear them daily, as most people are accustomed to seeing you with eyewear and it reflects your authentic appearance.
- Anti-reflective coating on lenses significantly reduces glare, but clean lenses and proper lighting angles are essential to minimize reflections effectively.
- Positioning the main light above eye level and tilting your chin down can help eliminate hot spots and hotspots caused by reflections on glasses.
- Photographers often capture two shots—one with glasses and one without—to ensure options if glare or prescription distortion are problematic.
- Proper preparation includes cleaning lenses, packing backup frames, and confirming that lighting can be adjusted for glasses wearers before the session.
Table of Contents
- Headshots With Glasses: Authenticity vs. Glare Concerns
- What Techniques Reduce Glasses Glare in Photos?
- Which Frame Styles Photograph Best?
- Do You Need a Backup Shot Without Glasses?
- What Can Retouching Fix, and What Can’t It?
- How to Prepare for a Headshot Session if You Wear Glasses
- How We Handle Glasses at Every Session
- Ready to Book a Session That Handles Glasses Right?
- Sources
- FAQ
Headshots With Glasses: Authenticity vs. Glare Concerns
Your headshot’s job is to look like you. If glasses are part of your daily face, taking them off for a photo introduces a small dishonesty that people pick up on, even if they cannot name why. That gap between the headshot and the handshake matters more than most people think.
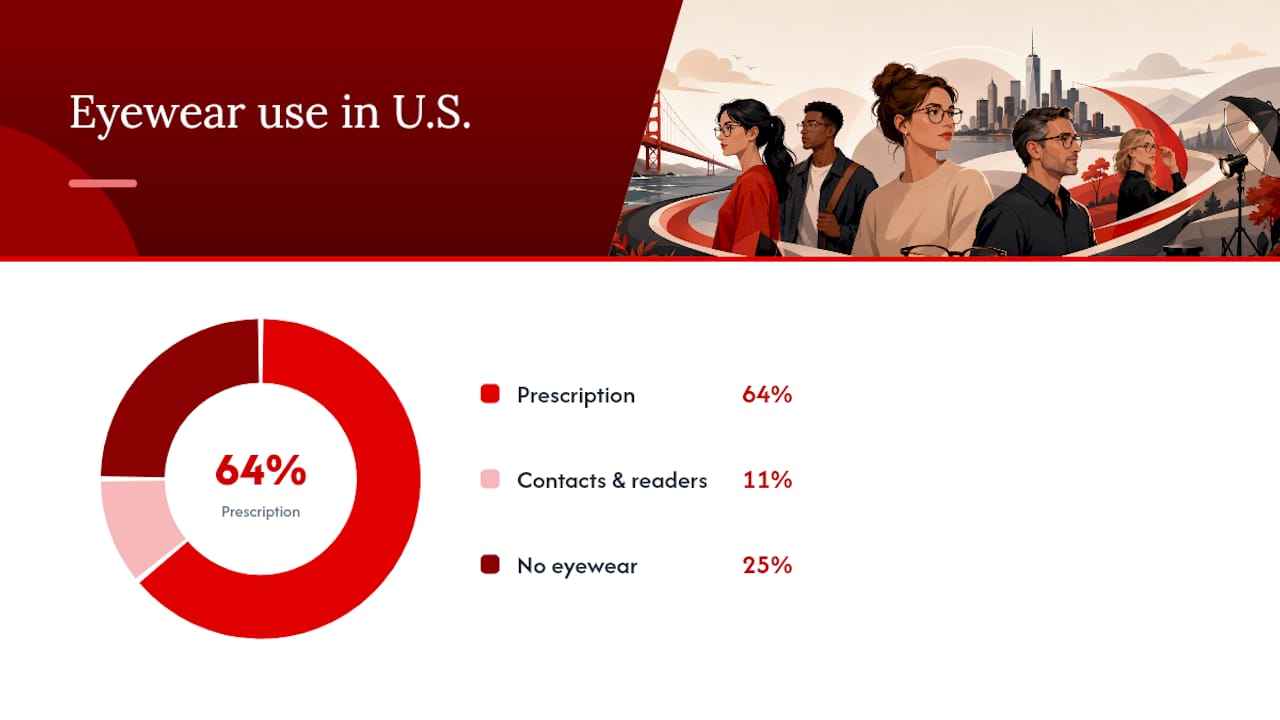
The numbers back this up. About 64% of American adults wear prescription eyeglasses, and once you count contacts and readers, eyewear use climbs to roughly 75%. Glasses are not an outlier accessory anymore. They are the default face for most of the working population, which is exactly why hiding them in a professional portrait can backfire.
There is also a perception angle worth knowing. Research on how eyewear shapes first impressions has found that glasses can shift how viewers judge traits like competence and trustworthiness, often in a positive direction for professional contexts. Frames are not a liability to photograph around, and mastering visual storytelling tips helps emphasize the authentic role of glasses in your personal brand. They are part of the message.
That said, a few situations call for going without:
- Glare that cannot be resolved even with lighting changes and lens treatments.
- Extremely thick or high-prescription lenses that visibly distort or magnify the eyes.
- A specific casting or role requirement where the client has asked for a bare-eye look.
A simple rule of thumb: if you wear your glasses more days than not, wear them in the shoot and let your photographer manage the glare. Ask for a couple of test shots first. You will know within thirty seconds whether the lighting setup is working.
What Techniques Reduce Glasses Glare in Photos?
Glare-free headshots wearing eyeglasses come down to controlling three variables: the lenses themselves, the light source, and your position relative to that light. Here is the order most photographers work through on set.
- Start with the lenses. Anti-reflective (AR) coating is the single biggest lever available before the camera ever comes out. It cuts down surface reflections substantially, though it will not erase every internal reflection or catch from a polarized light source, according to Edmund Optics’ technical primer on the coating. If your glasses have photochromic or transition lenses, avoid wearing them on shoot day. They can tint unpredictably under studio lights.
- Clean the lenses right before the shoot. Smudges scatter light in ways that are hard to retouch later and easy to prevent with a microfiber cloth. Remove any protective film or stickers too.
- Raise the main light above eye level. Positioning the key light slightly higher than the subject’s eyes sends most reflections up and out of the lens rather than straight back into the camera.
- Tilt your chin down a few degrees and rotate your head slightly. A small downward tilt combined with a 10 to 20 degree turn changes the angle at which light bounces off the lens, often eliminating a hotspot instantly.
- Favor soft, diffused light over direct flash. Softboxes, bounced light, and even window light spread illumination across a wider area, which reduces the small, sharp reflections that direct flash tends to create.
- Let the photographer move, not just you. Sometimes the fastest fix is repositioning the light or raising the camera an inch, rather than asking the subject to keep adjusting.
- Consider popping the lenses out. Many opticians can remove lenses temporarily for a shoot, or you can bring empty frames if you own a backup pair. This eliminates reflection risk entirely for the frame shot.
Pro Tip: AR coating handles most surface glare, but expect a faint residual catch at certain angles, especially with higher prescriptions. Budget a minute or two for test shots and small lighting nudges rather than expecting a single perfect setup on the first try.
A good photographer treats this as a normal part of the session, not a special accommodation. If you are researching how the headshot photography process works step by step, glare management is baked into the lighting setup phase, well before anyone says “smile.”
Which Frame Styles Photograph Best?
Frame choice affects the final image almost as much as lighting does. Thin to medium metal or acetate frames tend to disappear into the portrait, letting your expression carry the shot. Heavy black frames or oversized rims can cast shadows across the upper cheek and eye area, especially under a low key light, which pulls attention away from your face.
A few practical guidelines:
- Choose frame colors that complement your skin tone and wardrobe rather than clashing with either.
- Thinner lens profiles and quality AR coatings photograph more cleanly than thick, uncoated lenses.
- Skip trendy novelty shapes or heavily tinted lenses for a business headshot. They read as personality-forward in a way that can undercut a polished, corporate look.
- Coordinate your frames with what you plan to wear. If you need outfit direction too, these outfit tips for a professional photo shoot cover color and pattern choices that pair well with eyewear.
Bring two pairs if you own them: your primary glasses and a simpler backup, ideally with lenses your optician can remove. Having options on hand means a fifteen minute fix instead of a rescheduled session.
Do You Need a Backup Shot Without Glasses?
Most experienced photographers apply what is often called the two-shot rule: capture at least one version with glasses and one without, every time a client wears them regularly. This costs almost no extra time on set, and it gives you a fallback if a particular submission calls for a different look, or if one specific angle produces glare that lighting adjustments cannot fully clear.
Alternates matter most in three cases:
- Persistent glare that survives your best lighting fixes.
- A strong prescription that visibly bends or magnifies the eyes in-camera.
- A casting call or platform that explicitly requests a bare-eye version.
Test both versions on the spot using the camera’s live review, then pick the keeper together with your photographer before you leave. Mentioning up front that you wear glasses daily, and that you want alternates, lets the photographer plan lighting for both setups instead of improvising mid-session.
What Can Retouching Fix, and What Can’t It?
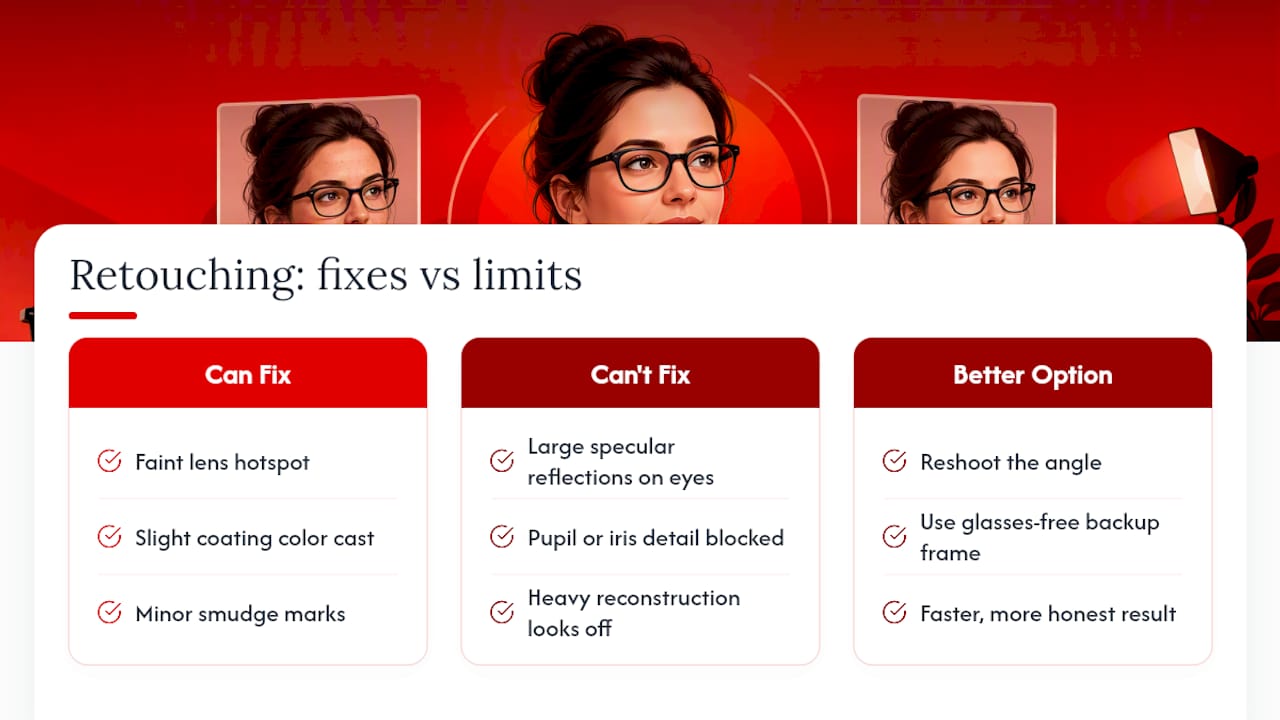
Retouching handles small, well-defined problems: a faint hotspot in the corner of a lens, a slight color cast from the coating, or minor smudge marks that survived the shoot. These are quick fixes that do not compromise the final image.
What retouching cannot reliably do is rebuild eye detail hidden behind a large specular reflection. If a glare patch covers the pupil or iris, an editor is essentially guessing at what should be there, and the result often looks slightly off, even to viewers who cannot say why. Heavy reconstruction work also takes real time, which adds cost. In most of these cases, reshooting the angle or using your backup, glasses-free frame is faster and produces a more honest result than an editor fabricating eye detail from scratch.
How to Prepare for a Headshot Session if You Wear Glasses
A few minutes of prep before your session prevents almost every glasses-related headache on set.
- Clean both lenses thoroughly, front and back, and check that nose pads sit evenly and the frame is not crooked from wear.
- Pack a second, simpler pair of frames, and ask your optician in advance whether your lenses can be popped out for part of the shoot.
- Plan wardrobe that complements your frame color, and skip busy patterns or bold prints near your face that compete with the glasses for attention.
- If you have time before booking, ask your optician about anti-reflective coating on your primary pair. It is the single most effective preventive step available.
- Confirm with your photographer that lighting can be adjusted live and that you will get to review test shots before the real session begins.
For a deeper walk-through of wardrobe, posing, and general prep beyond eyewear, this session prep and dressing guide covers the rest of what belongs on your pre-shoot checklist.
How We Handle Glasses at Every Session
At Metroplex Headshots, glasses come up in nearly every consultation, and the process is built around solving glare before it becomes a problem, not editing it out after the fact. Every session starts with a quick conversation about your frames, your prescription, and whether you want a backup shot without them.
From there, lighting gets adjusted on the spot. Softbox positioning that works cleanly in a controlled studio often needs a different angle on location, where window light or ambient room light adds variables a fixed studio setup does not have. Real-time image review lets you and the photographer catch a reflection immediately and fix it in the next frame rather than discovering it during editing days later.
This hands-on adjustment, paired with straightforward client communication, is what keeps glasses from becoming the thing people notice first in a portrait. It should be your expression, not your lenses, that carries the shot.
— Traci Schowmeyer
Ready to Book a Session That Handles Glasses Right?
Metroplex Headshots builds glare management into the shoot itself, using studio lighting calibrated to your frames and skin tone, real-time image review, and quick alternate setups, rather than leaving reflections for an editor to chase down afterward.

When you book, mention that you wear glasses regularly so your photographer can plan lighting angles in advance, and ask about getting one shot with and one without glasses if you want both options for different platforms. Metroplex Headshots also offers professional retouching for the small fixes editing can genuinely handle, from minor hotspots to color cast, without pretending it can rebuild an eye hidden behind a large reflection. If you need a group or team session, the same live-adjustment process applies across every subject in the room.
Ready to see it in action? Browse Metroplex Headshots’ session packages, including in-studio and on-location options, and pick the format that fits your schedule and wardrobe.
Sources
For readers who want the underlying data and optics behind this advice: the Vision Council’s consumer eyewear research covers prevalence trends, Edmund Optics’ knowledge center explains how anti-reflective coatings work, and this study on glasses and facial perception examines how frames shape first impressions.
- Vision Council releases new research spotlighting Q2 consumer trends and generational
- Anti-Reflection Coatings — Edmund Optics knowledge center
- The glasses stereotype revisited: Effects of glasses on perception, recognition and impressions of faces (ResearchGate)
FAQ
Should You Take Headshots With Glasses?
Yes, if you wear them regularly. Glasses are part of your everyday appearance for roughly 75% of American adults once contacts and readers are counted, so leaving them out creates a mismatch between your photo and how people actually see you day to day.
What Should You Avoid Wearing in a Headshot?
Skip busy patterns, heavy logos, and overly trendy or oversized frames that pull focus from your face. For eyewear specifically, avoid transition lenses that darken unpredictably under studio lighting, and steer clear of very thick, uncoated lenses prone to glare. A guide to common headshot mistakes covers wardrobe pitfalls beyond glasses.
What Looks Best in a Professional Headshot?
A relaxed, natural expression paired with wardrobe and eyewear that match your everyday look tends to photograph best. Consistency between your headshot and your real-world appearance, glasses included, builds the kind of recognition that matters most on platforms like LinkedIn, where small details in a profile photo shape first impressions.
How Do You Take a Headshot While Wearing Glasses?
Clean your lenses beforehand, tilt your chin down slightly, and turn your head 10 to 20 degrees to redirect reflections away from the camera. Ask your photographer to raise the main light above eye level and use soft, diffused light instead of direct flash, since anti-reflective coatings handle most surface glare but rarely eliminate every reflection on their own.
Does Metroplex Headshots Offer Sessions Designed for Glasses Wearers?
Yes. Every session includes live lighting adjustments and real-time image review, which lets the photographer resolve glare on the spot rather than relying on retouching afterward. Pricing for an in-studio session starts at $300, with on-location company sessions available separately.

