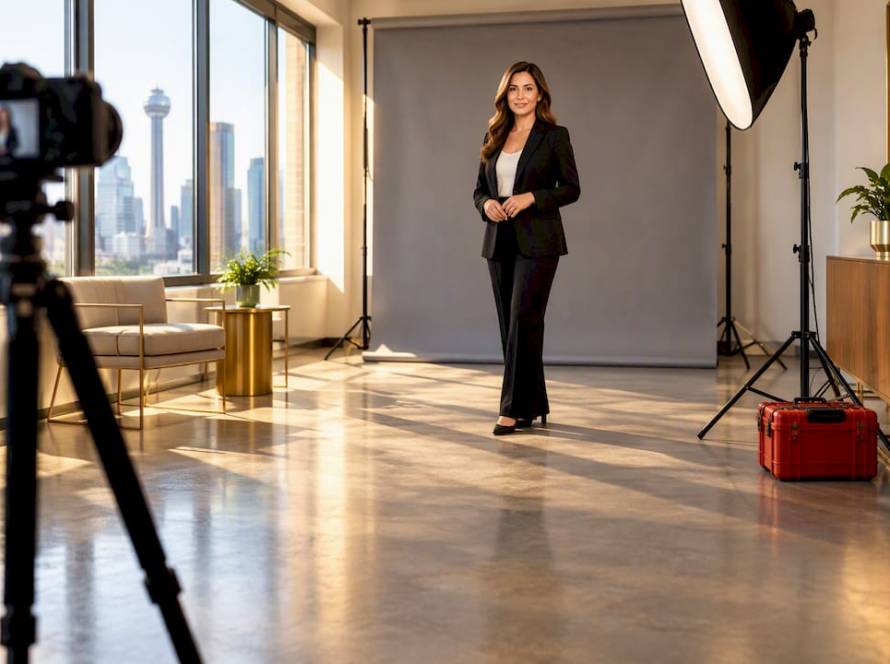
A polished corporate headshot comes down to three things: a clear, well-lit face, wardrobe that matches your industry, and an expression that reads as both confident and approachable. Get those three right and everything else, background, retouching, file format, falls into place.
Before you book anything, run through this:
- Wardrobe: solid mid-tone colors, no busy patterns, two outfit options minimum.
- Grooming: haircut 1-2 weeks before, minimal makeup that photographs naturally, remove distracting jewelry.
- Pose cue: turn your body slightly, push your chin forward and down, drop your shoulders.
- Background: neutral and consistent, especially if this photo will sit next to teammates’ photos.
- Files to request: one retouched high-res image, one lightly retouched backup, both in web and print resolution.
Pro Tip: If you’re stuck deciding on wardrobe or retouching at the last minute, default to a mid-tone solid color and ask for minimal retouching. You can always request more editing after you see the proofs, but you can’t undo an outfit that photographed poorly.
Key Takeaways
A professional corporate headshot succeeds when face clarity, use-case-appropriate wardrobe, and a relaxed three-quarter pose come together under consistent, neutral lighting.
| Point | Details |
|---|---|
| Face and focus come first | Eyes need to be sharp and well-lit before wardrobe or background choices matter at all. |
| Bring two outfits | Pack one formal and one softer option in solid mid-tone colors to give your photographer flexibility. |
| Use the baseline pose | Turn your body, push your chin forward and down, drop your shoulders, and try a subtle squinch. |
| Standardize for teams | A one-page style sheet covering background, crop, wardrobe, and retouching keeps every employee photo consistent. |
| Hire for high-stakes use | Metroplex Headshots delivers consistent lighting, restrained retouching, and clear file deliverables for executive and team shoots alike. |
Table of Contents
- What Are the Key Elements of a Great Corporate Headshot?
- What Should You Wear for a Corporate Headshot?
- How Do You Pose to Look Confident and Natural?
- What Lighting and Background Work Best for Corporate Photos?
- What Camera Settings and Composition Rules Matter Most?
- What Retouching Standards and File Deliverables Should You Expect?
- What Should You Do to Prepare on Shoot Day?
- How Do You Standardize Headshots Across a Team?
- Should You DIY Your Headshot or Hire a Professional?
- How Do You Brief Your Photographer for the Best Results?
- How Does Metroplex Headshots Standardize Corporate Photos?
- Ready to Standardize Your Team’s Headshots?
- Frequently Asked Questions
- Sources
What Are the Key Elements of a Great Corporate Headshot?
Every corporate headshot lives or dies on three technical fundamentals: face sharpness, eye contact, and crop discipline. If a viewer’s eye doesn’t land on your eyes within a second, the image has already failed its job, no matter how nice the lighting or wardrobe looks.
Sharp focus on the eyes is non-negotiable. Photographers typically set focus points directly on the near eye, because even a millimeter of softness there reads as “off” to viewers, even ones who couldn’t tell you why. Composition matters just as much. A LinkedIn thumbnail gets cropped into a small circle, so tight head-and-shoulders framing with your face filling most of the frame works best there. A company bio page or press photo can afford a slightly wider crop that shows more of your posture and attire, which matters when the photo runs larger.
Photographers who publish standards frameworks for professional headshots consistently point to the same trio: clarity on the face, neutral wardrobe choices, and dependable technical setup. That’s not an accident. It’s what separates a headshot that looks “professional” from one that just looks like a photo of a person at work.
For teams, consistent lighting and matching backgrounds across every employee’s photo matter more than any single portrait looking spectacular. A few things to confirm before your shoot:
- Ask whether you’ll receive both retouched and raw files.
- Confirm the resolution: at minimum 1000 pixels on the short edge for web use, higher for print.
- Clarify file formats up front, JPEG for web, TIFF for print production.
Pro Tip: Think about where this photo will live most often before the shoot. If it’s mainly a LinkedIn profile picture, ask your photographer to shoot slightly tighter than they normally would. A crop that looks fine on a website often looks awkward once Instagram-style circle cropping cuts into it.
What Should You Wear for a Corporate Headshot?
Solid mid-tone colors beat pure black or pure white almost every time. Pure white tends to blow out under studio lighting and pure black can swallow detail, while jewel tones, navy, and muted colors sit right in the middle of your camera’s dynamic range and photograph consistently. Bring two outfit options, one more formal with a jacket and collared shirt, one softer with a knit or open collar, so you and your photographer can choose based on how the light and background are working that day.
Industry context changes the calculus. Finance and law still lean toward a jacket and tie for men, structured blazers for women. Tech and startup culture often skip the tie entirely in favor of a quality button-down or sweater. Creative fields have more room for personality in color choice, while healthcare professionals often shoot in a white coat or scrubs to visually signal their role. For executive portraits specifically, mid-weight worsted wool in navy is a durable default that photographs well across skin tones and lighting setups.
Fine pinstripes, small checks, and tight patterns can create a distracting moiré effect on camera, a rippling optical artifact that has nothing to do with the actual fabric. Stick to solids or very subtle textures. Matte finishes photograph better than shiny fabrics, which can reflect studio lights unpredictably. Keep jewelry simple, and if you wear glasses, ask about anti-reflective coating or bring a backup pair without a strong coating that causes glare.
Grooming timing matters more than people expect. Get a haircut 1-2 weeks before your session, not the day before, so it has time to settle. Avoid trying new skincare products or treatments in the days leading up to the shoot. Makeup should be slightly more defined than everyday wear since camera lighting tends to flatten features, but “camera-ready” doesn’t mean heavy.
- Bring: two outfits, a lint roller, blotting papers, a comb.
- Avoid: brand-new shoes you haven’t broken in, strong cologne or perfume, dramatic new hair color right before the shoot.
Pro Tip: Lay both outfit options flat on a bed and photograph them with your phone under regular indoor lighting. If one washes out or clashes with your skin tone in that quick test, it’ll likely do the same under studio lights.
How Do You Pose to Look Confident and Natural?
Start with the baseline pose photographers use again and again: turn your body about 30 to 45 degrees from the camera, push your chin slightly forward and down, and drop your shoulders away from your ears. This single combination, documented across professional posing guides, does more to improve a headshot than almost any wardrobe change.
- Angle your body, don’t face the camera head on. A slight turn slims the frame and looks more natural than a straight-on mugshot stance.
- Push your chin forward, then down. This sounds odd until you try it, it eliminates double-chin shadows and sharpens your jawline.
- Drop your shoulders and lean your torso very slightly toward the camera. This creates engagement without looking stiff.
- Try the squinch. Slightly tighten your lower eyelids without squinting your whole eye. It reads as confidence rather than a wide-eyed stare.
- Match your smile to your industry. A full smile suits sales, hospitality, and consumer-facing roles. A subtle, closed-mouth smile often reads as more authoritative for law, finance, and executive leadership.
If you’re briefing a photographer remotely or over email, include these cues directly: three-quarter turn, chin forward and down, shoulders relaxed, subtle squinch, smile intensity matched to industry.
Pro Tip: Practice the chin-forward-and-down move in a mirror for two minutes before your shoot. It feels unnatural at first, almost everyone laughs the first time they try it, but it becomes second nature by the time the camera is on you.

What Lighting and Background Work Best for Corporate Photos?
Neutral lighting and neutral backgrounds are the default for corporate headshots because they age well and stay consistent when you compare one employee’s photo to another. A gray or soft blue backdrop under even, diffused lighting doesn’t compete with your face for attention, and it won’t look dated in three years the way a trendy colored gel or heavy vignette might. Consistency across a team matters more here than any single portrait looking dramatic.

Environmental or branded backdrops, an office space, a branded step-and-repeat, a recognizable architectural feature, add context that a plain backdrop can’t. They work well for press kits, “meet the team” pages with a distinct company aesthetic, or executive bios where storytelling matters. The tradeoff is portability and consistency: environmental shoots require more setup time and are harder to standardize across multiple locations or a growing team.
Photographers typically use a two or three-light setup: a key light positioned at roughly 45 degrees to soften shadows, a fill light to lift the shadow side of the face, and sometimes a hair or rim light to separate you from the background. Softer, larger light sources are more flattering across skin tones than small, harsh light sources, which is why most studios use umbrellas or softboxes rather than bare flash.
- Ask whether the studio can offer both neutral and environmental background options in the same session.
- Confirm your wardrobe color won’t blend into or clash with the chosen backdrop.
- If you wear glasses, ask specifically about anti-reflective settings or polarizing filters the photographer can use.
Pro Tip: Ask upfront whether background swaps are possible after the shoot. Some studios can composite a different neutral color behind you in post-production, which gives you flexibility without needing a second session.
What Camera Settings and Composition Rules Matter Most?
For head-and-shoulders framing, most photographers work with a focal length between 85mm and 135mm on a full-frame camera, shot from a working distance of six to ten feet. Shorter focal lengths shot too close can distort facial features, a real problem if you’re comparing photos across a team.
For resolution, aim for at least 300 dpi for print materials and a minimum of 1000 pixels on the short edge for web use. Standard composition puts your eyes roughly in the upper third of the frame, leaves modest headroom above your head, and uses a square or 4:5 ratio for most professional platforms.
Pro Tip: If you’re organizing a team shoot, lock in one focal length for the entire session. Switching lenses between employees, even slightly, changes perspective and facial proportions enough that side-by-side comparisons on a company page will look inconsistent.
What Retouching Standards and File Deliverables Should You Expect?
Good retouching removes temporary distractions, stray flyaway hairs, a blemish, lint on a jacket, without altering your actual features. Skin texture, wrinkles that reflect your real age, and your natural bone structure should stay intact. Over-retouching that smooths skin into plastic or reshapes your face is a red flag, not a bonus.
Ask for delivery in both JPEG (for immediate web and social use) and TIFF (for print production), along with the color profile used, typically sRGB for web. Request a clear file naming convention, especially for team shoots where dozens of employee photos need to stay organized without manual renaming.
Pro Tip: Always request one lightly retouched image and one unretouched high-resolution file in addition to your final selects. You may need the unretouched version later for a different use case or a different retouching style entirely.
What Should You Do to Prepare on Shoot Day?
- Arrive 15 minutes early. This gives you time to settle in, check your appearance in a mirror, and mentally run through your posing cues before the camera comes out.
- Do a few warm-up frames. Most photographers shoot several throwaway images first specifically to help you relax and stop performing for the camera.
- Change outfits partway through if you brought two options, giving your photographer material to compare before you pick final selects.
- Review a few images on the back of the camera or on a tethered screen if the studio offers real-time review, so you can adjust expression or posture before wrapping up.
Bring both outfits, a lint roller, a small makeup kit for touch-ups, water, and if it helps, one or two reference photos showing a look or crop you like. Skip anything brand new that day, shoes, skincare products, hairstyles, since unfamiliar things tend to show up as tension in your expression.
Pro Tip: Practice your brief cues, three-quarter turn, chin forward and down, subtle squinch, out loud in the car or on your walk in. Saying them once more right before the camera comes out keeps them fresh.
How Do You Standardize Headshots Across a Team?
A one-page style sheet solves most team consistency problems before they start. It should specify: exact background color, crop ratio, wardrobe palette (colors to wear, colors to avoid), the retouching policy, and the file naming convention everyone’s photo will follow.
Operationally, block enough time per employee, typically 5 to 10 minutes each for a straightforward team shoot, and build in a short image review right after each person’s turn so nobody has to be called back for a reshoot days later. Consistent lighting and background standardization matters more for team cohesion than any individual photo looking exceptional, since inconsistencies become obvious the moment photos sit side by side on a website.
Send the style guide to employees at least two weeks ahead, not the week of, so people have time to plan wardrobe. A pre-shoot email checklist should cover:
- The approved wardrobe colors and what to avoid.
- The shoot date, time slot, and expected duration per person.
- A reminder to bring a backup outfit.
- Where and when final images will be delivered.
Our guide on headshots for company websites walks through exactly what visual consistency should look like once everyone’s photo is live.
Should You DIY Your Headshot or Hire a Professional?
A DIY headshot works fine for a quick LinkedIn refresh between professional sessions, using natural window light, a plain wall, and a phone camera set up on a tripod. What it won’t reliably deliver is lighting consistency, professional retouching, or a result that matches teammates’ photos on a company page. Professional photographers control lighting and turnaround in ways a phone camera and a lamp simply can’t replicate.
For executive bios, press kits, annual reports, or any team standardization project, hire a professional. The stakes are higher and inconsistency is far more visible when images run side by side.
On cost and timing: individual sessions typically run 20 to 60 minutes, with budgets commonly ranging from $250 to $600 in major U.S. markets, while team shoots often run $150 to $400 per person. Standard turnaround is a few business days; rush delivery usually carries an added fee.
- DIY if: it’s a quick personal update, low stakes, and you have decent natural light.
- Hire if: it’s for a team, an executive bio, a press kit, or anything that needs to look consistent alongside other people’s photos.
- Budget rule: the more people or platforms that will see this photo, the more the professional session pays for itself.
Since headshots tend to stay in circulation for three to five years before most professionals update them, the cost of a session amortizes to a small amount per year of use, worth weighing against the DIY alternative.
How Do You Brief Your Photographer for the Best Results?
A tight, specific brief saves time on shoot day and prevents miscommunication about what you actually need. Keep it to a few lines:
- Objective: what the photo is for (LinkedIn, executive bio, press kit, team page).
- Use cases: where it will appear and at what size or crop.
- Wardrobe guidance: the two outfits you’re bringing and any color constraints.
- Retouching rules: what to soften, what to leave untouched.
Pair that with a short shot list:
- One tight head-and-shoulders crop, straight-on expression.
- One three-quarter turn with a subtle smile.
- One backup variant with the second outfit.
Confirm file formats, color profile, and turnaround time in writing before the shoot starts. When reviewing selects, give specific feedback, “the second frame has better eye contact” beats “I don’t love this one”, so your photographer can make targeted adjustments instead of guessing.
How Does Metroplex Headshots Standardize Corporate Photos?
Metroplex Headshots builds every corporate session around the same core standards: neutral, tested backgrounds, consistent lighting setups across every subject in a team shoot, and a retouching philosophy that removes distractions without erasing what makes someone look like themselves. Clients get both retouched and high-resolution files, with clear turnaround commitments spelled out before the shoot even happens.
For a real-world example of how this plays out, a company booking a 20-person team shoot receives a pre-shoot style guide covering wardrobe palette and crop, a scheduled block of individual sessions on-site, real-time image review so nobody leaves without a usable frame, and a batch delivery of final files with consistent naming. That’s the difference between “everyone got their photo taken” and “the whole team looks like they belong on the same page.”
Metroplex Headshots holds that a headshot should look like a confident, camera-ready version of the person, not a stylized departure from them, which is why retouching stays restrained and background choices stay consistent across every subject in a shoot.
Pro Tip: Whatever provider you choose, get turnaround time and retouching scope written into your service agreement. Verbal promises about “a few days” or “light retouching” mean nothing once the invoice is paid and you’re waiting on files.
Why consistent headshots matter more than most teams realize
I’ve come to think of a headshot less as a single photo and more as a recurring impression, one that shows up on LinkedIn, a company bio page, a press mention, sometimes years apart. When those impressions are inconsistent across a leadership team, it reads as disorganization even when the business itself is anything but. A prospective client scanning a “meet the team” page notices mismatched backgrounds and lighting faster than they’d ever admit, and that quiet inconsistency chips away at trust before a single word is exchanged.
Ready to Standardize Your Team’s Headshots?
Here’s the real advantage of working with a professional studio over piecing together a DIY session or a patchwork of employee-submitted photos: you get consistent lighting, a documented wardrobe standard, and matching backgrounds across every single person on your team, delivered on one predictable timeline instead of chasing down a dozen mismatched submissions.

Metroplex Headshots handles the technical side, lighting, backdrop, retouching standards, so your team shows up looking like they belong together, whether you need one executive portrait for an annual report or fifty employee photos delivered on the same schedule. Our professional headshot session guide walks through exactly what to expect before you book, and our national headshot program is built specifically for companies coordinating shoots across multiple offices or locations. Reach out today to schedule a consultation and get a corporate package quote tailored to your team’s size and timeline.
Frequently Asked Questions
What are the basic corporate headshot guidelines everyone should follow?
Focus on a sharp, well-lit face, wear a solid mid-tone color that fits your industry, and use a slight three-quarter turn with relaxed shoulders. Everything else, background choice, retouching level, builds on those three fundamentals.
What should I wear for a corporate headshot?
Choose solid, mid-tone colors over pure black or white, and bring two outfit options, one formal with a jacket, one softer with an open collar or knit. Avoid tight patterns and busy prints, which can create a distracting moiré effect on camera.
How should I pose to look confident but approachable?
Turn your body 30 to 45 degrees from the camera, push your chin slightly forward and down, and drop your shoulders. Add a subtle squinch and match your smile intensity to your industry, fuller for consumer-facing roles, more restrained for law and finance.
How much does a professional corporate headshot cost?
Individual sessions in major U.S. markets typically run $250 to $600, while team shoots often cost $150 to $400 per person, with sessions lasting 20 to 60 minutes depending on the package.
How do I keep headshots consistent across my whole team?
Create a one-page style sheet specifying background color, crop ratio, wardrobe palette, and retouching policy, then send it to employees at least two weeks before the shoot date.
Sources
- The Corporate Headshot Guide (What to Wear, How Long It Takes) – Tov Studio Photo
- Corporate headshot photography tips
- How to Take Your Own Professional Headshot