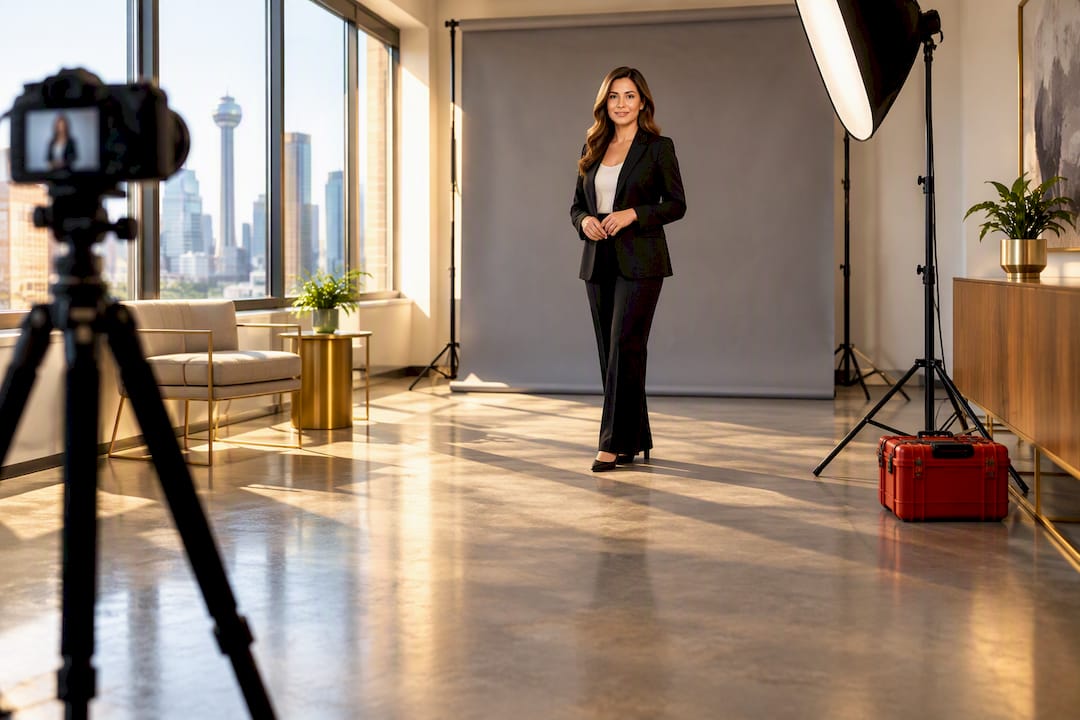
For a smooth on-site corporate headshot day, plan for roughly a 12 by 20 foot clear area with a 10-foot ceiling. A 10 by 15 foot room works as a practical minimum, though it limits your photographer’s lens choices and framing options. If your office has neither, a portable booth or a compact on-location setup can still get the job done.
TL;DR:
- Rooms with at least 12 by 20 feet of clear space and 10-foot ceilings provide optimal distance for flattering focal lengths and lighting angles.
- Smaller rooms can work with shorter focal lengths and compact gear but may limit image quality and flexibility.
- Consistent, simple lighting setups and proper room organization help maximize throughput and ensure high-quality results.
- Controlling ventilation, noise, and clutter is critical to maintain comfort and prevent distractions during the shoot.
- Mobile studios or off-site locations are better options when office space is too small or unsuitable for a professional headshot session.
Table of Contents
- Office Headshot Space Requirements: Ideal vs. Minimum
- Lighting, Power, and Color Control for Headshot Setups
- Room Layout and Scheduling for Faster Throughput
- What to Do When the Room Is Too Small
- Pre-Shoot Checklist HR Should Run Through
- What Photographers Actually Look For on Shoot Day
- Ventilation and Climate Control for Headshot Rooms
- Noise Control and Soundproofing for a Distraction-Free Shoot
- Storage Space for Equipment and Props During the Shoot
- Publisher Perspective: Space Planning Protects Your Employer Brand
- Metroplex Headshots Handles the Space So You Don’t Have To
- Sources
- FAQ
Office Headshot Space Requirements: Ideal vs. Minimum
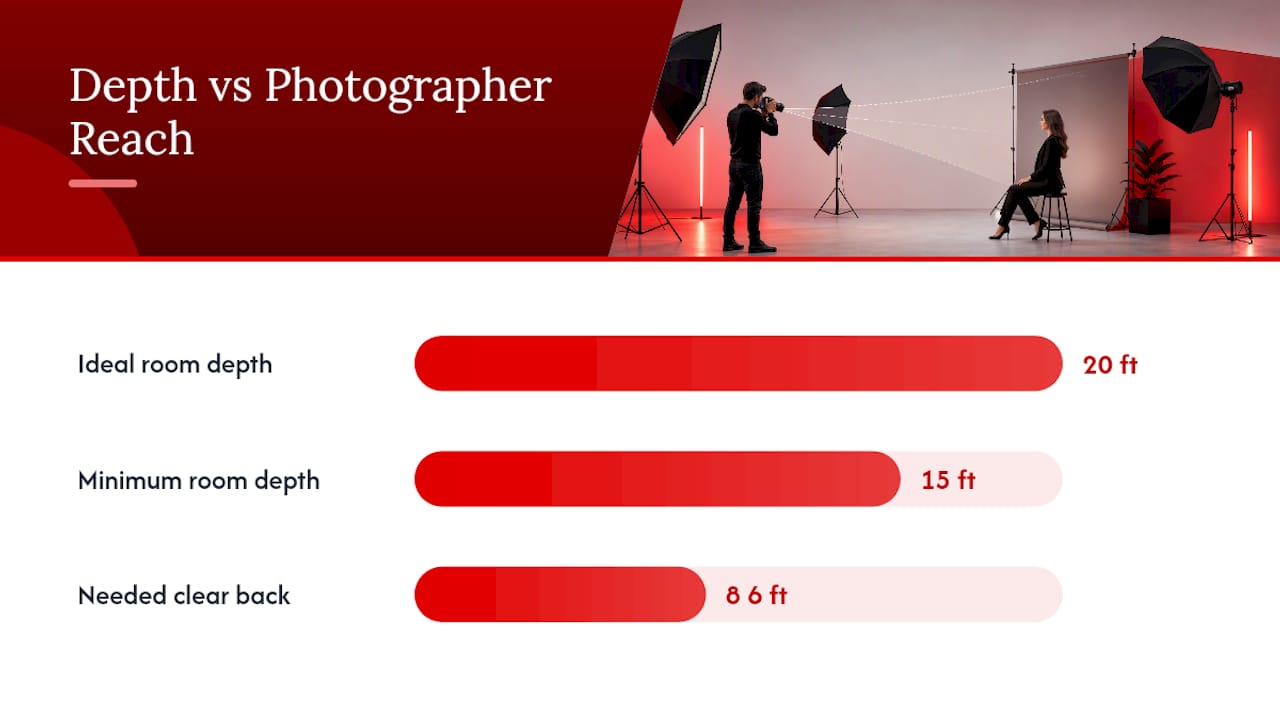
The 12 by 20 foot benchmark isn’t arbitrary. That extra length gives your photographer enough camera-to-subject distance to use flattering focal lengths without distorting facial features or forcing an awkward wide-angle crop. Corporate headshot practitioners generally recommend the same 12 by 20 foot footprint with 10-foot ceilings, noting that a 10 by 15 foot room works too, but it caps how much reach the photographer has to work with.
Depth matters more than width here. A wider room with a shallow depth still boxes the photographer in, while a narrower room with real depth gives far more flexibility. That’s because portrait lenses in the 85mm to 135mm range on a full-frame camera (55mm to 90mm on APS-C) need distance to compress the background and avoid the “fisheye” look you get from standing too close. In a cramped office, 70mm sometimes becomes the longest workable option, which changes how tight the crop looks in the final image.
Ceiling height affects more than headroom. A 10 to 12 foot ceiling gives room to angle a softbox or umbrella down toward the subject at a natural, flattering angle. Professional shooting areas for portraits commonly run 150 to 400 square feet with those ceiling heights, though smaller 130 to 215 square foot setups can work for headshots specifically, with some trade-offs on distance and modifier size.
Before you commit a room, run a quick test:
- Measure clear floor space with a tape measure, not eyeballing it. Furniture, plants, and monitor arms eat into your working depth fast.
- Stand where the camera would go and walk backward until you hit a wall. If you can’t get at least 8 to 10 feet back, the room is tight.
- Check the ceiling for sprinkler heads, low light fixtures, or ductwork that could interfere with a boom stand.
Lighting, Power, and Color Control for Headshot Setups
Most corporate headshot lighting rigs use two lights, a key and a fill, or one main light paired with a reflector to soften shadows. This keeps setup time short and results consistent across dozens of employees, which matters far more on a high-volume shoot day than a complicated three-point lighting design.
Turn off the overhead fluorescents before anything else. Standard office fluorescent lighting frequently casts harsh shadows across the crown of the head and introduces a color cast that fights with the photographer’s flash output. Mixing flash with tungsten or fluorescent light is one of the fastest ways to get inconsistent skin tones across a team gallery, so photographers generally avoid mixed sources altogether and rely on a large softbox as the main light for even, soft coverage.
Power planning deserves its own conversation before the shoot day, not during it:
- Confirm at least one dedicated outlet near the shooting area, ideally on its own circuit.
- Bring surge-protected power strips and extension cords rated for continuous use.
- Tape or ramp cables flat across walkways so nobody trips mid-session.
Pro Tip: Walk the room with your photographer the week before and flip off every overhead switch you can find. If faces still look uneven or greenish on a test shot, there’s likely a window or skylight adding its own color cast that needs blocking.
Room Layout and Scheduling for Faster Throughput
Divide the room into four zones: a shooting lane with enough depth for the photographer to back up, the backdrop wall, a staging or waiting area outside camera view, and a review station where employees can check their shots. Keeping the waiting area outside the shooting lane protects the privacy of whoever is currently in front of the camera and keeps the line moving.
Throughput on a well-run on-location shoot typically lands around 8 to 10 people per hour, changeover included, assuming a straightforward workflow with quick outfit checks and minimal posing direction. Plan your schedule around that pace rather than guessing:
- Book employees in 5 to 7 minute slots, with a buffer slot every 60 to 90 minutes for wardrobe fixes, late arrivals, or anyone who needs extra time.
- Stagger departments or floors into morning and afternoon blocks instead of one long open sign-up sheet.
- Reset the room briefly after lunch, since natural light through windows shifts and can throw off your color balance.
- Flag accessibility needs ahead of time so ramps, seating, or extra time can be built into the schedule rather than improvised.
What to Do When the Room Is Too Small
Not every office has a spare conference room with 20 feet of depth. When you’re working with less, the fix usually starts with the lens, not the light. Shorter focal lengths (down toward 50mm to 70mm) let the photographer shoot from a closer position, though the trade-off is a slightly less compressed, more three-dimensional look to the face.
Compact gear helps close the gap:
- Collapsible fabric backdrops and pop-up frames take up a fraction of the footprint a traditional backdrop stand needs.
- Battery-powered LED panels reduce cable clutter, though most photographers still prefer outlet power for consistency across a long shoot day.
- Smaller setups running 130 to 215 square feet can work for headshots specifically, even if they wouldn’t support a full-body portrait session.
If no room in the building clears even a compact minimum, a mobile headshot studio built for tight spaces or an off-site studio day usually beats forcing a shoot into a hallway or a repurposed break room. A branded photo booth is another option worth weighing. It protects privacy well but generally runs slower than a full setup, since booths are built for quick single shots rather than posed direction.
Pre-Shoot Checklist HR Should Run Through
A few days of prep prevents most of the delays that eat into a scheduled headshot day. Work through this list before the photographer arrives:
- Clear the room of loose furniture, cables, and anything reflective, like glass tabletops or mirrored walls, that could bounce stray light into the frame.
- Confirm outlet access and building rules on stands, booms, or anything mounted near ceiling fixtures.
- Send wardrobe guidance to employees in advance: solid colors, minimal patterns, and a note on glasses (anti-glare coatings help) and basic grooming.
- Collect signed release forms ahead of time so the shoot doesn’t stall on paperwork.
- Post simple signage outside the room noting a session is in progress, so hallway traffic doesn’t wander into frame.
- Confirm file delivery timing and naming conventions with the photographer up front. Consistent file names by department or employee ID save real time when hundreds of images need sorting later.
Reviewing corporate headshot guidelines with your team beforehand also keeps everyone’s expectations aligned on pose, crop, and background before the camera ever comes out.
What Photographers Actually Look For on Shoot Day
The 12 by 20 foot ideal and 10 by 15 foot minimum aren’t theoretical numbers pulled from a manual. They’re the two measurements that come up again and again when photographers scout a room before a corporate shoot, because they map directly to focal length and lighting angle limits, not just floor space for its own sake.
Budgeting throughput around 8 to 12 people per hour keeps schedules realistic, and running the room on a strict one-person-at-a-time basis does more for image quality than most HR planners expect. It removes the audience effect that makes employees stiffen up in front of the camera.
A simple, repeatable setup beats a complicated one on high-volume shoot days. Consistent lighting and a clear workflow produce more even results across fifty employees than a fancier rig that eats into changeover time.
A 3 to 5 foot circulation corridor around stands and tripods also keeps the day moving without anyone clipping a light stand on their way to the next slot. Small logistics like these are exactly where an experienced on-location provider earns its keep.
— Insight informed by on-location shoot day workflows and industry lighting benchmarks.
Ventilation and Climate Control for Headshot Rooms
A hot, stuffy room shows up on camera faster than most HR planners expect. Studio lights generate real heat, and a closed conference room with two softboxes running for three or four hours can climb several degrees, leaving employees visibly sweating or flushed by early afternoon.
Check that the room has working HVAC access, not just a vent that’s technically present but blocked by furniture. If the space relies on a single wall unit or a shared building system, ask facilities to run it a notch cooler than usual before the shoot starts, since body heat, lighting heat, and foot traffic all add up over a full day. A small portable fan, positioned out of frame and turned off during actual capture, helps between shots without showing up in the images.
Avoid rooms with no windows and poor airflow if you have another option. Stale air affects more than comfort. It shows in skin tone, sweat sheen, and general fatigue on faces by hour three of a shoot. If ventilation is genuinely limited, build in a five-minute break every 45 minutes to let the room and the crew reset.
Noise Control and Soundproofing for a Distraction-Free Shoot
Headshot sessions don’t need a recording studio’s isolation, but a noisy room slows everything down. Employees waiting outside a thin door can hear directions being given inside, which adds self-consciousness before they even sit down. Open-plan offices are the worst offenders here, since ambient chatter and phone calls bleed into the shooting area constantly.
Pick an interior room with a solid door over a glass-walled conference space whenever possible. If the only available room borders a break room or a busy hallway, a simple printed sign asking for quiet during sessions goes further than most HR teams assume. HVAC and mechanical noise matter too. A loud rooftop unit or a rattling vent won’t show up in the photo, but it can rattle the photographer’s ability to give clear direction and can make an employee feel rushed or on edge.
Storage Space for Equipment and Props During the Shoot
A headshot day involves more gear than most rooms are designed to absorb: light stands, softboxes, backdrop poles, a laptop station for real-time review, spare cables, and often a rolling case or two. Set aside a corner, ideally out of the shooting lane, for equipment staging so the room doesn’t feel like an obstacle course by hour two.
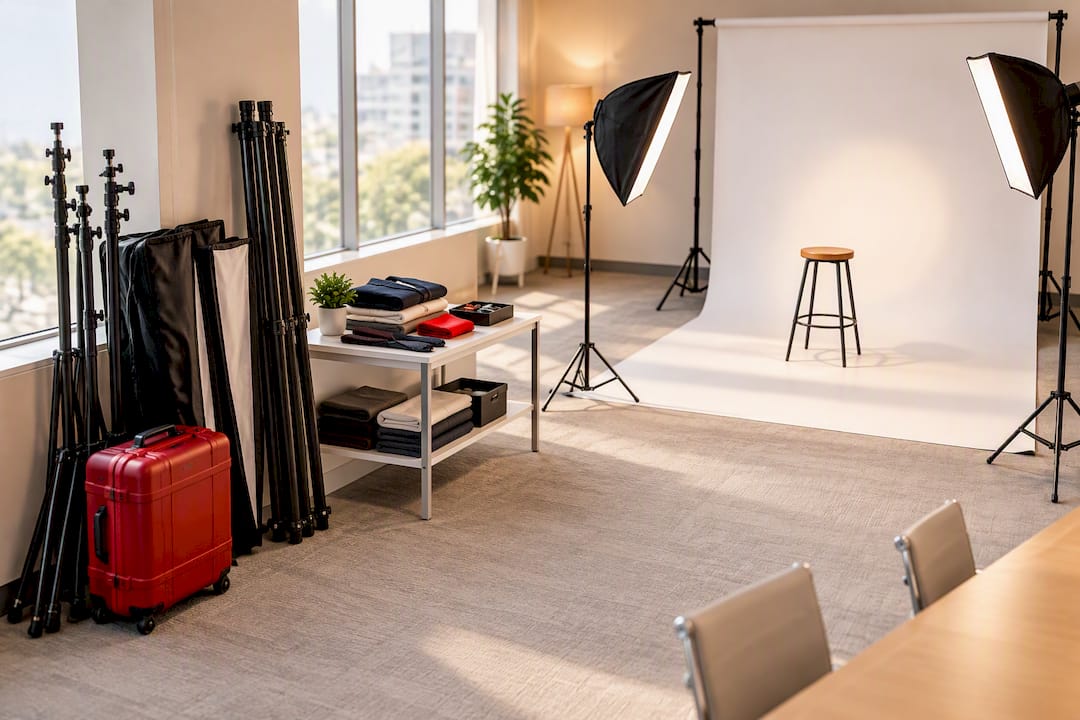
If employees are bringing a change of clothes or accessories, a small table or rack near the staging area keeps personal items organized and out of the shot. Props, when a company wants a branded element like a logo backdrop or company signage, need their own dedicated space too, since swapping backgrounds mid-session eats into throughput if the gear isn’t staged and ready to go.
Publisher Perspective: Space Planning Protects Your Employer Brand
Inconsistent lighting and cramped rooms are the two biggest reasons companies end up reshooting headshots within a year. A gallery where half the team looks warm and sharp and the other half looks flat and shadowed undercuts the professional image you’re trying to build.
Treat headshot day as a recurring program, not a one-off event, and the space planning gets easier every time. The room you scouted once becomes the room you book automatically next year.
— Traci Schowmeyer
Metroplex Headshots Handles the Space So You Don’t Have To
Metroplex Headshots is the alternative to scouting, measuring, and lighting a spare conference room yourself. Instead of guessing whether your 10 by 12 break room clears the minimum, our mobile studio setup brings the 12 by 20 foot equivalent of professional lighting, backdrops, and camera positioning to whatever space your office actually has.

Setup and teardown, backdrop selection, lighting calibration, and real-time image review allow employees to check their shot before they walk away. Throughput scheduling can be adapted to available headcount and room size, whether a full conference room or a tighter corner office. For teams with multiple locations, our national headshot programs keep results consistent across every office. Check available dates and session details on the Metroplex Headshots packages page to see what fits your space and headcount.
Sources
- Corporate Headshots: Lighting, Posing & Pricing Guide
- Photography Studio: Size Requirements (2026) – BusinessDojo
- Get better photos at the office party by adjusting for overhead lighting — Lifehacker
FAQ
What Is the Ideal Space for an Office Headshot Setup?
The ideal footprint is roughly 12 by 20 feet of clear floor with a 10-foot ceiling, which gives the photographer enough distance for flattering focal lengths. A 10 by 15 foot room works as a practical minimum, though it limits lens choices and framing flexibility.
What Is the 20 60 20 Rule in Photography?
The 20 60 20 rule refers to a lighting ratio guideline, not a space measurement, where roughly 20% of the frame carries shadow detail, 60% falls in midtones, and 20% holds highlights for balanced exposure. It’s a general composition and exposure principle rather than a fixed rule every headshot photographer follows strictly.
Should Headshots Be 8×10?
8×10 is a traditional print size for headshots, especially for actors and print portfolios, but most corporate headshots today are delivered as digital files sized for LinkedIn, websites, and internal directories. The aspect ratio matters more than the print dimension, and most photographers deliver files that can be cropped to whatever size a company needs.
What Does a 3/4 Headshot Look Like?
A three-quarter headshot frames the subject from roughly the chest or waist up, showing more of the body and posture than a tight head-and-shoulders crop. It’s common for executive portraits and website team pages where a bit more context and body language add to the professional image.
How Fast Can a Team Get Through a Headshot Day?
Throughput on a well-organized on-location shoot typically runs 8 to 10 people per hour, including changeover between employees. Booking short slots with regular buffer times keeps the schedule realistic without long backups.
How Much Does an On-Location Headshot Session Cost?
Metroplex Headshots prices its on-location company sessions at $1,250 per session, with in-studio sessions starting at $300. Additional images beyond the package are $150 each, and add-ons like professional hair and makeup run $95 to $160.