


A corporate photography workflow is the structured, repeatable process businesses use to produce consistent, high-impact images that reflect brand identity and drive client engagement. This process covers every stage from pre-shoot planning and style guide creation to shoot day execution, post-production editing, and multi-channel asset deployment. Without a documented workflow, companies risk visual drift, inconsistent imagery, and missed brand opportunities. The tools and frameworks involved, including brand style guides, Adobe Lightroom presets, and digital asset management (DAM) software, are what separate one-off photo sessions from a scalable corporate photography process.
What are the key stages of a corporate photography workflow?
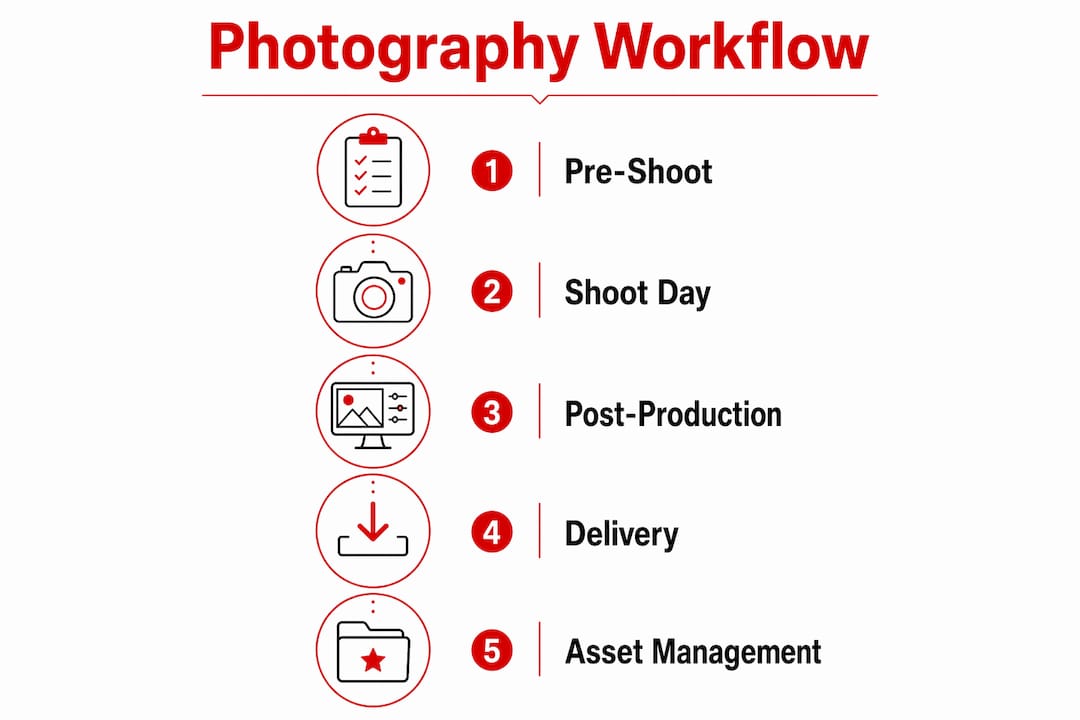
A well-run corporate photography workflow moves through four distinct phases. Each phase builds on the last, and skipping any one of them creates problems that are expensive to fix after the fact.
Phase 1: Pre-shoot planning
Pre-shoot planning is where brand alignment happens before a single shutter click. You define the visual direction by building a shot list, establishing a mood board, and locking in your brand style guide parameters. Mood boards align stakeholders on lighting, composition, and subject treatment before the shoot, preventing costly post-production changes. This phase also covers logistics: location scouting, scheduling, wardrobe guidelines, and confirming which team members or executives will be photographed.

Phase 2: Shoot day execution
Execution is where planning pays off. Consistent lighting setups, defined camera angles, and clear direction for subjects produce images that look like they belong together. For group shots, setup requires at least 30 minutes before the shoot begins, with the full group photo taking a minimum of 20 minutes. Strategic positioning also matters for candid coverage. In corporate retreat settings, candid images make up roughly 70% of total images captured, yet they require the most intentional setup to succeed.
Phase 3: Post-production
Post-production includes culling, color grading, retouching, and export. This is the most time-intensive phase. Marketing teams typically expect hero images within 72 hours of an event, with full edited galleries delivered within 7 to 14 business days. That timeline means your culling and editing process must be efficient and repeatable, not improvised.
Phase 4: Delivery and asset management
The final phase covers file formatting, metadata embedding, and organizing assets inside a DAM system. This is where images become usable, searchable, and deployable across your website, social media, print materials, and internal communications. Without this phase, even great photography gets buried in disorganized folders and forgotten.
How do corporate photo style guides influence workflow and brand consistency?
A corporate photography style guide is not the same as a general brand guidelines document. Brand guidelines and photography style guides serve different functions. Brand guidelines cover logo usage, typography, and color codes. A photography style guide goes deeper into imagery specifics: approved lighting setups, color palette references for editing, composition rules, and examples of approved versus disapproved imagery.
The business case for this distinction is clear. Companies with documented brand guidelines report up to 23% higher revenue compared to those without. That figure reflects the compounding effect of consistent visual communication across every client touchpoint, from LinkedIn profiles to pitch decks to office lobbies.
Here is how the two documents compare in practice:
| Element | Brand guidelines | Photography style guide |
|---|---|---|
| Scope | Logo, typography, color palette | Lighting, composition, editing standards |
| Audience | All marketing and design teams | Photographers, editors, creative directors |
| Format | PDF or brand portal | Annotated image examples, preset files |
| Update frequency | Annually or at rebrand | After each major shoot cycle |
| Primary goal | Brand identity consistency | Visual consistency across all photography |
Failure to document lighting, color palettes, and composition rules leads to inconsistent imagery that erodes brand identity over time. This is visual drift in action. One quarter your headshots look bright and approachable. The next quarter they look dark and corporate. Clients notice, even when they cannot articulate why.
Pro Tip: Create a one-page “approved vs. disapproved” image reference sheet and share it with every photographer and editor before each shoot cycle. This single document eliminates more back-and-forth than any other tool in the workflow.
What are best practices for image culling and editing in corporate photography?
Culling is the process of selecting the best images from a shoot before editing begins. Done poorly, it wastes hours. Done well, it sets up the entire editing phase for speed and consistency.
- View thumbnails in rows, not one at a time. Effective culling uses multiple small thumbnail rows to prioritize composition and storytelling over pixel-level sharpness during initial selection. This approach is faster and produces better story-driven selections.
- Cull in passes, not all at once. First pass: eliminate technical failures (blinking, motion blur, missed focus). Second pass: select the best expression and composition from each setup. Third pass: narrow to final selects based on brand alignment and storytelling value.
- Use color grading presets tied to your brand palette. Presets built around your approved color palette produce consistent results across different editors and shoot days. Color grading presets should be version-controlled and shared among all editing team members to maintain brand consistency.
- Set retouching standards in writing. Retouching standards define what is corrected (temporary blemishes, stray hairs, distracting backgrounds) versus what is preserved (natural skin texture, authentic expressions, genuine body language). Over-retouching produces images that feel staged and undermine executive presence.
- Export for each channel separately. Web images need compressed JPEGs at 72 DPI. Print materials require TIFFs or high-resolution JPEGs at 300 DPI. Social media platforms have their own dimension requirements. Structured delivery formats for each channel save time and protect brand integrity across platforms.
Pro Tip: Build your export presets in Adobe Lightroom or Capture One for each channel (web, social, print) and name them clearly. A preset labeled “LinkedIn Profile 800×800” takes two clicks instead of ten manual steps every time.
How to manage and deploy corporate photography assets effectively
Asset management is the phase most businesses skip or underinvest in, and it is the phase that determines whether your photography investment pays off long-term. Images that cannot be found, identified, or repurposed are effectively wasted.
Embedding rich IPTC metadata and adopting clear file naming conventions enhances asset discoverability and reduces duplicate use across marketing teams. A naming convention like “CompanyName_ShootDate_SubjectName_Version” takes seconds to apply and saves hours of searching later.
DAM platforms like Bynder, Canto, and Brandfolder allow teams to tag, search, and share approved images without digging through shared drives. For high-volume studio workflows, CRM systems that track arrivals and orders prevent scheduling mistakes and missed deadlines. The operational benefit compounds as your image library grows.
Here is a practical reference for channel-specific technical specifications:
| Channel | File format | Resolution | Dimensions |
|---|---|---|---|
| Website hero image | JPEG | 72 DPI | 1920 x 1080 px |
| LinkedIn profile photo | JPEG | 72 DPI | 800 x 800 px |
| Print brochure | TIFF or JPEG | 300 DPI | Varies by layout |
| Email signature | JPEG | 72 DPI | 200 x 200 px |
| Social media post | JPEG or PNG | 72 DPI | 1080 x 1080 px |
Planning refresh shoots is also part of asset management. Most corporate photography libraries need updating every 12 to 18 months to reflect team changes, rebrands, or updated brand direction. Tracking image usage across channels helps you identify which assets are performing and which need replacing. This is how you treat photography as a living brand asset rather than a one-time expense.
Key takeaways
A corporate photography workflow succeeds when pre-shoot planning, brand-aligned editing, and structured asset management work together as a single documented system.
| Point | Details |
|---|---|
| Document your style guide | A photography style guide covering lighting, composition, and editing standards prevents visual drift across shoots. |
| Plan before you shoot | Mood boards and shot lists align stakeholders and eliminate costly post-production corrections. |
| Cull by storytelling, not sharpness | Selecting images by composition and narrative value produces stronger, more brand-aligned galleries. |
| Version-control your presets | Shared, version-controlled color grading presets keep editing consistent across editors and shoot cycles. |
| Manage assets with metadata | IPTC metadata and clear naming conventions make images findable, reusable, and deployable across channels. |
Why most corporate photography workflows fail before the shoot ends
I’m Traci Schowmeyer, and after working with businesses of all sizes on their corporate photography process, I can tell you the most common failure point is not the photography itself. It is the absence of a documented plan before anyone picks up a camera.
The businesses that get the most value from their photography investment are the ones that treat the workflow for corporate shoots as a cross-functional project, not a creative task handed off to one person. Marketing, HR, and leadership all have a stake in how the company looks visually. When those teams are not aligned before the shoot, you end up with images that satisfy the photographer but confuse everyone else.
The second mistake I see constantly is treating post-production as an afterthought. Editing is where brand identity either gets reinforced or quietly undermined. If your editing team does not have access to approved presets and written retouching standards, every editor makes their own judgment calls. The result is a library of images that technically look fine individually but feel disconnected as a set.
The fix is simpler than most companies expect. A one-page style guide, a shared preset library, and a clear delivery timeline resolve the majority of workflow problems before they start. You do not need a massive production budget to run a professional corporate photography process. You need documentation, communication, and a photographer who understands brand alignment as well as they understand aperture.
— Traci Schowmeyer
How Metroplex Headshots supports your corporate photography workflow

Metroplex Headshots brings a structured, brand-first approach to every corporate photography engagement. Whether you are coordinating company-wide headshot projects for a growing team or refreshing executive portraits ahead of a rebrand, the workflow is built around your brand identity from the first planning call to final delivery. Every session is designed to reflect who you are, what your business environment communicates, and the executive presence you want clients to experience. Explore the corporate headshot packages available and take the first step toward photography that works as hard as your business does.
FAQ
What is a corporate photography workflow?
A corporate photography workflow is the step-by-step process that takes a photography project from initial planning through shoot execution, post-production editing, and final asset delivery. It includes brand style guides, culling protocols, editing presets, and DAM systems working together.
How long does a corporate photography workflow take?
Timelines vary by project scope, but marketing teams generally expect hero images within 72 hours after an event and full edited galleries within 7 to 14 business days. Pre-shoot planning adds additional lead time depending on the complexity of the shoot.
What should a corporate photo style guide include?
A corporate photo style guide should cover approved lighting setups, color palette references for editing, composition rules, subject positioning standards, and side-by-side examples of approved versus disapproved imagery. It functions as the visual rulebook for every photographer and editor on your team.
Why do companies need a photography style guide separate from brand guidelines?
Brand guidelines cover logo, typography, and color codes. A photography style guide addresses the technical and creative specifics of imagery, including how subjects are lit, framed, and edited. Without both documents, visual consistency breaks down across shoots and editors.
How often should corporate photography assets be refreshed?
Most corporate photography libraries benefit from a refresh every 12 to 18 months to reflect team changes, rebrands, or updated brand direction. Tracking which images are actively used across channels helps identify what needs replacing first.

