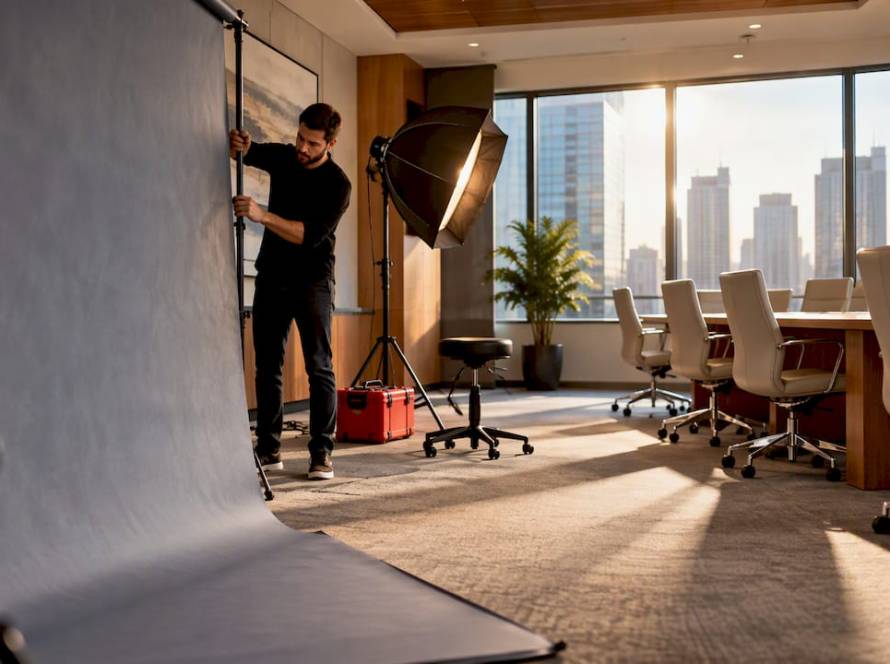
The fastest way to build patient trust online is with original, professional dentist headshots, not stock photography. Use them for your homepage hero, provider bios, and Google Business Profile. Book a specialist photographer who offers on-location or mobile studio sessions, and plan a focused half-day if your practice has more than one provider. Metroplex Headshots is one example of a team built around exactly this kind of session.
TL;DR:
- Using original, professional dentist headshots tailored to practice style can significantly reduce patient anxiety and build trust more effectively than stock photos.
- Environmental and natural expressions, including warm smiles for family practices and composed looks for specialists, communicate different signals to anxious patients.
- Consistent background, crop, and lighting across provider photos reinforce practice organization and help maintain trust over time.
- A full headshot session, costing between $500 and $2,000, typically produces a library of images lasting two to three years, with minimal retouching.
- Preparing outfits, props, and timing in advance improves headshot quality, while batch scheduling across locations ensures visual consistency for multi-provider practices.
Table of Contents
- What Do Great Dentist Headshots Actually Look Like?
- Why Do Original Headshots Matter More Than Stock Photos in Dentistry?
- What Should Dentists Wear for Professional Headshots?
- Where Should You Actually Use Your Dentist Headshots?
- What Do Dentist Headshot Sessions Cost, and Which Format Fits?
- How Should Dentists Prepare Before a Headshot Session?
- How Do You Keep Headshots Consistent Across a Multi-Provider Practice?
- How Often Should You Update Your Dentist Headshots?
- What Makes Metroplex Headshots’ Approach Different?
- Skip the Stock Photo Shortcut, Even If It’s Tempting
- Ready to Book Your Practice’s Headshot Session?
- Sources
What Do Great Dentist Headshots Actually Look Like?
Dentist headshots fall into a handful of distinct styles, and each one sends a different signal to a nervous patient scrolling your website at 11 p.m. before their appointment. The right choice depends less on personal preference and more on what your specific patient base needs to feel before they book.
A warm, teeth-showing smile reads as approachable and reassuring. It works well for general and pediatric dentistry, where parents and anxious adults are scanning for a sign that the visit won’t hurt. A closed-lip, gentle smile reads as composed and precise. It tends to suit cosmetic and specialist practices, such as oral surgery or orthodontics, where patients are evaluating skill as much as warmth.
Environmental headshots, shot in the actual treatment room or at the front desk, give patients a preview of the space they’re walking into. Tight studio crops against a clean background do the opposite: they isolate the face and let expression carry the whole message. Most practices benefit from a mix of both.
Consider these style directions when briefing your photographer:
- Warm and open: full smile, soft natural light, slightly angled body toward camera. Best for family and pediatric practices.
- Composed and precise: closed-lip smile, sharper contrast, direct eye contact. Best for cosmetic and specialty providers.
- Environmental: provider in the operatory or at the front desk, shallow depth of field. Best for “meet the team” pages.
- Candid or mid-action: hands adjusting equipment, a genuine laugh with a hygienist. Best for social media and About pages that need personality.
Background color matters more than most practices realize. Cool blues and grays feel clinical; soft neutrals and warm whites feel human without sacrificing professionalism, which is why they show up so often in dental brand photography built for patient-facing pages. For inspiration on crop, lighting, and expression variety, the Top 7 Headshot Photo Examples gallery is worth reviewing before your session, since it shows how small posing changes shift the entire feel of a portrait.
Why Do Original Headshots Matter More Than Stock Photos in Dentistry?
Dental anxiety is not a minor design consideration. A 2024 census-matched US survey found dental fear prevalence at 72.6%, with 45.8% reporting moderate fear and 26.8% reporting severe fear. That means roughly three out of four people browsing your website already carry some level of dread about what’s coming.
By the numbers: Nearly three-quarters of American adults report some degree of dental fear, and more than a quarter describe it as severe.
When a majority of your audience arrives anxious, the first face they see matters. Original photos of your actual clinicians reduce uncertainty because patients can match the face online to the face in the chair, which lowers the surprise factor that fuels anticipatory anxiety. Stock photography does the opposite. The same generic “dentist” photo appears across hundreds of competing practice websites, and patients notice the repetition, even if they can’t name why a page feels untrustworthy.
Placement matters too. Your homepage hero and “meet the doctor” bio pages carry the heaviest trust burden, since that’s where a hesitant patient decides whether to call. Interactive tools like AI chatbots can ease short-term anxiety before a visit, but they work better alongside a real human face than in place of one.
What Should Dentists Wear for Professional Headshots?
Clinical attire versus business casual comes down to what you want the photo to communicate, and where it will live. A crisp white coat over a collared shirt signals clinical authority, which suits your Google Business Profile and provider bio. Business casual, a blazer or a solid-color top without a lab coat, tends to soften the image for social media and community-facing marketing.
Solid, muted colors photograph better than busy patterns, and jewel tones (navy, burgundy, forest green) tend to flatter most skin tones under studio lighting. Avoid pure white near the face if you’re also wearing a white coat, since it can wash out skin tone and blow out highlights. V-necks and open collars look more natural than tight, high collars, which can appear stiff in a static portrait.
Small props add credibility without clutter. A visible name badge or loupes pushed up on the forehead signal “working clinician” rather than “model in a coat,” and subtle props like these photograph well when used sparingly, one item, not three.
- White coat with collared shirt: best for bios and Google Business Profile.
- Business casual, no coat: best for social media and community pages.
- Jewel-toned solids: flatter most skin tones under studio light.
- One credibility prop (badge or loupes): adds context, not distraction.
On smiles, default to a natural, teeth-showing expression unless the provider is visibly more comfortable with a closed-lip look. Forced smiles read as forced, and patients pick up on that faster than they can articulate it. For guidance on relaxing genuinely into an expression, the approachability tips from Metroplex Headshots cover posing cues that work even for camera-shy providers.
Pro Tip: Practice your smile in a mirror for thirty seconds before the session. It sounds silly, but it warms up the muscles you don’t normally use and prevents the stiff, camera-day grin that shows up in so many first-attempt shots.
Where Should You Actually Use Your Dentist Headshots?
Not every photo needs to work equally hard. Some placements decide whether a patient calls; others just maintain the impression once they’ve already trusted you.
- Homepage hero image: your single highest-converting placement. Use a wide environmental shot or a warm, direct-eye-contact portrait, sized for a full-width banner.
- Provider bio pages: a tight headshot, consistent crop across every provider, ideally showing teeth for a welcoming tone.
- Google Business Profile: upload recent headshots alongside exterior and interior shots. Profiles with more frequent, varied photo uploads see stronger discoverability and appointment requests.
- Social media: square or vertical crops for thumbnails, with more tolerance for candid, mid-action shots.
- In-office and print: a larger environmental portrait works well in the waiting room, reinforcing the face patients just saw online.
Always export a mobile-optimized version, since most patients are searching for a dentist on their phone, not a desktop monitor.
What Do Dentist Headshot Sessions Cost, and Which Format Fits?
Three session formats cover most practices: in-studio, on-location, and mobile studio. In-studio sessions give you the most lighting control and the cleanest backgrounds, but require closing time or coordinating around patient schedules. On-location sessions bring the photographer into your actual operatory, which produces those environmental shots patients respond to, though you trade some control over lighting consistency. A mobile studio setup splits the difference: professional lighting equipment brought into your space, giving you studio-quality images without the commute.
Virtual or remote headshot sessions exist, typically using video calls and AI-assisted retouching, but they struggle with lighting consistency and can’t produce the environmental or team shots that matter most for dental marketing. Treat them as a stopgap, not a primary solution.
Expect these deliverables from a professional session:
- A set number of final retouched images (commonly 5 to 15 per provider, depending on package).
- Light retouching focused on skin smoothing and background cleanup, not identity-altering edits.
- Usage licensing for web, print, and social.
- Turnaround typically within one to two weeks.
On pricing, foundational dental practice photography commonly runs $500 to $2,000 for a session covering headshots, team shots, and 20 to 30 environmental images of the office. Team size drives cost the most: a solo practitioner shoot costs far less than a six-provider DSO session with multiple locations. Travel fees, expedited turnaround, and heavier retouching requests all push the price toward the higher end. The upside is longevity. A single half-day session typically produces a usable image library for two to three years, which makes the cost per image quite low once you spread it across every page and post that photo touches.
How Should Dentists Prepare Before a Headshot Session?
Preparation is where most avoidable mistakes happen, and nearly all of them are fixable with a short checklist the week before your session.
- Wardrobe: bring two to three outfit options, including one clinical (white coat) and one business casual look, so you leave with variety.
- Grooming: schedule the session on a day you’d normally get a haircut or trim, not the day after.
- Timing: book earlier in the day, before patient appointments create rushed expressions or fatigue.
- Props: bring your loupes, a name badge, and anything specific to your specialty that adds visual context.
- Hair and makeup: keep it natural under studio lighting, since heavy makeup or product can read as shine or texture on camera.
On the smile question specifically: choose a full, teeth-showing smile if your practice serves families, pediatric patients, or anyone likely to associate a closed-lip expression with formality or distance. Choose a closed-lip, composed expression if you’re a specialist whose patients are evaluating precision and calm over warmth, oral surgeons and some cosmetic specialists tend to fall here. When in doubt, shoot both and let your team vote.
Pro Tip: Do the session before, not after, a full day of patients. A photographer can coach a relaxed smile, but no amount of coaching fixes the tired eyes that show up after eight hours of masks and bright operatory lights.
For a full pre-shoot walkthrough, the Ultimate Professional Headshot Session Guide covers wardrobe planning and timing in more depth, and the posing fundamentals in this headshot posing guide are useful if you want to rehearse before the camera arrives.
How Do You Keep Headshots Consistent Across a Multi-Provider Practice?
A practice with five dentists and mismatched headshot styles looks less trustworthy than one with three dentists and a unified look. Consistency reads as organization, and patients equate organization with competence.
Build a simple style guide before your session: one background color, one crop ratio (head-and-shoulders versus environmental), one lighting setup, and one expression direction (teeth or closed-lip) applied to everyone. Write it down. It sounds excessive for a five-person team, but it’s the only way to keep results matching a year later when you add a new hygienist.
For practices spanning multiple locations or a DSO structure, schedule sessions in batches by location rather than trying to gather every provider on one day. A mobile studio setup helps here, since the photographer brings consistent lighting to each site instead of forcing everyone into one central studio.
- Lock background, crop, and lighting specs before day one.
- Batch multi-location sessions by site, not by provider availability.
- Photograph new hires against the same setup within their first month.
- Keep a reference folder of “approved” past shots for the photographer to match.
Team portraits shot with this kind of consistency tend to do more for perceived stability than any single standout individual photo.
How Often Should You Update Your Dentist Headshots?
Plan to refresh your full headshot library every two to three years, which lines up with how long a well-shot image set typically stays usable before hairstyles, weight, or office decor make it feel dated. Between full sessions, use short mini-sessions or candid smartphone photos to keep your Google Business Profile active, since practices with frequent, recent photo uploads tend to perform better in local search and patient discovery.
Keep files organized with a simple naming convention (provider name, date, crop type) and store both web-sized and print-resolution versions. A messy photo folder is how practices end up reusing a five-year-old headshot because nobody can find the current one.
What Makes Metroplex Headshots’ Approach Different?
A professional session works best when it follows a repeatable process rather than improvising on the day. The workflow behind Metroplex Headshots’ dental and healthcare sessions starts with a pre-shoot consultation to settle wardrobe and expression choices before anyone steps in front of a camera. Sessions happen on-location or through a mobile studio setup, which keeps lighting consistent no matter which room in your practice you use.
Real-time image review during the session means providers approve their own poses on the spot, which cuts down on reshoots and awkward “that’s not how I look” moments after delivery. Retouching stays limited to skin smoothing and background cleanup, preserving the authenticity that matters so much given how many patients are already anxious before they ever see your face.
Original photography that shows the real clinician, shot with real consistency, does more to lower a nervous patient’s guard than any amount of copywriting on the page around it.
This is where the dental anxiety research and the practical case for real photography meet: patients aren’t scanning your site for polish, they’re scanning it for a person they can trust to be gentle.
Skip the Stock Photo Shortcut, Even If It’s Tempting
The advice I’d push back on hardest is the idea that a “good enough” stock photo can hold a practice over until there’s budget for something better. There isn’t a good-enough version of a fake dentist. Patients researching a provider before a procedure are doing exactly the kind of scrutiny that catches a mismatched, generic smile, and once trust cracks on the photo, it’s harder to rebuild on the copy around it.
The conventional advice on dentist headshots spends too much time on lighting technicalities and not enough on the actual decision that moves patients: teeth or no teeth, coat or no coat, and whether every provider on the team page looks like they belong together. Those three choices do more work than any retouching software ever will.
If you do one thing this year, prioritize the homepage hero and the provider bio page first. Everything else, social, print, the waiting room print, can follow once those two assets are right.
— Traci Schowmeyer
Ready to Book Your Practice’s Headshot Session?
Metroplex Headshots gives dental practices a faster path to a consistent, patient-ready image library than piecing together stock photos or a rushed phone-camera session between patients. On-location and mobile studio options mean no closing the office for a full day, and multi-provider teams get a coordinated look shot in one visit instead of scattered individual attempts.

Sessions include a pre-shoot consultation, real-time image review so every provider approves their own shots, and retouching focused on skin and background cleanup, not identity-altering edits. Pricing follows the same realistic bands common across the industry, scaled to team size and location count rather than a flat one-size fee. Browse real session results in the Top 7 Headshot Photo Examples gallery, then reach out to schedule a consultation and lock in a session date for your team.
Sources
- A census-matched survey of dental fear and fear-treatment interest in the United States
- Brand Photography for Dental Practices: A 2026 Guide | Dentplicity Blog
- Dental Website Photography: Real vs Stock – The | Dental SEO Experts
- Dental Practice Google Business Profile Statistics (Q1 2026 Study)
- AI-based chatbot short-term reductions in anticipatory dental anxiety (quasi-experimental study)