Getting your professional photo for industry publications rejected is more common than most people expect. Editors at trade magazines and digital outlets have specific technical requirements, and even a sharp, well-composed image can get flagged for the wrong file format, insufficient resolution, or an awkward crop. The good news is that high-quality professional images that meet editorial standards are entirely within reach when you know what to prepare for. This guide walks you through every stage, from pre-shoot planning to final submission, so your photo works for you instead of against you.
Table of Contents
- Key takeaways
- What your professional photo for industry publications must get right
- Executing the shoot for editorial-quality results
- Technical handling and submission best practices
- Troubleshooting rejections and managing multiple submissions
- My honest take on what most professionals get wrong
- Get publication-ready with Metroplex Headshots
- FAQ
Key takeaways
| Point | Details |
|---|---|
| Research specs before shooting | Publication requirements like pixel dimensions and file format must be confirmed before you book a photographer. |
| Frame with cropping in mind | Leave negative space around your head so editors can crop to squares or circles without losing your chin or forehead. |
| Submit as a separate file | Never embed your photo in a document. Editors require standalone image files at the correct resolution. |
| Plan licensing from the start | Securing the right usage rights upfront prevents legal complications and costly re-shoots later. |
| Update your photo regularly | An outdated image creates visual drift between your current appearance and your published presence. |
What your professional photo for industry publications must get right
Before you step in front of a camera, you need to understand what the publication actually wants. Editorial standards vary, but the fundamentals are consistent across most trade magazines and industry outlets. Photos must be sharp, properly exposed, evenly lit, and submitted as separate files at the correct resolution. One widely cited standard is 1200×677 pixels, though you should always verify the specific outlet’s guidelines before shooting.
What to research before you book
Every publication has a submission page or media kit that outlines its technical requirements. Look for these details before you do anything else.
- Pixel dimensions: Confirm minimum and preferred resolution. Many outlets specify 1200×677 pixels or higher for byline photos.
- File format: JPEG is most common, but some publications accept TIFF or PNG. Ask if you are unsure.
- Color profile: Most digital publications use sRGB. Print outlets may require CMYK.
- Background preferences: Clean, neutral, or white backgrounds are standard for editorial use.
- Licensing and model release requirements: If your image will be used commercially or across multiple platforms, you may need a model release document in place before submission.
| Requirement | Common Standard | Why It Matters |
|---|---|---|
| Resolution | 1200×677 pixels minimum | Prevents pixelation in print and digital layouts |
| File type | JPEG or TIFF | Ensures compatibility with editorial software |
| Background | Clean, neutral | Keeps focus on the subject, not the setting |
| Submission format | Separate file attachment | Embedded images are frequently rejected outright |
| Licensing | Editorial or commercial release | Determines where and how the image can legally appear |
Pro Tip: Call or email the publication’s editorial team directly if their submission guidelines are unclear. Editors appreciate professionals who ask the right questions upfront. It saves everyone time.
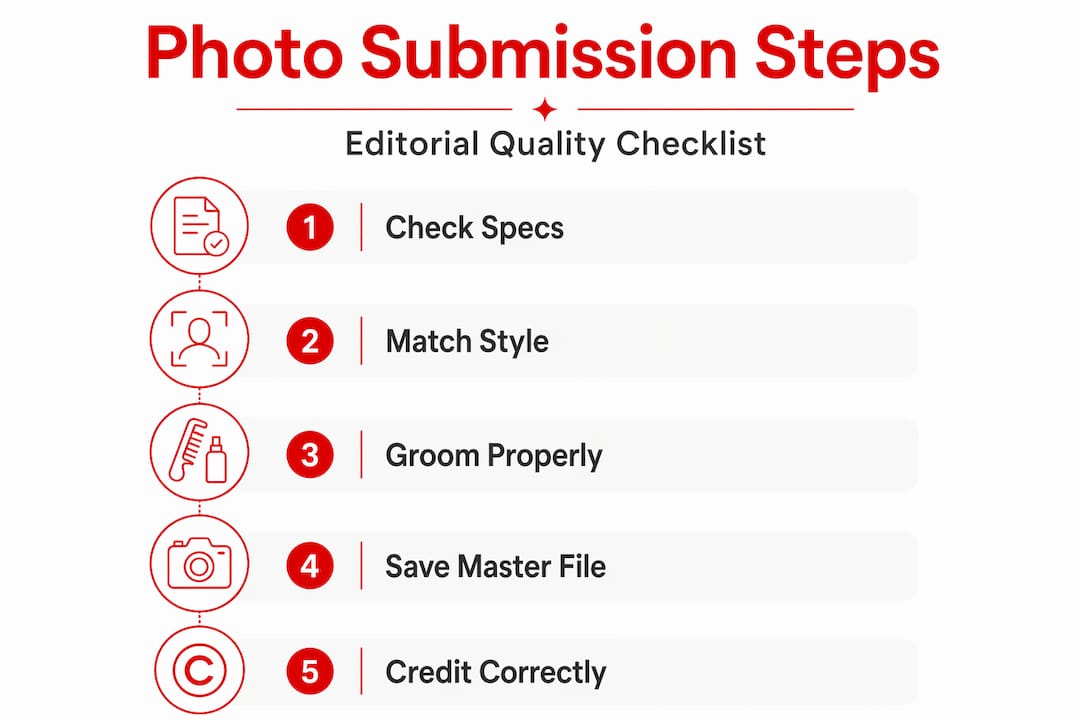
Understanding editorial style preferences matters just as much as the technical specs. Publications want images that reflect executive presence and professionalism. That means natural lighting, clean backgrounds, and attire appropriate to your industry. A financial advisor and a creative director will dress differently, but both need a photo that communicates authority and approachability in equal measure.
Executing the shoot for editorial-quality results
Once you know what the publication needs, the shoot itself becomes much more purposeful. Industry publication photography is not the same as a LinkedIn update or a casual corporate team photo. Editors are making layout decisions based on your image, which means every compositional choice you make either helps or hurts their ability to use it.
Framing and composition
- Shoot from the chest or waist upward. Shoulders should be visible and the subject centered in the frame. This gives editors flexibility when cropping for different layout formats.
- Leave space above your head. Editors often crop to squares or circles for digital layouts. Hidden editorial crop geometry can remove your forehead or chin if the original shot is too tight.
- Keep the background uncluttered. A busy background competes with your face and can make the image unusable in certain layouts.
- Use even, face-illuminating light. Harsh shadows or directional lighting that darkens one side of the face creates problems in post-production that are difficult to fix cleanly.
- Avoid heavy filters or extreme retouching. Editors want your photo to look like you. Over-processed images signal low credibility and often get rejected on editorial grounds.
Pro Tip: Ask your photographer to shoot a few frames with slightly more negative space than you think you need. You can always crop tighter in post-production. You cannot add space back that was never there.
Posture, expression, and attire
Your posture communicates as much as your expression. Stand or sit upright with relaxed shoulders. A slight head tilt reads as approachable without looking casual. Your eyes should face the camera directly because this creates the sense of direct engagement that editors and readers respond to.
For attire, think about the industry you are representing. A surgeon submitting a photo to a medical trade journal and a marketing executive submitting to a business publication have different visual expectations. Both should wear what they would wear to meet a high-value client, not what they wear on a casual Friday.
“Your photo is your digital handshake with every reader who encounters your byline. Make it count.”
Grooming matters more in publication photography than most people realize. Stray hairs, wrinkled collars, and visible distractions pull the reader’s eye away from your face. A quick review of your appearance on camera before the shoot begins saves time and prevents reshoots.
Technical handling and submission best practices
Getting through the shoot is only half the process. How you prepare and deliver your files determines whether the photo actually gets used. Submissions often fail not because the image is poor quality but because the file was embedded in a Word document, named incorrectly, or sent at the wrong resolution.
Here is what to check before you hit send.
- Send as a standalone attachment. Never paste your photo into an email body or embed it in a document. Editors need the original file.
- Name your file clearly. Use a format like FirstName_LastName_Headshot.jpg. Avoid generic names like “photo1.jpg” or “final_final_v3.jpg.”
- Resize without degrading quality. If you need to reduce file size, use professional editing software rather than a phone app. Compression artifacts are immediately visible at publication resolution.
- Verify your resolution after resizing. Scaling down an image does not always preserve the pixel count you need. Confirm the final dimensions match the publication’s requirements.
- Include negative space around the head. Editors may crop to squares or circles, so extra room around the head protects against losing important parts of the frame.
Pro Tip: Save a master file at the highest resolution your photographer provides. Work from copies when resizing for specific publications. This protects your original and gives you a clean source for every future submission.
Licensing and crediting
Licensing is the part of industry publication photography that most professionals skip until it becomes a problem. Rights-managed editorial images have restrictions on use unless additional licenses are purchased. If you plan to use the same image for your byline, your company website, and a speaking engagement brochure, you need to confirm that your licensing covers all three uses.
| Usage Type | License Needed | Common Restriction |
|---|---|---|
| Editorial byline only | Standard editorial license | Cannot be used for advertising or promotion |
| Website and marketing | Commercial license | Requires model release in most cases |
| Multiple publications | Broad usage rights | May require individual agreements per outlet |
| Promotional materials | Full commercial release | Subject must sign a model release document |
Editorial photos lack model and property releases by default and require explicit crediting when used in publications. If you are commissioning original photography, discuss usage rights with your photographer before the shoot. Getting this right from the start is far less expensive than renegotiating or reshooting later.
Troubleshooting rejections and managing multiple submissions
Even well-prepared professionals face rejections. The key is knowing how to interpret the feedback and adjust without starting from scratch.
- Different size requirements across publications: Shoot at the highest resolution possible and save your master file. You can resize down for any outlet without quality loss. Going the other direction is not possible.
- Feedback about background or lighting: If multiple publications flag the same issue, it is worth scheduling a reshoot rather than trying to fix it in post-production. Editing can only go so far.
- Outdated appearance: If your photo is more than two to three years old or your appearance has changed significantly, update it. Visual drift between your current look and your published image erodes credibility.
- Conflicting crop requirements: Some outlets want a square crop, others a horizontal banner. This is why negative space in your original shot is not optional. It is the buffer that makes your image work across formats.
- Managing multiple licensing types: If you are submitting the same image to several publications with different usage terms, keep a record of each agreement. A simple spreadsheet tracking outlet name, submission date, license type, and credit requirements prevents confusion.
When it comes to best photos for industry articles, versatility is the goal. One well-executed shoot, properly licensed and formatted, should serve you across multiple outlets for at least two to three years before a refresh is needed.
My honest take on what most professionals get wrong
I’m Traci Schowmeyer, and after working with professionals across dozens of industries, I can tell you that the single most common mistake I see is treating the publication photo as an afterthought. People spend weeks crafting an article or preparing a speaking submission, and then they attach whatever headshot is already on their phone.
What I have learned is that editors notice. They are making layout decisions in minutes, and a photo that does not meet their specs or does not project the right level of authority gets replaced or rejected without a second thought. The photo is not a formality. It is part of your editorial package.
The licensing piece is where I see the most overlooked risk. Many professionals do not realize that a photo taken for one purpose may not be legally cleared for another. Proper licensing planning often gets skipped entirely, and it only becomes a problem when someone asks for proof of usage rights. By then, the options are limited.
My practical advice: treat your professional portrait as a strategic asset with a shelf life and a use case. Know what it covers, where it can go, and when it needs to be updated. The professionals who do this consistently are the ones whose names and faces show up repeatedly in the publications that matter in their field.
— Traci Schowmeyer
Get publication-ready with Metroplex Headshots
If you are ready to stop guessing and start submitting photos that editors actually want to use, Metroplex Headshots is built for exactly this. Every session is designed with brand alignment and editorial standards in mind, from composition and lighting to the final delivered files.
Metroplex Headshots works with professionals across industries to produce headshot sessions that meet publication specs, reflect your executive presence, and hold up across every format an editor might need. Whether you are submitting to a trade magazine, a digital outlet, or both, the team guides you through attire, positioning, and file delivery so nothing gets left to chance. Explore the difference between headshots and portraits to find the right format for your specific publication goals, then book your session with confidence.
FAQ
What resolution does my photo need for industry publications?
Most industry publications require a minimum of 1200×677 pixels, though some outlets specify higher. Always confirm the exact dimensions with the publication before your shoot.
Why do publications reject photos that look fine to me?
Photos are rejected most often because they are embedded in documents rather than sent as standalone files, fall below the required pixel count, or have backgrounds and lighting that do not meet editorial standards.
Do I need a model release for my own headshot?
For editorial use only, a model release is typically not required. However, if you plan to use the same image for promotional or commercial purposes, a model release is necessary to extend usage rights beyond editorial contexts.
How often should I update my publication photo?
Plan to refresh your photo every two to three years, or sooner if your appearance changes significantly. An outdated image creates a disconnect between your published presence and your current professional identity.
Can I use one photo for multiple publications?
Yes, provided your licensing covers all intended uses. Shoot at the highest resolution possible and maintain a master file so you can resize and reformat for each outlet’s specific requirements without quality loss.
Recommended
- Set Your Professional Headshot Goals for 2024 | Metroplex Headshots
- Professional photo shoot: 4 Steps to Elevate Your Image
- What Makes a Good Headshot in 2026
- Ultimate Professional LinkedIn Photo 2026