


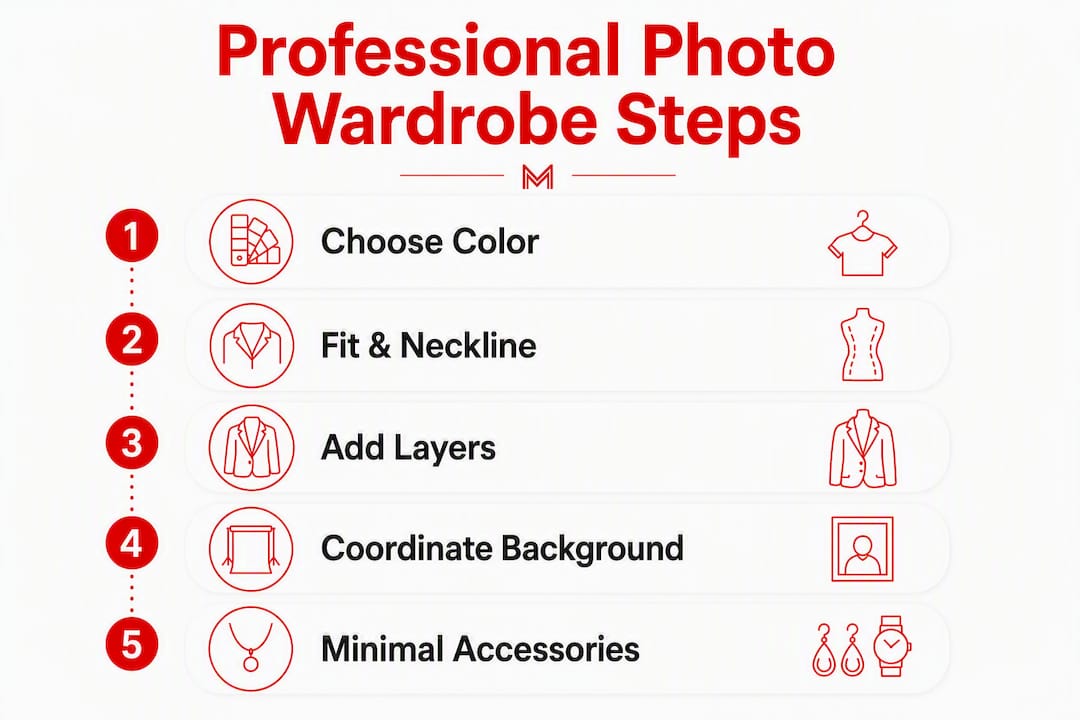
For a polished professional headshot, wear a solid mid-tone or muted jewel-tone top in a well-tailored fit, keep accessories minimal, bring multiple outfit options, and treat the 48 hours before your session as part of the shoot itself. Schedule your haircut about a week out, steam your clothes two days prior, and arrive hydrated and rested.
The four rules that matter most:
- Solid colors in mid-tones or muted gem tones photograph best on nearly every skin tone.
- Tailored fit beats baggy or tight every time — clothes should skim, not cling or swallow.
- Keep jewelry and accessories minimal; one focal piece is the ceiling.
- Prep starts 48 hours out: sleep, hydrate, and skip new skincare products.
Metroplex Headshots works with executives, attorneys, healthcare professionals, and creative entrepreneurs across Dallas–Fort Worth, and the guidance below reflects what actually works in a professional studio setting. These aren’t generic fashion tips — they’re the rules that separate a forgettable photo from one that functions as your digital handshake.
Table of Contents
- What to wear in professional photos: color and pattern rules
- How fit and neckline shape your headshot
- How layers, texture, and fabric affect the final image
- Accessories and grooming details that photographers notice
- What not to wear: the short list of photo-ruining choices
- Hair and makeup: camera-aware finishing touches
- Bring, test, and coordinate: wardrobe logistics for a smooth session
- Posture and clothing tricks that create a slimmer, more confident look
- Your 48-hour and day-of prep checklist
- Do shoes matter in a professional photo?
- How to coordinate your outfit with the background and setting
- Key Takeaways
- The wardrobe detail most professionals overlook
- Ready to book your session with Metroplex Headshots?
What to wear in professional photos: color and pattern rules
Solid mid-tones and muted jewel tones are the safest and most flattering choices for professional photography. Colors like slate blue, burgundy, forest green, dusty rose, and charcoal read confidently on camera without competing with your face. Bright neons reflect light unpredictably; pure white can blow out near a light source; jet black flattens dimension unless paired with contrast.
Small, tight patterns are a technical problem, not just an aesthetic one. They create a moiré effect on camera — a shimmering, distracting artifact that no amount of retouching can fully fix. Stick to solids or very large, widely spaced patterns if you want texture.
If your headshots may be printed in black and white — common for legal directories, annual reports, or press kits — plan for tonal contrast. A light shirt under a dark jacket preserves dimension and separation in monochrome. Without that contrast, the image goes flat.
| Color family | Best use case | Photographic effect |
|---|---|---|
| Slate blue, navy | Corporate, LinkedIn, legal | Conveys authority; flatters most skin tones |
| Burgundy, deep plum | Executive, personal brand | Warm and commanding; adds depth |
| Forest green, teal | Healthcare, creative, personal brand | Fresh and approachable; camera-friendly |
| Charcoal, medium gray | All industries | Neutral anchor; pairs well with any skin tone |
| Warm white, ivory | Casual or creative sessions | Softer than pure white; avoids blowout |
| Neon, bright orange | Avoid | Reflects light; distracts from the face |
Pro Tip: Ask your photographer to preview your outfit under studio lighting before the session begins. Colors shift under artificial light — a muted olive can turn muddy, and a soft pink can read almost white. A 30-second preview saves the whole shoot.
How fit and neckline shape your headshot
Well-fitted, tailored clothing photographs better than anything baggy or overly tight. Baggy fabric creates visual volume and odd folds; tight clothing pulls and distorts. The goal is clothes that skim your frame cleanly.
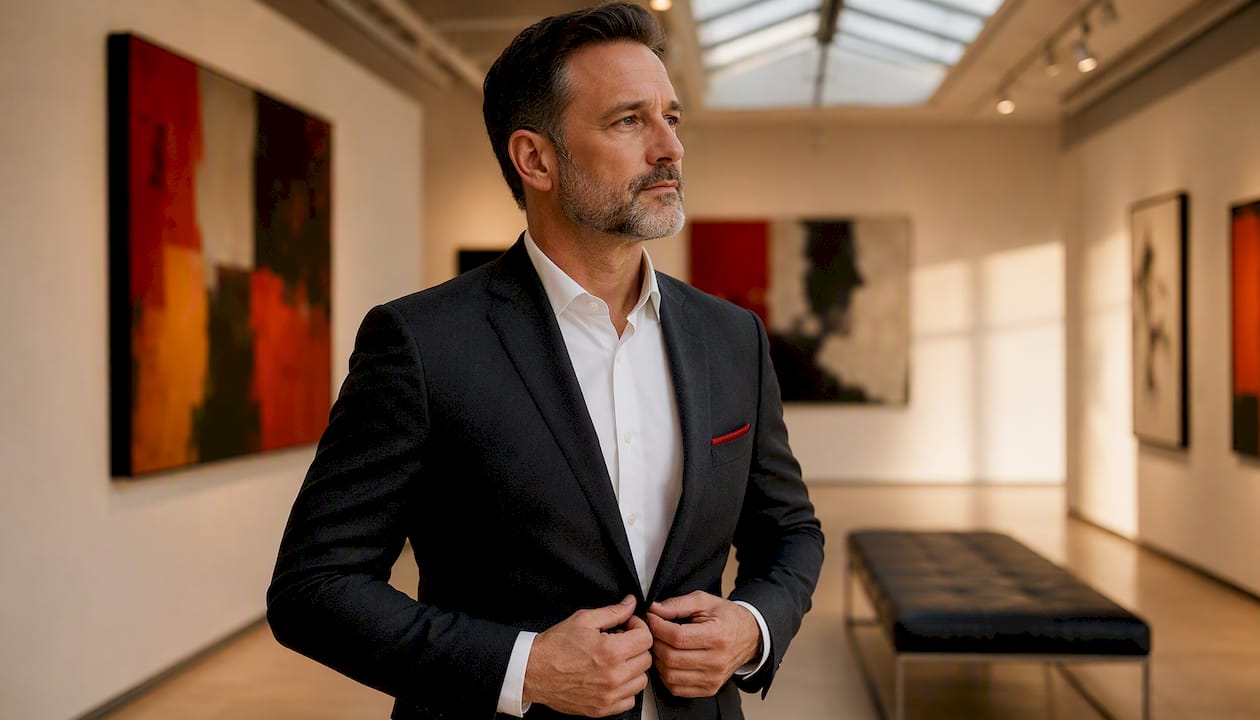
Necklines do real work in a headshot. A V-neck draws the eye downward and lengthens the neck, which tends to be flattering in close-cropped portraits. Crew necks work well for a clean, approachable look but can shorten the neck on some face shapes. Collared shirts and blazers add structure and signal professionalism — open collars read softer and more approachable than buttoned-to-the-top.
Shoulder seams and sleeve length matter more than most people expect. A shoulder seam that sits off the edge of your actual shoulder makes the whole silhouette look borrowed. Sleeves that are too long bunch at the wrist; too short and the forearm looks disconnected. Both read as “off” on camera even when they’re invisible in a mirror.
Fit check to run at home before your session:
- Stand straight and check that shoulder seams sit exactly at the shoulder point, not drooping or pulling inward.
- Raise both arms slightly — the shirt or jacket should not ride up or pull across the back.
- Button the jacket or top and check for any pulling across the chest or shoulders.
- Confirm sleeve length: shirt cuffs should hit the wrist bone; jacket sleeves should show a quarter-inch of shirt cuff.
- Check the collar: it should lie flat against the neck without gaping or bunching.
How layers, texture, and fabric affect the final image
A structured blazer or jacket is the single most reliable wardrobe upgrade for a headshot. It creates clean shoulder lines, adds a layer of visual formality, and frames the face with intentional geometry. Photographers consistently reach for a blazer change as the fastest way to produce a second, distinctly different look in the same session.
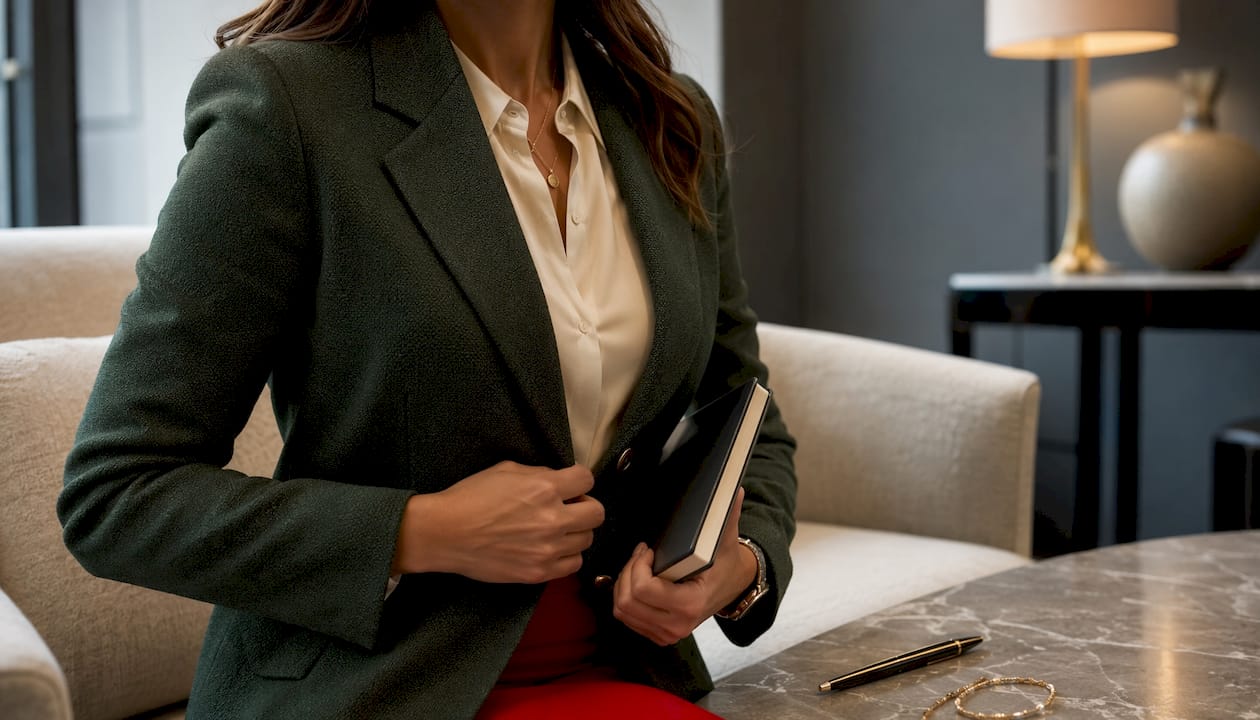
Texture adds depth that flat fabrics simply cannot. Matte knits, wool blends, and silk-cotton mixes catch light in subtle ways that read as dimension on camera. High-shine or clingy polyester fabrics do the opposite — they reflect studio lights and create distracting highlight blowouts or unflattering cling. When in doubt, choose matte over shiny.
Coordinating your layers with the background is worth a moment of thought. A dark blazer against a dark gray background creates low-contrast blending that erases your silhouette. Aim for at least one stop of contrast between your outermost layer and the backdrop — light top against a medium background, or a dark jacket against a lighter one.
Pro Tip: Test your outfit on your phone camera before the session. Hold it up, take a quick photo, and zoom in. Fabric glare, moiré, and color clashes that are invisible in a mirror show up immediately on a camera preview.
Accessories and grooming details that photographers notice
Minimal jewelry photographs best. Small stud earrings, a delicate chain, or a classic watch are the ceiling for most professional headshots. Large statement pieces — chandelier earrings, chunky necklaces, bold cuffs — pull the viewer’s eye away from your face, which is the entire point of the image.
Glasses deserve specific attention. If you wear them daily, plan to shoot with them on for at least part of the session. Anti-reflective coating on the lenses is critical — standard lenses catch studio lights and create white glare patches across your eyes. A slight downward tilt of the frames during the shoot can reduce reflections without looking unnatural. Rimless and thin-frame glasses tend to photograph more cleanly than thick statement frames.
- Keep earrings small: studs or small hoops only
- Necklaces, if worn, should sit above the neckline of the top
- Watches are fine if visible, but oversized smartwatches can visually date the image
- Avoid bracelets and rings that catch light or create noise at the wrist
Pro Tip: Pack a small grooming kit for the day of your session: blotting papers, a travel-size setting powder, a fine-tooth comb or brush, clear lip balm, and a lint roller; for detailed pre-shoot grooming tips, see this sharp guide to prepare groom for photos. These five items solve 90% of last-minute touch-up needs.
What not to wear: the short list of photo-ruining choices
Some clothing choices are simply incompatible with a professional headshot. Here is the short list, and why each one is a problem on camera:
- Neon or very bright colors reflect light unpredictably and cast color onto your skin
- Large logos or brand graphics distract from your face and can date the image quickly
- Small tight patterns (houndstooth, fine stripes, busy prints) create moiré artifacts on camera
- High-shine fabrics (satin, polyester blends) produce highlight blowouts under studio lights
- Wrinkled or un-steamed clothing reads as careless and is difficult to retouch
- Oversized smartwatches can visually date the image and draw the eye to the wrist
Pro Tip: If your employer or firm has a dress code or brand guideline for headshots, follow it. Company-facing headshots that deviate from brand standards create visual drift across team pages and marketing materials — consistency is part of the professional signal.
Hair and makeup: camera-aware finishing touches
Camera-aware makeup is different from everyday makeup. The goal is definition without shine. Matte foundation or powder, a subtle contour along the cheekbones and jaw, and well-defined brows all translate to better facial structure on camera. Heavy shimmer on the cheeks or eyelids catches light and creates distracting hot spots. Concealer and a good setting powder are the two products that do the most work — they even skin tone and prevent the midday shine that kills otherwise great shots.
For hair, the rule is simple: style it the way you normally wear it, but slightly neater. A headshot is not the moment for a dramatic new look. Bring a brush or comb, a small amount of product for flyaways, and a few pins if you have longer hair. Pulled-back styles work well for a clean, professional look; loose styles work equally well as long as they are controlled.
- Use matte products; avoid heavy shimmer on cheeks or lids
- Set everything with a light translucent powder to prevent shine under lights
- Trim and tidy facial hair two to three days before the session — not the morning of
- For longer hair, bring pins and product; plan one pulled-back and one loose option
Pro Tip: Do a full hair and makeup run-through at home, then take a phone photo under both natural and artificial light. What looks polished in a bathroom mirror can read differently under studio lighting — catching it early means you arrive confident, not surprised.
Bring, test, and coordinate: wardrobe logistics for a smooth session
A 30-minute headshot session can accommodate several outfit changes, and bringing multiple looks produces a far more useful gallery than shooting a single outfit. Most professionals who bring only one top leave wishing they had options.
What to pack:
- Two to three tops in different color families (one neutral, one with color, one with a collar or blazer)
- One structured blazer or jacket
- One slightly more casual option if your work spans formal and approachable contexts
- Spare undergarments in neutral tones that won’t show through lighter fabrics
- A lint roller — non-negotiable
- Your small grooming kit (see the accessories section above)
For team sessions, coordinate around a tonal palette rather than matching outfits exactly. Exact matching reads as costume; a shared palette reads as cohesive. Agree on a color family (navy and gray, for example) and let individuals choose their own pieces within it. For company-facing headshots, one consistent option — a branded polo or a uniform blazer — often makes sense for the primary image.
| Setting | Wardrobe consideration | Shoes matter? |
|---|---|---|
| Studio (head/shoulders crop) | Focus on top, collar, and jacket; shoes irrelevant | No |
| Studio (three-quarter crop) | Add trouser or skirt coordination; shoes may appear | Sometimes |
| On-location (full environment) | Full outfit coordination including shoes and accessories | Yes |
| Mobile studio at office | Match company dress code; background may include office elements | Occasionally |
Posture and clothing tricks that create a slimmer, more confident look
Posture and clothing work together. A slight torso twist — turning the body about 30 degrees away from the camera while keeping the face forward — immediately creates a slimmer silhouette. Keeping the weight on the back leg and elongating the neck by pushing the chin slightly forward and down (not up) removes the appearance of a double chin and sharpens the jawline.
Clothing choices reinforce these posture cues. Vertical lines, V-necks, and structured shoulders all create a longer, leaner line. A well-placed open blazer with a slight forward lean reads as approachable and confident simultaneously.
- Elongate the neck: chin slightly forward and down, not tucked or raised
- Relax the shoulders: drop them away from the ears before each shot
- Twist the torso 30 degrees from the camera; keep the face directed toward the lens
- Push the forehead very slightly toward the camera to sharpen facial definition
Quick pose practice (under five minutes):
- Stand in front of a mirror and turn your body 30 degrees to the right.
- Drop your shoulders deliberately, then take a breath and let them settle naturally.
- Push your chin forward and slightly down — notice how the jawline sharpens.
- Lean your upper body just slightly toward the mirror. Hold for three seconds.
Run through this sequence three or four times before your session and it becomes muscle memory by the time you’re in front of the camera.
Your 48-hour and day-of prep checklist
Studio professionals treat the shoot as a two-day process. The condition you arrive in — hydrated, rested, calm — often matters more than any last-minute makeup or wardrobe decision.
The 48-hour rule: Hydrate consistently, avoid alcohol and high-sodium foods, get two solid nights of sleep, and skip any new skincare products or aggressive treatments. Irritated or puffy skin is difficult to retouch and impossible to fully hide.
Week before:
- Schedule your haircut about a week out so hair settles into its natural shape before the session.
- Dry-clean or steam your chosen outfits two days prior — not the morning of.
- Test your outfits on camera at home (phone selfie under both natural and artificial light).
Day of:
- Arrive fed, calm, and a few minutes early.
- Bring outfits on hangers to prevent wrinkles in transit.
- Use your lint roller before you change into each outfit.
- At Metroplex Headshots, real-time image review lets you and your photographer check color, fit, and expression immediately — problems get caught and corrected during the session, not after.
Pro Tip: Morning sessions tend to work best for most people. Skin is less puffy, makeup stays fresher, and energy is higher. If you can only book an afternoon slot, avoid a heavy lunch and touch up with blotting papers and setting powder before you walk in.
For a complete session prep walkthrough, the professional headshot session guide at Metroplex Headshots covers logistics, timing, and what to expect from start to finish.
Do shoes matter in a professional photo?
The answer depends entirely on the crop. In a standard head-and-shoulders headshot, shoes are completely irrelevant — they never appear in the frame. For a three-quarter crop that shows the body from mid-thigh up, shoes may appear at the very bottom edge, so they should coordinate with the overall outfit without being distracting. In full-length or on-location shots where the environment is part of the image, shoes matter as much as any other piece of the outfit.
The practical rule: confirm your intended crop with your photographer before the session. If there is any chance of a three-quarter or full-length shot, wear shoes that match the formality of your outfit. Clean, polished, and simple is always the right call — ornate or casual footwear pulls attention downward in a frame where the face should dominate.
How to coordinate your outfit with the background and setting
Background and clothing need to work together, not compete. A dark background with a dark outfit creates a silhouette problem — the edges of your clothing blend into the backdrop and you lose definition. A very light background with a very light outfit has the same effect. Aim for contrast: your outermost layer should be at least one clear tone lighter or darker than the background.
Color temperature matters too. Warm-toned backgrounds (cream, warm gray, wood tones) pair naturally with earth tones, burgundy, and warm neutrals. Cool-toned backgrounds (white, cool gray, blue-gray) work better with navy, slate, and cool jewel tones. When you book with Metroplex Headshots, the team can advise on background options that complement your planned outfits — it is part of the consultation process, not an afterthought.
For on-location sessions, the environment itself becomes the backdrop. An office setting with neutral walls and natural light calls for slightly more formal attire; an outdoor or lifestyle setting allows for softer, more relaxed choices. The wardrobe tips for headshots resource at Metroplex Headshots walks through background coordination for both studio and on-location scenarios.
Key Takeaways
Solid mid-tones, a tailored fit, minimal accessories, and 48 hours of deliberate preparation are the four pillars of a professional headshot that actually works for your brand.
| Point | Details |
|---|---|
| Color choice | Solid mid-tones and muted jewel tones flatter most skin tones and keep focus on the face. |
| Fit over fashion | Well-tailored clothing photographs better than baggy or tight; check shoulder seams and sleeve length at home. |
| Minimal accessories | Keep jewelry to one small focal piece; large statement pieces draw the eye away from your face. |
| 48-hour prep | Hydrate, sleep well, avoid new skincare products, and steam your outfits two days before the session. |
| Metroplex Headshots | Offers real-time image review and wardrobe consultation during sessions so fit and color issues are caught on the spot. |
The wardrobe detail most professionals overlook
There is a pattern that shows up in nearly every session: clients spend weeks thinking about which outfit to wear and almost no time thinking about how they will feel when they walk in. The wardrobe is the visible part of the equation, but the condition underneath it — rested, hydrated, calm — is what actually determines whether the images are usable.
The other thing worth saying plainly: variety within a single session is underused. Most professionals book a headshot, wear one outfit, and leave with a single-note gallery. Three outfits — one formal, one business casual, one with a pop of personality — give you images for LinkedIn, your firm’s website, a speaking bio, and a press kit, all from the same hour. That is not a luxury; it is just smart planning.
The real secret sauce of professional branding photography is not the lighting or the background. It is the moment when a client sees themselves on the review screen and realizes the image actually looks like the professional they are, not the version they were afraid the camera would catch. That moment happens consistently when the wardrobe, the prep, and the session workflow are all aligned. Outfit variety, real-time review, and a photographer who can spot a fit issue before it becomes a retouching problem — those are the variables that separate a great headshot from a mediocre one.
Ready to book your session with Metroplex Headshots?
Metroplex Headshots serves executives, corporate teams, attorneys, healthcare professionals, and entrepreneurs across Dallas–Fort Worth with in-studio and on-location sessions built for professionals who need images that work across multiple platforms. Every session includes real-time image review so you can see your images as they are captured, swap outfits with confidence, and leave knowing you have what you need. Professional retouching, background editing, and fast delivery are standard, not add-ons.

If you are coordinating headshots for a team, the national headshots program handles multi-location and enterprise bookings with consistent results across every location. For individual sessions, the session prep and booking page is the fastest way to check availability and get started. Bring your outfits, arrive rested, and let the studio handle the rest.

