

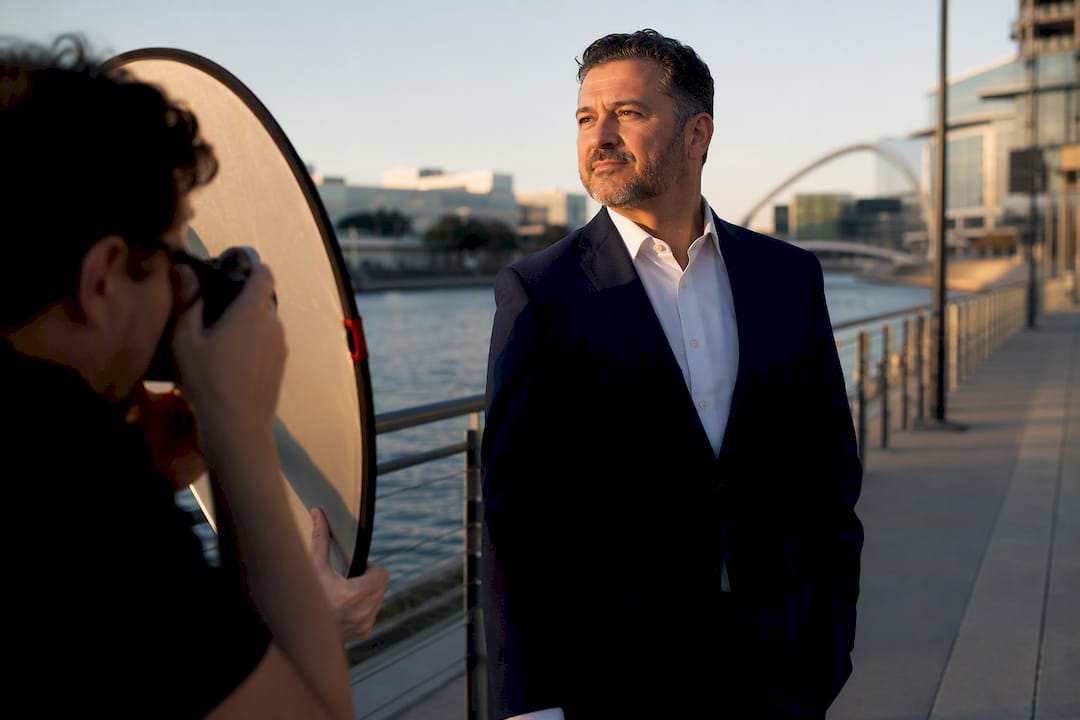
The best time for outdoor headshots is golden hour, roughly the hour after sunrise or the hour before sunset, when low sun angles produce soft, warm, directional light that flatters skin and minimizes harsh shadows. Blue hour and overcast open shade work as reliable backups when golden hour doesn’t fit the schedule. Exact windows shift with the date and your latitude, so you’ll want a planning tool rather than a guess.
TL;DR:
- Shooting during morning golden hour offers the best balance of low crowds, crisp skin tones, and fresh lighting for professional headshots.
- Use planning tools like PhotoPills or SunCalc to precisely determine the best window, starting setup 60 to 75 minutes before sunset or sunrise.
- Overcast and open shade conditions provide consistent, soft light suitable for client sessions when golden hour is unavailable or schedules are tight.
- Blue hour offers a moody, urban aesthetic ideal for city backdrops, but requires a tripod or fast lens due to lower light levels.
- Evening golden hour generally lasts 30 to 60 minutes, longer closer to summer or the equator, with sunset often providing more extended usable light than sunrise.
Table of Contents
- When Should You Schedule Your Outdoor Headshot Session?
- Golden Hour vs. Blue Hour: What’s Actually Happening in the Sky
- How to Calculate Your Exact Shoot Window
- What Works When Golden Hour Isn’t an Option
- Matching Your Location to the Light
- Your Session-Day Checklist and Starter Camera Settings
- What Studio-Tested Outdoor Sessions Actually Look Like
- Sunrise or Sunset: Which One Should You Actually Book?
- What the Conventional Advice Gets Wrong
- Booking an Outdoor Session With Metroplex Headshots
- Sources
- FAQ
When Should You Schedule Your Outdoor Headshot Session?
Every outdoor headshot session comes down to three factors: the mood you want, your logistics, and how much crowd interference you can tolerate. Here’s how the main windows stack up against each other.
- Morning golden hour. The air is crisper, foot traffic is lighter in most business districts and parks, and the light reads clean and fresh. This is the window I’d point most corporate and LinkedIn headshot clients toward, since a crisp look photographs as more polished than a warm one.
- Evening golden hour. Warmer color temperatures and dramatic sky color give portraits a welcoming, approachable feel. Real estate agents and therapists often want this warmth because it softens formality.
- Blue hour. The sky’s deep blue and city lights create a moody, editorial look, but you’ll need a tripod or a fast lens since the light drops fast.
- Overcast or open shade. This is the dependable fallback. Soft, even light is available almost any time of day, which matters when a client’s calendar won’t bend to sunrise or sunset.
The quick decision rule: if you want polish, shoot morning. If you want warmth, shoot evening. If your calendar only allows midday, plan for shade instead of fighting the sun.
Golden Hour vs. Blue Hour: What’s Actually Happening in the Sky
Golden hour exists because sunlight is traveling through more atmosphere at a low angle, scattering shorter blue wavelengths and letting warmer reds and oranges dominate. That’s the physics behind the flattering glow that Pro EDU and most working photographers point to as the single most consistent light source for headshots. Blue hour happens right after the sun dips below the horizon, when indirect skylight bathes everything in cool, even tones with none of golden hour’s warmth.
Golden hour typically runs 30 to 60 minutes, while blue hour is shorter, usually 20 to 40 minutes, and both stretch longer the farther you are from the equator, according to PhotoSerge’s comparison of the two windows. Season matters too. A Dallas shoot in June has a longer golden hour than one in December, since the sun’s path angles differently across the year.
Here’s how to choose between them for a headshot session:
- Pick golden hour when skin tone and catchlights matter most. The low, warm light creates natural highlights in the eyes and softens texture without washing anyone out.
- Pick blue hour when the backdrop is urban or architectural. City lights balance against the cool sky, producing a magazine-style portrait that golden hour can’t replicate.
- Combine both when the schedule allows. Start in golden hour for the primary headshot, then shift into blue hour for a handful of moodier alternate shots.
Low-angle light produces long, soft shadows that add shape and dimension, while blue hour flattens contrast in a way that reads as editorial rather than corporate. Neither is objectively better. They’re different tools for different assignments.
How to Calculate Your Exact Shoot Window
Sunrise and sunset times shift daily, and golden hour’s length depends on both season and latitude, so working off a rough guess wastes real shoot time. A simple heuristic: start setup 60 to 75 minutes before sunset and have your subject camera ready 30 to 45 minutes before sunset, since the best light often arrives faster than people expect.
For precision, lean on dedicated planning tools rather than a weather app’s sunset time alone:
- PhotoPills maps sun position and azimuth directly onto a location’s terrain, so you know exactly where the light will fall on a building or tree line.
- SunCalc gives a visual timeline of golden hour, blue hour, and solar noon for any date and coordinate.
- timeanddate offers straightforward daily sunrise, sunset, and twilight tables, useful for quick scheduling without opening a full app.
These tools let you calculate sun azimuth and the precise start and end of golden and blue windows for the specific date and GPS location of your shoot.
A sample evening timeline: arrive 45 minutes before sunset to scout backgrounds and test exposure, shoot front-lit portraits through the first 20 minutes of golden hour, switch to backlit or rim-light setups as the sun drops lower, then transition into blue hour for two or three final frames once the sun is below the horizon.
What Works When Golden Hour Isn’t an Option
Client calendars don’t always cooperate with sunrise or sunset, and that’s fine. Overcast skies function as a massive natural diffuser, spreading sunlight evenly and cutting the harsh contrast that direct sun creates. Portrait photographers increasingly treat cloudy days as an advantage rather than a compromise, since the soft light works at almost any hour.
Open shade is the midday move. Look for shadows cast by a building, awning, or tree canopy, and position your subject so the shade covers their whole face evenly, not just half of it. Uneven shade creates the same harsh split-lighting problem you’re trying to avoid.
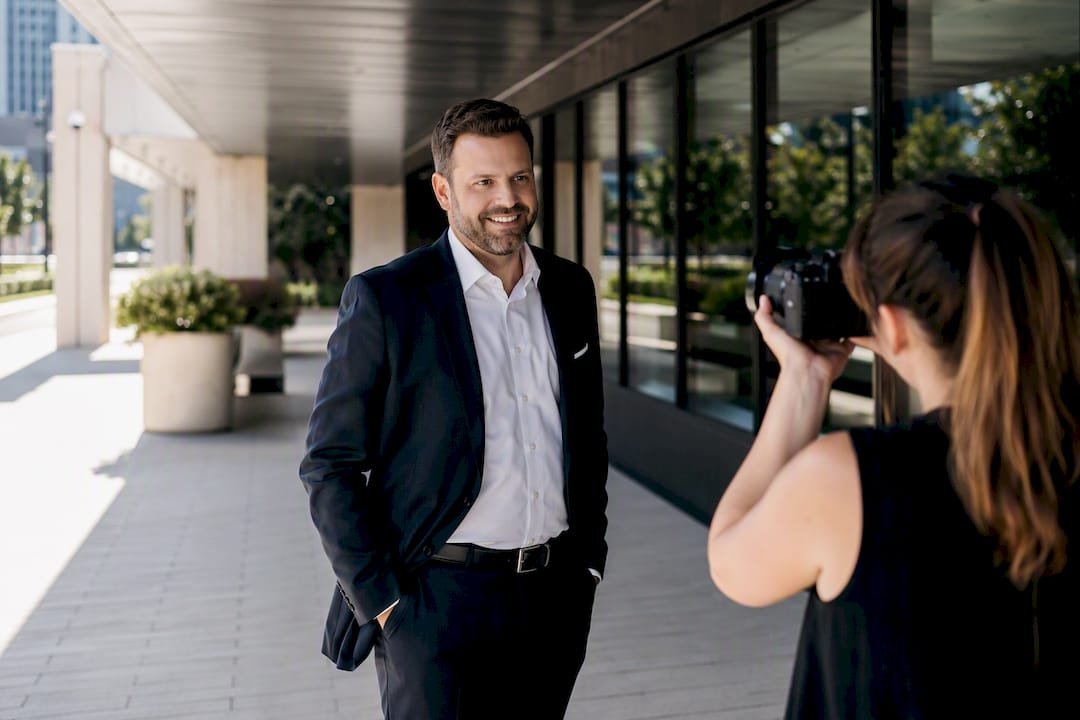
If you’re stuck shooting between 10 a.m. and 3 p.m. with no shade available, reflectors, scrims, and fill flash with high-speed sync become essential rather than optional gear. A reflector bounces light back into shadowed areas of the face; a scrim diffuses direct sun before it hits the subject; fill flash balances a bright sky against a subject’s face so the exposure doesn’t force a choice between the two.
Pro Tip: Position your subject with their back toward the sun and a reflector in front of them at chest height. This backlight-plus-reflector combo often looks more natural at midday than fighting direct front light with heavy flash.
- Set white balance manually under overcast skies (around 6500K) rather than trusting auto white balance, which can drift cool.
- Test a few frames in open shade before committing, since dappled light through leaves creates distracting spots on skin.
- Bring a 5-in-1 reflector kit for midday sessions. It’s small enough to carry and solves most harsh-light problems on the spot.
Matching Your Location to the Light
Buildings, tree cover, and water all change how much usable light reaches your subject and how it behaves once it arrives. A downtown alley with tall buildings on both sides can block golden hour entirely by midafternoon, while a waterfront location bounces low-angle light back up into the subject’s face for a natural fill.
Textured brick walls, foliage, and reflective water all gain the most from low-angle sun, since the light rakes across the surface and reveals detail that flat midday light erases. Before booking a location, check the sun’s azimuth for your shoot time using PhotoPills or SunCalc, and walk the site if possible to spot obstructions like power lines or parking structures that won’t show up in a map view.
A few common scenarios:
- Urban plaza background: shoot 30 to 45 minutes before sunset, when the sun angles between buildings instead of hiding behind them.
- Park with mature trees: morning golden hour works best, since afternoon shade from the canopy can block the light entirely by early evening.
- Waterfront or lakeside: either golden hour window works, but evening often wins because reflections on the water intensify as the sky colors deepen.
Your Session-Day Checklist and Starter Camera Settings
Confirm your exact sunrise or sunset time the morning of the shoot, since seasonal drift can shift it by a minute or two even week to week. Scout the location in advance if you haven’t shot there before, and pack a reflector or scrim regardless of forecast, since clouds can roll in or clear out with little warning.
- Arrive early and shoot test frames. Check exposure and white balance against your actual subject, not just the empty background.
- Set golden hour starting points around f/2.8 to f/5.6, shutter speed fast enough to freeze normal movement, and ISO as low as the light allows.
- Switch to blue hour settings with a wider aperture, higher ISO, and a tripod if the light drops below what handheld shooting can manage cleanly.
- Shoot RAW and bracket white balance between 4500K and 6000K during golden hour, since the color temperature shifts noticeably as the sun drops.
- Review images on-screen with your subject between setups, and make small in-camera adjustments rather than planning to fix everything in post.
Pro Tip: Meter for the subject’s face, not the sky. A camera’s automatic metering often underexposes skin tones when a bright sunset fills most of the frame.
What Studio-Tested Outdoor Sessions Actually Look Like
Professional headshot services often build outdoor sessions around golden hour and blue hour windows, adjusting for each client’s schedule and the realities of shooting around buildings, parks, and waterfronts in their area. That means checking sun position ahead of time, scouting for shade backups, and bringing reflectors as standard kit rather than an afterthought.
Readers who want more hands-on technique can review 8 photographer-tested outdoor headshot tweaks for adjustments that make a real difference in the field, or check the national headshots page for how coordinated outdoor sessions work across multiple locations for teams.
Sunrise or Sunset: Which One Should You Actually Book?
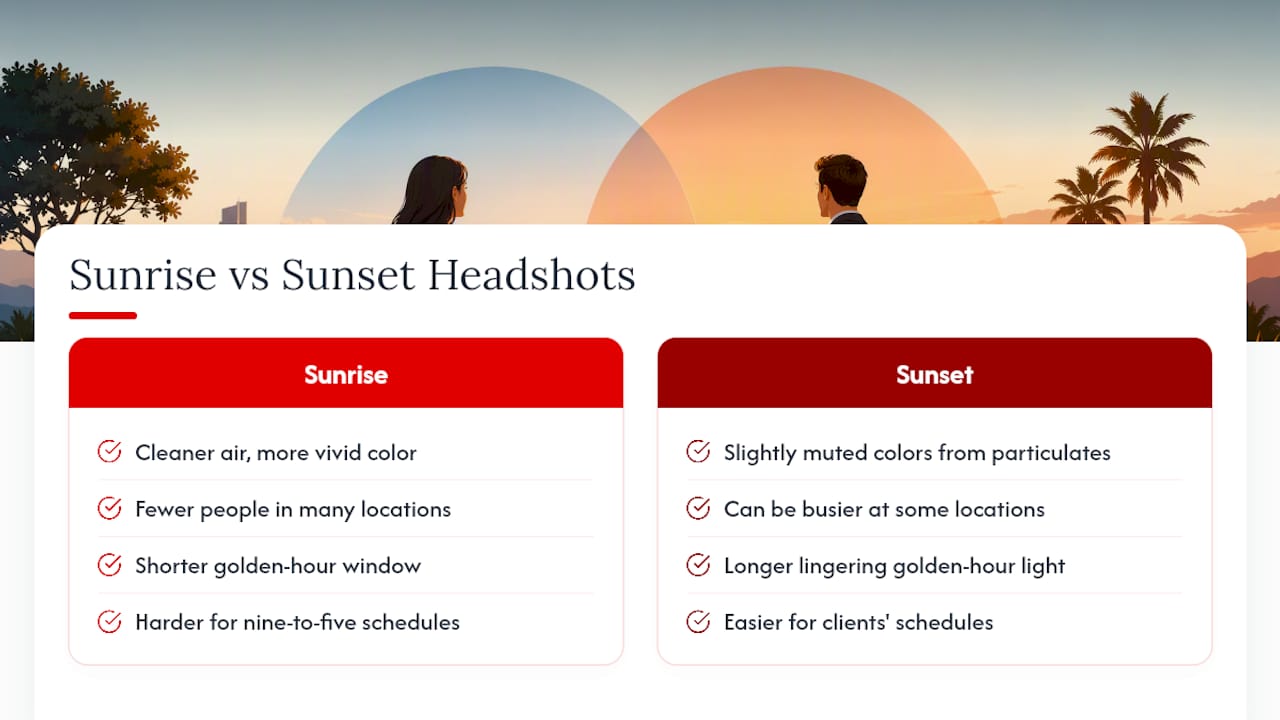
Sunrise offers cleaner air, since fewer cars and less industrial activity have stirred up haze by that hour, which often produces more vivid, saturated color in the sky. It also means fewer people in public locations, so you’re less likely to get photobombed in a park or plaza that fills up by midmorning.
Sunset trades some of that air clarity for intensity. Warmer temperatures during the day tend to build up more atmospheric particulate by evening, which can mute colors slightly compared to a sharp sunrise, but the tradeoff is usually worth it: sunset light lingers longer as the sun angles down, giving you more usable minutes before the color fully fades. Evening sessions also fit typical business schedules far better, since asking a client to show up camera-ready at 6 a.m. is a harder sell than booking them after their workday winds down.
Crowds cut both ways depending on your location. A popular waterfront trail might be empty at sunrise and packed with joggers and dog walkers by sunset. A downtown plaza often has the opposite pattern, quiet in the early morning and busier as people head home from work. Scout your specific location at both times before deciding, since general rules about crowds don’t always hold at a particular spot.
For most professional headshot clients, evening golden hour wins on convenience alone. Morning wins when air clarity and quiet backgrounds matter more than fitting into a nine-to-five calendar.
What the Conventional Advice Gets Wrong
Most guides treat golden hour as a rule to follow rather than a tool to use, and that framing sets photographers up to panic when a client can only meet at noon. The research is clear that golden hour produces the most reliably flattering light, but it’s not the only path to a usable headshot, and treating it as mandatory leads to canceled sessions that didn’t need to be canceled.
What gets underestimated is how much scouting matters more than timing precision. A photographer who knows exactly where the shade falls at 1 p.m. on a specific wall will out-produce one who insists on chasing sunset but shows up to an unfamiliar location with no backup plan. Planning apps like PhotoPills and SunCalc solve the timing math, but they don’t replace walking a site and understanding how buildings, trees, and water actually behave there.
If you take one thing from this guide, prioritize flexibility over dogma. Book golden hour when you can get it. Build a real overcast or open-shade plan when you can’t. The client who needs headshots for a Tuesday afternoon LinkedIn deadline doesn’t care about your ideal light. They care about a portrait that looks professional, and that’s achievable in far more conditions than most advice admits.
— Traci Schowmeyer
Booking an Outdoor Session With Metroplex Headshots
Some headshot services offer scheduling tools that incorporate real-time sun-window planning paired with same-day image review, helping clients confirm the quality of light during their shoot.

On-location sessions cover company headshots starting at $1,250, with add-ons like professional hair and makeup available between $95 and $160 depending on the service. Mobile studio setups can be arranged for various locations such as office parking lots, waterfront parks, or downtown plazas, with location scouting recommended to plan for sun position and shade backups. For teams spread across multiple offices, the national headshots program coordinates corporate and event headshot booths without forcing everyone into one city or one calendar slot. Businesses that also want marketing support for their own photography practice can check photography SEO services for client acquisition help.
Check available outdoor dates and get session pricing on the packages page to lock in a golden hour or blue hour slot before your calendar fills.
Sources
- What Is the Golden Hour in Photography? — Pro EDU
- Natural light photography — Cambridge in Colour
- Golden hour vs blue hour — PhotoSerge
- Best time of day to take outdoor portrait photos — PetaPixel
FAQ
What Is the 20-60-20 Rule in Photography?
The 20-60-20 rule refers to dividing golden hour into three phases: the first 20% for softer, cooler light right after sunrise or before full sunset, the middle 60% for the richest warm tones, and the final 20% as the light fades fast near sunset or brightens quickly after sunrise. It’s a rough guide for timing your strongest portrait shots within the window rather than a strict technical standard.
Is 5 P.M. a Good Time to Take Pictures Outside?
It depends entirely on the season and your location’s sunset time. In winter, 5 p.m. often falls right in golden hour, while in summer it can still be harsh midday-style light, so check your local sunset time with a tool like SunCalc before assuming 5 p.m. works.
Can Headshots Be Done Outdoors?
Yes, outdoor headshots work well and often look more natural than studio backdrops, especially when shot during golden hour or in open shade. Metroplex Headshots offers on-location sessions specifically built around this kind of natural light shoot.
What Is the Best Shutter Speed for Outdoor Portraits?
A shutter speed fast enough to freeze normal movement works for most stationary headshot poses. Blue hour sessions often require a tripod since the shutter speed needed for a lower-light exposure can drop below what’s comfortable handheld.
How Long Does Golden Hour Last for a Headshot Session?
Golden hour typically runs 30 to 60 minutes, depending on the season and how far you are from the equator. Sessions closer to summer solstice or higher latitudes get the longer end of that range, giving more flexibility for multiple poses and setups.

