

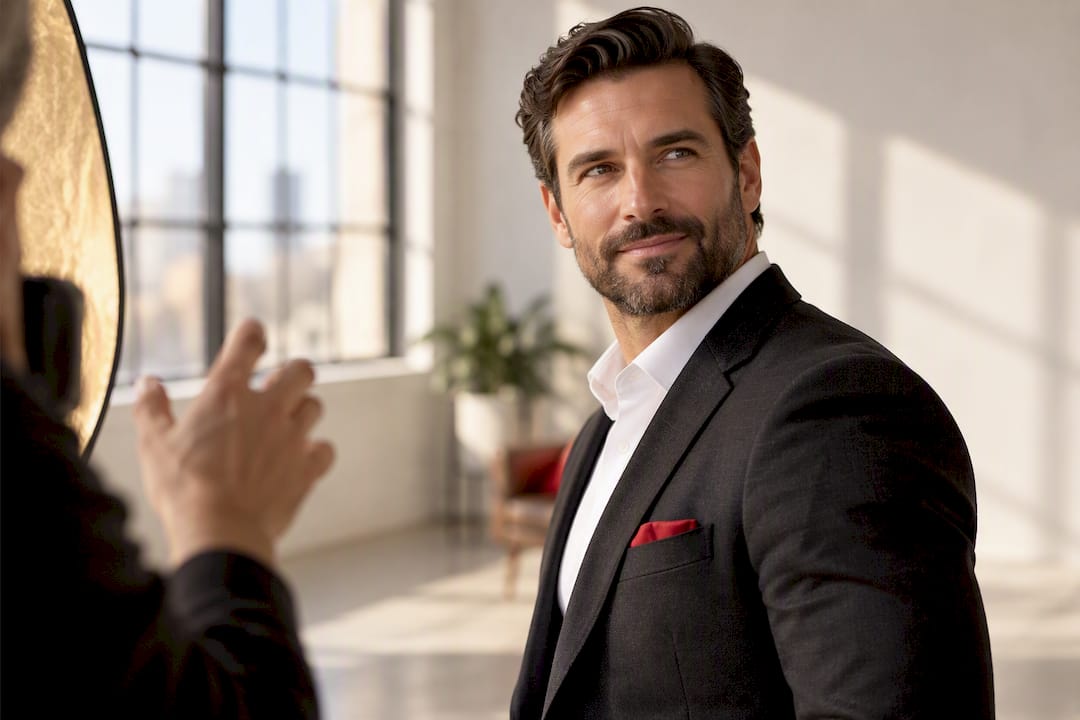
The best LinkedIn headshots share four traits: a head-and-shoulders crop with your face filling about 60% of the frame, a genuine smile with direct eye contact, a neutral or softly blurred background, and a high-resolution upload. Profiles with photos get dramatically more views than blank ones, so the payoff for getting this right is real. Below, you’ll find labeled example styles you can copy today, plus the exact specs behind each one.
TL;DR:
- Cropping your headshot so your face fills about 60% of the frame balances approachability and professionalism, with high resolution preventing pixelation.
- A genuine smile with engaged eyes and direct eye contact significantly boosts perceived trustworthiness, outperforming lighting or background tweaks.
- Natural light from a north-facing window or a simple softbox setup creates the most flattering, even lighting, while neutral or softly blurred backgrounds work across industries.
- Avoid technical errors like selfies, over-cropping, busy backgrounds, or excessive retouching, which undermine the photo’s authenticity and professionalism.
- Professional headshot sessions provide real-time feedback, expert lighting, and subtle retouching that is difficult to replicate with DIY methods or smartphones.
Table of Contents
- LinkedIn Headshot Examples by Professional Style
- How to Crop and Size Your Photo for LinkedIn Thumbnails
- Why Your Expression and Wardrobe Matter More Than You Think
- Lighting and Background Choices That Actually Photograph Well
- Common Mistakes That Quietly Sabotage a Good Photo
- What Professional Photographers Do Differently
- Getting Your Head and Mindset Right Before the Shoot
- Editing and Retouching: How Much Is Too Much
- Budget and DIY Options for a Professional-Looking Photo
- The Real Problem With Most LinkedIn Photo Advice
- Book a Session That Gets Your LinkedIn Photo Right the First Time
- Sources
- FAQ
LinkedIn Headshot Examples by Professional Style
Not every job calls for the same photo. An executive selling boardroom credibility needs a different look than a startup founder trying to seem reachable. Here are the styles that consistently work, organized by what they signal and who they fit.
- Approachable professional. Soft, even lighting, a light gray or blurred office background, and a relaxed three-quarter turn toward the camera with a warm, teeth-showing smile. Best for consultants, HR leaders, teachers, and anyone whose job depends on people feeling comfortable reaching out. Replicate it by tilting your chin down slightly and letting your shoulders angle away from the lens while your eyes stay locked on it.
- Executive or board bio. A darker, more saturated background (charcoal or deep navy), squared shoulders facing the camera, and a composed half smile rather than a full grin. Best for C-suite leaders, board candidates, and anyone whose bio will sit next to a company logo. Ask your photographer for a slightly lower camera angle. It reads as authority without looking staged. A guide on board bio preparation covers wardrobe choices for this exact look.
- Creative or agency. Unconventional but clean backgrounds (a textured wall, a pop of brand color), more relaxed posture, and an expression that suggests personality over polish. Best for designers, marketers, and agency owners. Replicate it with one strong catchlight source and asymmetrical framing.
- Founder or entrepreneur. Natural light, minimal retouching, and a confident, direct gaze with no forced smile. Best for startup founders pitching investors or recruiting early hires. Keep the background simple so the focus lands entirely on your face.
- Trusted advisor or consultant. Neutral backdrop, structured blazer, and a closed-mouth smile that reads calm rather than eager. Best for financial advisors, lawyers, and healthcare consultants who need to project reliability. A pose guide is a solid reference if posing feels unnatural to you.
- Tech casual or startup leader. Soft daylight, a simple crewneck or button-down with no tie, and a slight forward lean that suggests energy. Best for engineers, product managers, and tech executives at younger companies.
For a broader visual reference before your next session, a style ideas page breaks down more examples with captions.
How to Crop and Size Your Photo for LinkedIn Thumbnails
Your photo shows up as a small circle in search results, comment threads, and connection requests most of the time. That’s why the crop matters more than almost any other decision you make.
Cropping so your face fills roughly 60% of the frame hits the sweet spot between looking approachable and looking competent, according to LinkedIn’s own photography guidance. Crop too tight and you lose the shoulders that signal professionalism. Crop too wide and your face shrinks into an unreadable blur at thumbnail size.
Pro Tip: Upload at a high resolution, for example 1,200 x 1,200 pixels, even though LinkedIn displays the image at 400 x 400. The extra resolution keeps edges sharp when the platform compresses your file, and it prevents pixelation if someone views your profile on a high-resolution phone screen.
Stick to JPEG or PNG format and keep the file under LinkedIn’s upload limit. Most viewers see your photo first as a thumbnail on a phone screen, which makes small details like busy patterns or dark shadows disappear or distort.
Run this four-step check before you upload:
- Shrink the image on your screen to roughly the size of a dime.
- Check whether your eyes and smile are still clearly visible at that size.
- Look for shadows or background clutter that reads as noise once shrunk.
- Ask a colleague to glance at it for two seconds and describe your expression.
Why Your Expression and Wardrobe Matter More Than You Think
Faces get judged fast. Research out of Princeton found that people form trait impressions, including trustworthiness, within about 100 milliseconds of seeing a face, and those snap judgments barely shift with more viewing time. Your headshot doesn’t get a second chance to make a first impression. It gets 100 milliseconds.
What actually predicts whether someone trusts your photo? A study using machine-learning analysis of facial features found that resemblance to a happy expression was the strongest predictor of perceived trustworthiness, outperforming bone structure or facial proportions. Translation: a real smile does more work than any camera angle or lighting trick.
Practical rules that follow from this:
- Smile with your eyes engaged, not just your mouth. A closed-mouth smile works for law and finance; a teeth-visible smile works for sales, HR, and consulting.
- Keep direct eye contact with the lens, not slightly above or below it.
- Lift your chin a fraction and keep your neck long. Slouching reads as low energy even in a still photo.
- Choose solid colors over busy patterns. Navy, charcoal, and jewel tones photograph better than white or bright patterns, which can wash out or strobe on camera.
- Avoid logos, wrinkled fabric, or anything that pulls the eye away from your face.
Pro Tip: Steam or press your top the night before, and bring a backup shirt in a different color. Lighting reacts differently to fabric than your bathroom mirror shows, and having a second option saves the session if the first choice reads too dark or too bright on camera.
For a deeper wardrobe breakdown by industry, a dressing guide covers specific color and collar recommendations.
Lighting and Background Choices That Actually Photograph Well
Soft, diffused natural light from a north-facing window beats direct sun almost every time. Direct sunlight creates harsh shadows under the eyes and nose, while an overcast day or a window with sheer curtains gives you even, flattering light with almost no equipment.
A simple two-light studio setup, by contrast, gives a photographer more control. A softbox as the main light source, a subtle fill light to soften shadows on the opposite side, and a hair light to separate you from the background produce the polished, even look you see in professional portraits. That layered lighting approach is standard in how photographers structure a session, and it’s difficult to fully replicate with a phone and a window.
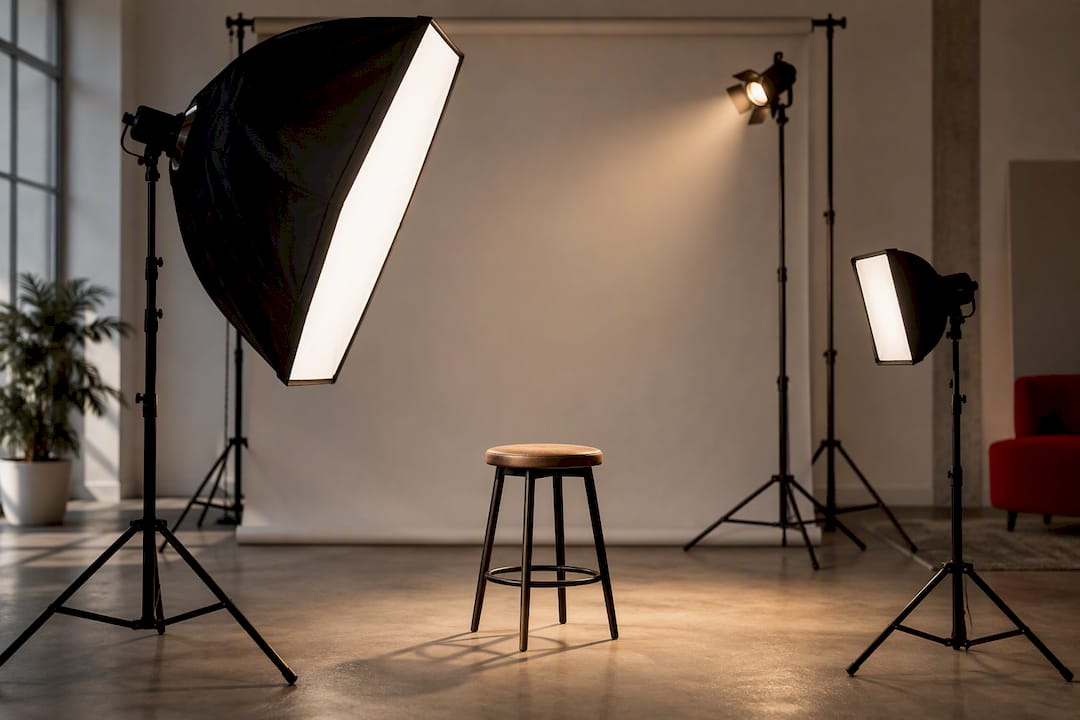
Background choice matters almost as much as lighting. A neutral seamless backdrop (gray, tan, or soft blue) works for nearly every industry. A softly blurred office setting adds context without distraction for corporate roles. Reserve environmental backgrounds, like a bookshelf or workspace, for creative fields where personality is part of the pitch.
If you’re shooting yourself:
- Face a window rather than standing with your back to it.
- Shoot in the first two hours after sunrise or before sunset for the softest natural light.
- Use a plain wall or hang a solid-color sheet a few feet behind you to avoid shadows falling on the backdrop.
- Prop your phone at eye level rather than shooting from above or below.
If you’re booking a session, ask specifically for a softbox key light, a subtle fill, and a hair light. Those three requests alone separate an amateur setup from a professional one.
Common Mistakes That Quietly Sabotage a Good Photo
Most bad LinkedIn photos aren’t bad because of the person in them. They’re bad because of a handful of fixable technical errors.
- Selfie distortion. Phone cameras held close to your face warp proportions, exaggerating your nose and chin. Fix it by using a tripod or asking someone else to shoot from at least four feet away.
- Over-cropping. Cutting off the top of your head or crowding your face out of the frame breaks the 60% guideline. Leave breathing room above your head and below your shoulders.
- Busy backgrounds. A cluttered bookshelf or a hallway with foot traffic pulls attention away from your face. Simplify or blur it.
- Heavy filters or over-retouching. Skin smoothed to a plastic finish reads as fake immediately, and it undermines the trust a genuine photo builds.
- Outdated wardrobe or photos. A headshot from five roles ago signals neglect. Update it whenever your role or appearance changes meaningfully.
- Low-resolution uploads. A blurry or pixelated photo looks unprofessional regardless of how good the original shot was.
Run a one-minute self-audit: check crop, background, resolution, and how recent the photo is. If two or more fail, it’s time for a retake. One more flag worth watching: AI-processed headshots have risen sharply in the past few years, and recruiters increasingly question images that look artificially smoothed or generated rather than photographed.
What Professional Photographers Do Differently
A photographer’s job isn’t just pointing a camera. It’s managing light, expression, and timing in ways that are hard to replicate solo.
Sessions run in-studio or on location, with options for offices and events, so teams don’t have to travel to get consistent results. Real-time image review during the shoot means you see shots as they’re taken and can adjust posture or expression before the session ends, rather than finding out later that your eyes were closed in every usable frame. Optional hair and makeup services may address small details, like shine or stray hairs, that read poorly on camera even when they’re invisible in person. Professional retouching can handle blemishes and background cleanup without tipping into the over-smoothed look that erodes trust.
Before a session, bring two or three wardrobe options, arrive with simple grooming done (trimmed facial hair, minimal shine), and expect the photographer to direct small adjustments to your chin, shoulders, and expression throughout. Delivery timelines vary by package, but Fast turnaround is often emphasized so your new photo doesn’t sit in an inbox for weeks. Details on packages and pricing can be found on the packages page.
Getting Your Head and Mindset Right Before the Shoot
The camera picks up tension faster than most people expect. A stiff jaw or a forced smile shows up as exactly that, stiff and forced, regardless of how good the lighting is.
Sleep matters more than most people account for. A tired face reads as puffy around the eyes and flat in expression, and no amount of retouching fully corrects it. Aim for a full night’s rest the day before, and avoid alcohol, which shows up as redness and puffiness the next morning.
Hydration affects skin texture on camera more than most people realize. Drink water steadily for the two days before your session rather than chugging a bottle right beforehand.
Physically, a short walk or light stretching before you arrive helps release tension in your shoulders and jaw, the two areas that show stress most obviously in a still photo. Rolling your shoulders back and taking a few slow breaths right before the camera clicks resets your posture without looking like you’re posing.
Mentally, think of one specific happy memory or person right before the shutter clicks rather than trying to manufacture a generic smile on command. Genuine expression micro-movements around the eyes are what separate a real smile from a performed one, and that authenticity comes through even in a still frame. Practicing a few smiles in the mirror beforehand also helps you find your best angle before you’re under studio lights.
Editing and Retouching: How Much Is Too Much
Light retouching should fix distractions, not rebuild your face. Removing a temporary blemish, softening under-eye shadows from a bad night’s sleep, or evening out skin tone under harsh light are all reasonable adjustments that most viewers won’t notice.
Where it goes wrong is when retouching starts changing your actual features: slimming your jaw, enlarging your eyes, or smoothing skin texture until it looks airbrushed. That’s the point where a photo stops looking like you, and viewers pick up on it even without knowing exactly why something feels off.
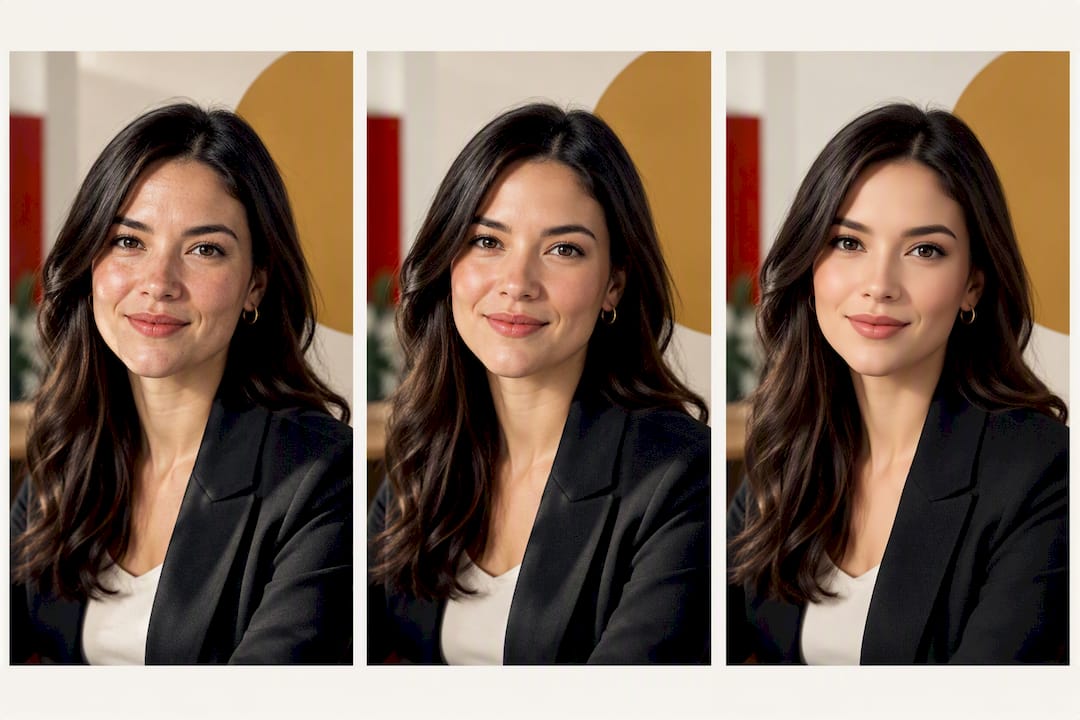
A simple test: if a coworker who hasn’t seen you in six months would be surprised by your photo when they see you in person, the retouching went too far. Your LinkedIn photo should look like your best version of an ordinary Tuesday, not a magazine cover.
If you’re editing your own photo, stick to basic adjustments: exposure, white balance, and minor blemish removal. Skip skin-smoothing filters entirely. They tend to flatten texture in a way that looks synthetic at full resolution, even if it looks fine on a small phone screen. If you’re working with a photographer, ask upfront how much retouching is included and whether you can request less. Most professional retouching workflows are designed to enhance clarity and correct lighting issues, not reshape your face, and a good photographer will tell you exactly where that line sits.
Budget and DIY Options for a Professional-Looking Photo
A booked session with a professional is the most reliable way to get a headshot that meets every guideline above at once, but it isn’t the only option if budget is tight right now.
At the DIY end, a smartphone with the main camera (not the wide-angle front-facing lens), a tripod or stack of books, and a window for natural light can produce a usable photo at zero cost. Ask a friend to help with framing and catch the moment your smile looks most natural, since a self-timer often catches you mid-adjustment.
The middle ground is a mid-range investment: some photographers offer shorter, simplified sessions at a lower price point than a full branding shoot, which can be worth it if you just need one strong image rather than a full library. Metroplex Headshots’ in-studio session runs $300 as a one-time fee, and adding hair and makeup runs $95 to $160, which covers the details that are hardest to fix with a phone camera and a window.
If DIY is your only option right now, prioritize lighting and crop above everything else. Those two variables have the biggest visible impact and cost nothing to get right. Save the professional session for when your role, industry, or career stage makes the photo worth the investment.
The Real Problem With Most LinkedIn Photo Advice
Most guidance on this topic treats the headshot like a technical checklist: get the crop right, get the lighting right, smile, done. That advice isn’t wrong, but it misses the point that a headshot is a decision about brand alignment, not just image quality.
The research actually points somewhere more specific than “smile more.” Trustworthiness in a face tracks closely with resemblance to a happy expression rather than facial structure or symmetry, which means the conventional advice to “just look natural” undersells how much a deliberate, genuine smile is doing. People aren’t reading your bone structure. They’re reading your expression, and they’re doing it in under a fifth of a second.
What gets overrated: exotic backgrounds, elaborate wardrobe styling, heavy retouching, and missed opportunities to use visual storytelling tips to boost your brand’s impact. What gets underrated: consistency across platforms, updating the photo as your role changes, and matching your expression to what your industry actually rewards (warmth for client-facing roles, composure for executive ones). If you take one thing from this article and act on it today, make it the crop and the smile. Everything else is refinement on top of that foundation.
— Traci Schowmeyer
Book a Session That Gets Your LinkedIn Photo Right the First Time
Professional sessions offer advantages like real-time image review during the shoot, so you see exactly how your crop, expression, and lighting look before the session ends instead of guessing at home and re-shooting later.

Individual sessions run $300 in-studio, with on-location options for teams and offices that need a mobile setup rather than a studio visit. Hair and makeup add-ons handle the small details that are hardest to fix on your own, and professional retouching keeps the final image polished without crossing into overdone. If you’re weighing a self-shot photo against a professional one, start by browsing the full package options or explore the range of session types available for LinkedIn, corporate, and team headshots, then book the option that fits your role and timeline.
Sources
- Which facial features are central in impression formation? (journal article DOI)
- Snap judgments decide faces’ character, Princeton University news
- 10 Tips for Taking a Professional LinkedIn Profile Photo — LinkedIn Talent Blog
FAQ
Can ChatGPT create a LinkedIn headshot?
ChatGPT and similar AI tools can generate face-like images, but they aren’t photographs of you, and using one raises authenticity concerns since recruiters increasingly flag AI-processed images that don’t match how a person actually looks in person or on a video call. A real photo, even a simple phone shot with good lighting, better represents you than a synthetic image.
How professional should my LinkedIn photo be?
It depends on your industry, but the safest baseline is a head-and-shoulders crop with your face filling about 60% of the frame, a genuine smile, and a neutral background. Executive and finance roles can lean more composed, while creative and startup roles can lean slightly more casual without losing polish.
What size should my LinkedIn profile photo be?
Upload at least 1,200 x 1,200 pixels even though LinkedIn displays the image at 400 x 400, since higher resolution keeps the thumbnail sharp after compression. Stick to JPEG or PNG format and stay within LinkedIn’s file size limit.
How much does a professional LinkedIn headshot cost?
Pricing varies by photographer and package. Metroplex Headshots’ in-studio session is $300 one-time, with hair and makeup add-ons at $95 to $160, and on-location company sessions priced separately for teams.
Should I smile with teeth in my LinkedIn photo?
A teeth-visible smile tends to read as more approachable and is well suited to sales, HR, and client-facing roles, while a closed-mouth smile works better for law, finance, and executive positions. Research on impression formation shows resemblance to a happy expression predicts trustworthiness more than facial structure, so genuine warmth matters more than the exact smile style you choose.

