


A professional headshot is defined as a portrait specifically crafted to communicate your credibility, personality, and brand in a single image. The choice between a DIY headshot vs professional photographer is not just about cost. It is about what your image communicates before you say a single word. Your headshot functions as a digital handshake, and the quality of that handshake shapes how clients, employers, and collaborators perceive you. Metroplex Headshots works with professionals every day who underestimated this gap until they saw the difference side by side.
What are the key differences between DIY and professional headshots?
The core difference between DIY and professional headshots comes down to controlled quality versus convenient effort. A professional photographer brings studio lighting, calibrated lenses, and years of posing experience to every session. A smartphone or entry-level camera, even a good one, cannot replicate that environment without significant setup knowledge.
Lighting is the most critical technical element in any headshot, whether you shoot it yourself or hire a pro. Poor light creates unflattering shadows, uneven skin tones, and a flat, amateur look that no filter can fix. A professional studio uses softboxes, reflectors, and controlled color temperature to produce images that look consistent across every frame.
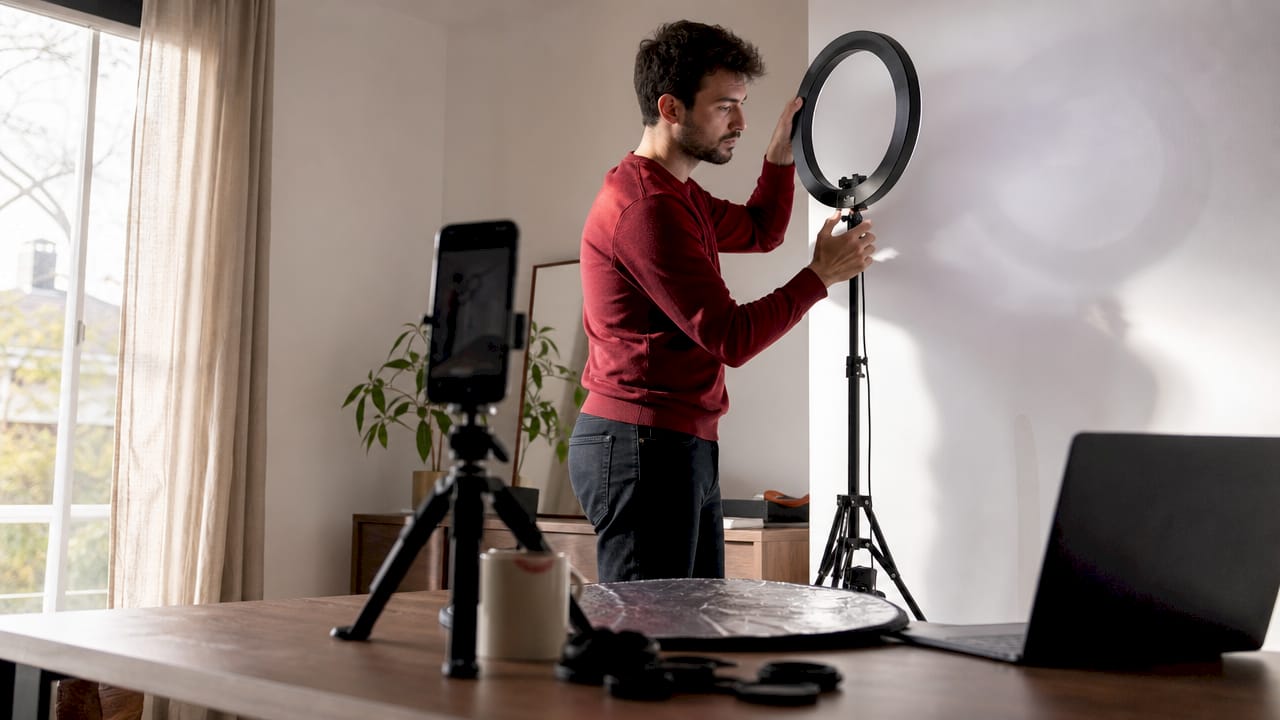
Editing and post-production separate the results even further. Professional photographers deliver retouched images with color accuracy, clean backgrounds, and consistent exposure. DIY editing with consumer apps often introduces visual drift, where colors shift between images and skin tones look inconsistent across platforms.
| Factor | DIY approach | Professional session |
|---|---|---|
| Equipment | Smartphone or basic camera | Studio lighting, professional lenses |
| Lighting control | Natural or basic artificial light | Controlled softboxes and reflectors |
| Posing guidance | Self-directed | Coached by experienced photographer |
| Editing quality | Consumer apps, inconsistent results | Retouched images with color accuracy |
| Session time | Variable, often longer | 30–60 minutes, efficient workflow |
| Brand consistency | Difficult to maintain | Built into the process |
Key advantages of a professional session include:
- Consistent image quality across multiple shots
- Expert posing and expression coaching
- Controlled backgrounds that reinforce brand alignment
- Retouched final images ready for immediate use
- Executive presence that reads clearly at thumbnail size
When does hiring a professional photographer make sense?
Hiring a professional photographer makes sense any time your image directly affects your income or reputation. Executives, real estate agents, attorneys, actors, and LinkedIn users who rely on their profile for lead generation all fall into this category. Strong and consistent branding depends on image quality and uniformity, and professional photographers provide the controlled environments that DIY simply cannot replicate reliably.
The business case is straightforward. A polished headshot on your LinkedIn profile, website, or press kit signals that you take your work seriously. Clients make trust decisions in seconds, and a blurry or poorly lit photo communicates carelessness before you have a chance to prove otherwise.
Here are the situations where a professional session is the right call:
- You are launching or rebranding a business and need a consistent image library.
- Your headshot appears on a company website, press release, or speaking bio.
- You work in a field where executive presence and credibility are non-negotiable.
- You need images that work at multiple sizes, from a business card to a billboard.
- You want photos that will remain current and professional for two or more years.
Pro Tip: Book your professional session before you update your LinkedIn profile, not after. Recruiters and clients visit your profile before they respond to outreach, so your photo needs to be ready before the opportunity arrives.
Professional portrait investment pays dividends that go beyond aesthetics. A single strong headshot can anchor your brand across every platform for years.
How to create an effective DIY headshot at home
A DIY headshot can work well for social media content, early-stage personal branding, and situations where budget is genuinely limited. DIY is cost-effective but requires deliberate setup to avoid the common pitfalls that make amateur photos look unprofessional.
Essential tools for a DIY shoot
You need four things: a camera or recent smartphone, a tripod, a light source, and a clean background. A tripod eliminates camera shake and frees you to focus on your expression. Natural window light is your best free resource. Position yourself facing the window, not beside it, to get even, flattering light across your face.
Step-by-step DIY headshot process
Follow these steps to get the best possible result at home:
- Set up near a large window with soft, indirect daylight. Avoid direct sunlight, which creates harsh shadows.
- Place your camera on a tripod at eye level or slightly above. Shooting from below adds unflattering distortion.
- Use a clean, neutral background. A white wall, a plain curtain, or a simple outdoor setting all work well.
- Set your camera or phone to portrait mode to create a shallow depth of field that separates you from the background.
- Use a remote shutter or your phone’s timer to avoid blur from pressing the button.
- Practice the squinch technique: slightly lower your lower eyelids to convey confidence rather than wide-eyed uncertainty. This single adjustment transforms the energy of a photo.
- Take at least 50 frames. Review them at full size and select the top three before editing.
Pro Tip: Shoot in RAW format if your camera supports it. RAW files give you far more control over color correction and exposure in editing than compressed JPEGs.
| DIY element | Budget option | Better option |
|---|---|---|
| Camera | Recent smartphone | Mirrorless or DSLR camera |
| Lighting | Large window, indirect daylight | Softbox or ring light with diffuser |
| Background | White wall or plain curtain | Seamless paper backdrop |
| Editing | Free mobile app | Lightroom or Capture One |
| Shutter control | Phone timer | Bluetooth remote shutter |
For editing, focus on three adjustments: exposure, white balance, and crop. Correct the exposure so your face is clearly lit without blown-out highlights. Adjust white balance so your skin tone looks natural, not orange or blue. Crop to a square or 4:5 ratio with your eyes in the upper third of the frame. That framing follows the rule of thirds, a composition standard that makes portraits feel balanced and intentional.
Common mistakes to avoid in DIY and professional headshots
Even expensive equipment cannot save a headshot ruined by avoidable mistakes. Poor lighting, busy backgrounds, and inconsistent editing are the three most common reasons DIY headshots fail to look professional. Knowing what to avoid is as valuable as knowing what to do.
Watch out for these errors in both DIY and professional contexts:
- Overhead or side lighting that creates raccoon shadows under the eyes or uneven skin tone across the face
- Cluttered or distracting backgrounds with furniture, artwork, or outdoor elements that pull attention away from your face
- Forced or stiff expressions that communicate discomfort rather than confidence. Relax your jaw, breathe out, and think of a specific person you enjoy talking to before the shutter fires.
- Excessive filters or heavy retouching that removes natural texture and makes you look like a different person. Authenticity matters. Clients want to recognize you when you walk in the room.
- Clothing that competes with your face. Busy patterns, logos, and neon colors all draw the eye away from your expression.
- Wrong angle or camera height. Shooting from below is universally unflattering. Eye level or slightly above is the standard for a reason.
A professional photographer coaches you past most of these mistakes in real time. In a DIY session, you have to catch them yourself, which is why reviewing your images at full size before you finish shooting is non-negotiable.
Cost considerations: budgeting for professional headshots vs DIY
Professional headshots represent a real financial investment, and the cost varies widely based on location, photographer experience, and what is included. Entry-level sessions from newer photographers may cost less, while experienced photographers who specialize in executive or corporate work charge more. Most sessions include a set number of retouched final images, and additional images are priced separately.
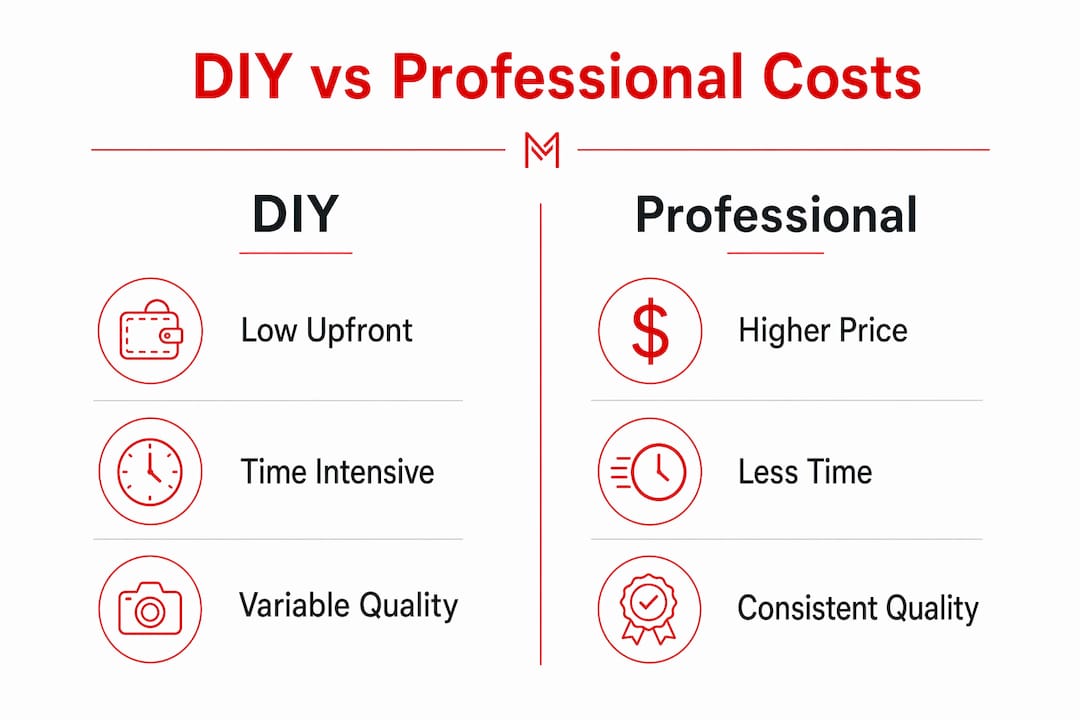
Professional sessions typically last 30–60 minutes and include posing guidance, lighting setup, and post-production editing. That time investment from the photographer is a significant part of what you are paying for. The efficiency of a professional workflow means you get better results faster than a DIY session that requires multiple attempts over several days.
DIY photography carries its own costs. A decent tripod, a ring light or softbox, and a photo editing subscription add up. More importantly, the time cost of learning, shooting, reviewing, and editing is real. For most professionals, that time has a dollar value that often exceeds the cost of a single professional session.
Pro Tip: Use a hybrid approach for the best return on your investment. Book a professional session for your core brand images, then use your phone for behind-the-scenes content, casual social posts, and quick updates. Hybrid strategies deliver the best balance of quality and content volume.
| Approach | Upfront cost | Time investment | Image quality | Brand impact |
|---|---|---|---|---|
| DIY | Low to moderate | High | Variable | Limited for formal use |
| Professional | Moderate to high | Low | Consistent and polished | Strong across all platforms |
| Hybrid | Moderate | Moderate | High for core images | Best overall balance |
For a deeper look at what professional sessions include and how to evaluate pricing, the headshot pricing guide from Metroplex Headshots breaks down what you should expect at each investment level.
Key Takeaways
A professional headshot delivers consistent quality, brand alignment, and executive presence that DIY photography cannot reliably match, making it the right investment for anyone whose image directly affects their business or career.
| Point | Details |
|---|---|
| Lighting is the deciding factor | Controlled studio lighting produces consistent, flattering results that DIY setups rarely replicate. |
| Professional sessions are efficient | A 30–60 minute professional session delivers polished, retouched images faster than most DIY attempts. |
| DIY works for specific use cases | Budget-limited or early-stage branding can benefit from DIY when setup and technique are applied carefully. |
| Hybrid approach maximizes value | Use professional images for core brand presence and DIY for casual social content to balance quality and cost. |
| Mistakes are costly without coaching | Poor lighting, busy backgrounds, and over-editing are the top reasons headshots fail, and a photographer prevents all three. |
What I’ve learned after years behind the camera
I’m Traci Schowmeyer, and after working with hundreds of professionals on their headshots, the question I hear most often is: “Can I just do this myself?” My honest answer is: sometimes, but rarely for the reasons people think.
The technical gap between a smartphone and a studio camera has narrowed significantly. What has not narrowed is the coaching gap. Professional headshots communicate credibility and personality simultaneously, and that combination is genuinely difficult to capture without someone guiding your expression in real time. Most people do not know what their face looks like when they think they are smiling confidently. A photographer does.
What I find most interesting is how often people invest in a DIY headshot to save money, then spend months using a photo they are not proud of. That hesitation to share your own image is a real cost that never shows up in a budget comparison. A headshot you love gets used. One you are unsure about gets avoided.
My advice for creatives and early-stage professionals: learn the DIY fundamentals, use them for content, and book a professional session when you are ready to make a serious impression. For executives, corporate professionals, and anyone whose headshot appears in a formal context, skip the DIY phase entirely. The business portrait photography standard exists for a reason, and meeting it signals that you belong in the room.
— Traci Schowmeyer
How Metroplex Headshots delivers headshots that work for your brand
Your headshot is an extension of your brand, and it deserves the same care you put into every other part of your professional presentation. Metroplex Headshots specializes in corporate and executive portraits that communicate who you are and what you bring to the table.
Whether you need a single polished portrait for LinkedIn or a full image library for your company website, Metroplex Headshots builds sessions around your goals, your environment, and the impression you want to make. Every session includes professional lighting, posing guidance, and retouched final images ready for immediate use. See the difference a professional headshot session makes, and browse headshot photo examples to find the style that fits your brand before you book.
FAQ
What is the main difference between a DIY and professional headshot?
A professional headshot is produced with controlled studio lighting, expert posing guidance, and professional retouching. A DIY headshot relies on available equipment and self-direction, which produces variable results.
How much do professional headshots typically cost?
Professional headshot pricing varies based on photographer experience, session length, and the number of retouched images included. Metroplex Headshots provides transparent pricing details on its headshot pricing page.
Can a smartphone produce a good headshot?
A recent smartphone can produce a usable headshot when paired with good natural lighting, a tripod, a clean background, and careful editing. Without those elements, even the best smartphone delivers poor results.
What is the squinch technique in headshot photography?
The squinch technique involves slightly lowering the lower eyelids to convey confidence and engagement. Professional photographers coach this expression during sessions because it produces a more authoritative and approachable look than a fully open-eyed expression.
When should I use a hybrid approach to headshots?
A hybrid approach works best when you need high-quality images for formal brand use and a steady stream of casual content for social media. Book a professional session for your core portraits and use your phone for behind-the-scenes and day-to-day updates.

