

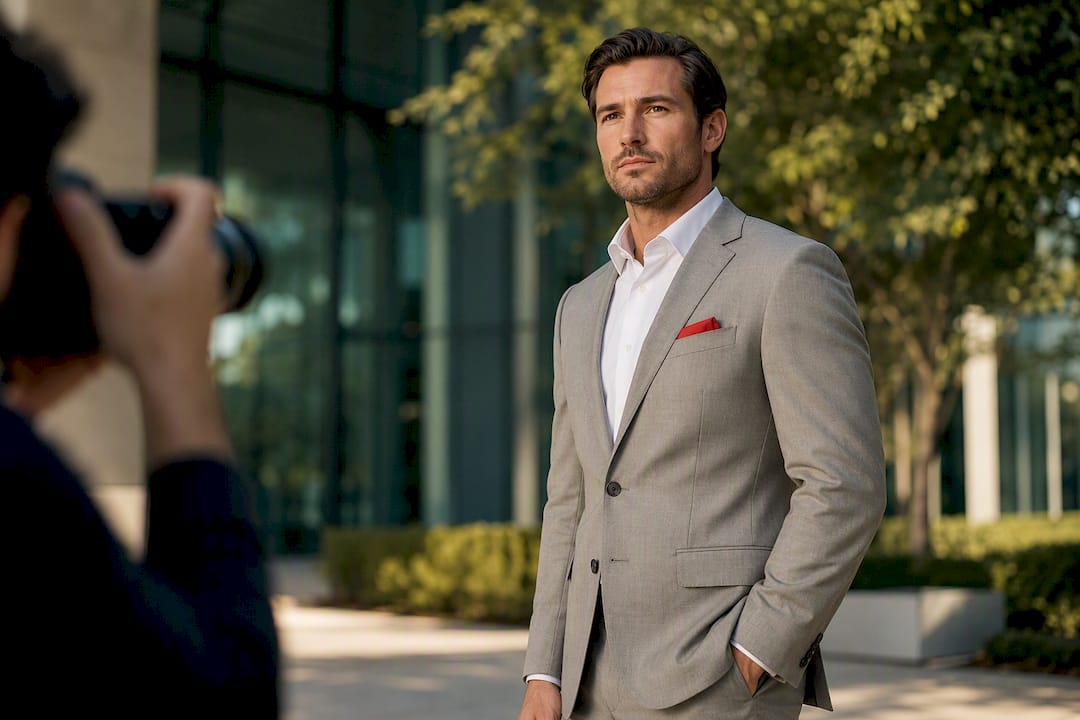
For reliably flattering outdoor headshots, schedule your session around golden hour or open shade and bring a reflector to fill harsh shadows. Add wardrobe that holds its shape in wind, keep the background simple and far enough behind you to blur, and coach your expression with small, natural cues rather than a stiff “say cheese” smile.
TL;DR:
- Shooting during golden hour or in open shade is essential for soft, flattering light that enhances skin tones and reduces harsh shadows.
- Arriving 15 to 30 minutes early allows sufficient time to test compositions and adjust settings before the optimal lighting window ends.
- Using structured, wind-resistant clothing and tying hair back prevents wardrobe malfunctions and maintains a professional appearance outdoors.
- Choosing backgrounds with strong vertical lines or textures reinforces your brand image while keeping them several feet away and blurring the background.
- Positioning subjects between the sun and a reflector fills shadows and prevents silhouettes, especially when aiming for rim lighting or working in bright sunlight.
Table of Contents
- Outdoor Headshots Tips You Can Use on Your Next Shoot
- Best Time of Day for Headshots: Golden Hour, Blue Hour, and Midday Fixes
- Choosing Outdoor Locations for Headshots That Reinforce Your Brand
- Wardrobe and Grooming Tips for Outdoor Conditions
- Posing for Outdoor Headshots: Quick Cues That Read as Confident
- Camera Settings and Simple Gear for Outdoor Portraits
- Scouting and Preparing for Session Day
- Troubleshooting Common Outdoor Headshot Problems
- Metroplex Headshots: How We Approach Outdoor Sessions
- Why a Professional Outdoor Headshot Is Worth the Investment
- Book an On-Location Session With Metroplex Headshots
- Sources
Outdoor Headshots Tips You Can Use on Your Next Shoot
A good outdoor session comes down to a handful of decisions made before the camera ever comes out. Get these right and you’re most of the way to a portrait that looks like it belongs on a magazine cover, not a driver’s license.
- Shoot during golden hour or find open shade. Soft, directional light flatters skin far more than a bare noon sun.
- Scout your location at the same time of day you’ll shoot. Light and foot traffic change by the hour.
- Pick a background that stays out of the way. Simple textures beat busy signage or cluttered storefronts.
- Bring a reflector. A collapsible silver or white disc fills shadows under the eyes and chin in seconds.
- Choose structured clothing over flowy fabric. Wind is unforgiving on thin materials.
- Fix hair and shine before you start. A lint roller and mattifying wipes solve most last-minute problems.
- Warm up your expression with a breath and a real thought. Forced smiles read as forced on camera.
- Arrive 15 to 30 minutes early. Rushed setups produce rushed-looking photos.
Pro Tip: If you’re shooting on a phone, lock your exposure and focus with a long press on the subject’s face before you shoot. It stops the camera from re-metering every time a cloud passes overhead.
One quick safety note: always check that your chosen public spot doesn’t require a permit, and never back into traffic or foot paths while framing a shot.
Best Time of Day for Headshots: Golden Hour, Blue Hour, and Midday Fixes
Golden hour, roughly the hour after sunrise and the hour before sunset, produces soft, warm light that flatters skin tones and softens shadows far better than midday sun. Blue hour, the short window just before sunrise or after sunset, gives portraits a cooler, moodier tone that works well for creative headshots but needs a tripod because the light is dim.
Arrive 15 to 30 minutes before your chosen window. Golden-hour light shifts by the minute, and you’ll want time to test compositions before it’s gone.
- Base ISO around 100 to 200, aperture between f/1.8 and f/4 for background separation, and shutter speed at or above 1/focal length to avoid blur.
- When shooting toward the sun, add 0.5 to 1.0 stops of exposure compensation or use a reflector so the face doesn’t go dark.
- Overcast skies act as a natural diffuser, giving even light that’s forgiving for portraits any time of day.
- At midday, move to open shade, angle a reflector toward the face, or use a diffuser between the subject and the sun.
For rim light, position your subject between yourself and the sun with the sun partially blocked by their head, then expose for the face and fill with a reflector to avoid a silhouette.
Choosing Outdoor Locations for Headshots That Reinforce Your Brand
Your background should say something about your profession, not just fill space behind you. Strong vertical lines like columns or glass facades read as executive and established. Textured brick or exposed loft walls suit creative professionals. Neutral greenery or stone works for almost any industry and rarely dates.
Standing several feet in front of your backdrop and using a wider aperture (f/2.8 or wider) blurs the background enough to keep attention on your face, even in a busy setting.
Before you commit to a spot, walk it at your actual shoot time and check for:
- Poles, signs, or branches lining up directly behind someone’s head.
- Parked cars, trash cans, or bright reflective surfaces in the frame.
- Repeating background elements at head height that create visual clutter.
- Foot traffic patterns or vehicle access that could interrupt the shoot.
Public parks and plazas sometimes require a permit for commercial photography, so a quick call to the city or property manager saves a wasted trip. For more on matching a backdrop to your industry, this background selection guide breaks it down by profession.
Wardrobe and Grooming Tips for Outdoor Conditions
Fabric choice matters more outdoors than in a studio. Structured materials like dense cotton, wool blends, and gabardine hold their shape in a breeze, while chiffon and thin linen wrinkle, cling, or flap the moment the wind picks up.
- Pick colors that contrast with your background rather than blend into it.
- Skip busy patterns and large logos, which distract from your face in a headshot.
- Pack a lint roller, mattifying wipes, a small brush, and safety pins for wardrobe emergencies.
- Use hair clips or a light hold spray to keep flyaways under control in wind.
- Add a simple prop, like glasses or a folder, if it gives your hands something natural to do.
Pro Tip: If wind is a factor, turn your body slightly away from the breeze and let the photographer shoot from the side that keeps hair settled. It’s a two-second fix that saves a dozen retakes. For a deeper wardrobe breakdown, see this executive headshot preparation checklist.
Posing for Outdoor Headshots: Quick Cues That Read as Confident
Nobody looks natural holding a pose for ten seconds, so give your subject something to do between shots rather than a single frozen stance.
- Shoulders back and slightly angled, not squared straight to the camera.
- Chin dropped slightly forward and down to avoid a double-chin or an overly tilted-back look.
- A short exhale right before the shutter clicks to release tension in the face.
- Hands relaxed at the sides or lightly in a pocket, never clenched or crossed defensively.
- A genuine thought, like recalling a good memory, to trigger a real smile instead of a held one.
For subjects who tense up, counting down out loud or asking a quick question mid-shoot almost always produces a more authentic expression than “smile on three.”
Camera Settings and Simple Gear for Outdoor Portraits
You don’t need a bag full of equipment to get a professional result outdoors, just the right few tools used correctly.
- An 85mm or 50mm equivalent lens gives natural facial proportions and pleasing background blur.
- Base ISO 100 to 200, aperture f/1.8 to f/4, and shutter speed at or above 1/focal length handheld.
- A collapsible reflector or diffuser handles most lighting problems; a small LED panel or fill flash helps once the sun drops low.
- On smartphones with Pro or RAW modes, lock autoexposure and autofocus on the face and avoid digital zoom, which softens detail fast.
Scouting and Preparing for Session Day
Scouting your location at the exact time of day you plan to shoot prevents surprises like unexpected shade, parked cars, or a crowd that wasn’t there yesterday.
- Visit the site at your planned shoot time and note where the sun sits and what shadows it casts.
- Pack a reflector, diffuser, lint roller, touch-up kit, water, and a spare pair of shoes.
- Arrive 15 to 30 minutes early to set up and test a few exposures before the real shoot starts.
- Confirm a backup indoor or covered location in case weather turns.
- Check whether the spot needs a permit, especially in parks, plazas, or near government buildings.
The ultimate professional headshot session guide walks through a full pre-shoot checklist if you want a longer reference.
Troubleshooting Common Outdoor Headshot Problems
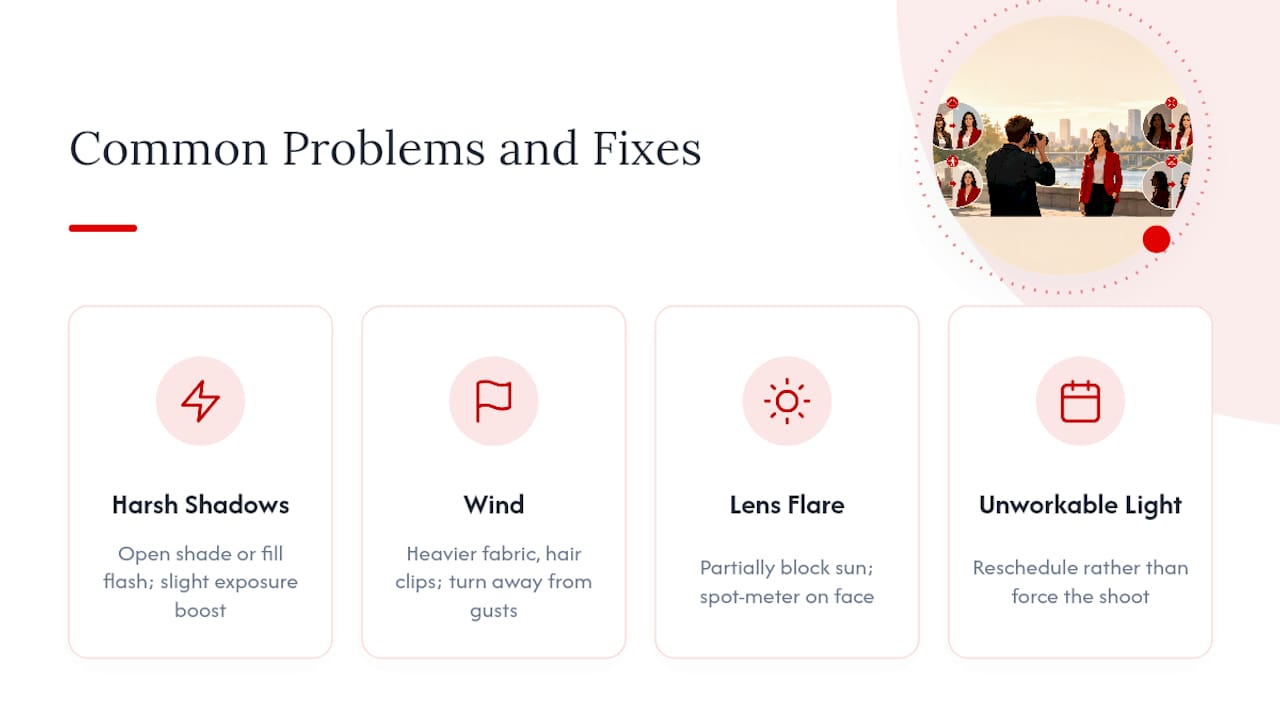
Harsh shadows and squinting mean it’s time to move into open shade or add fill flash, with a slight exposure boost if the face still reads dark. Wind calls for heavier fabric, hair clips, and turning the body away from the gusts. Lens flare or a blown-out sky usually means partially blocking the sun with your body or a prop, then spot-metering on the face. If the light simply isn’t workable and the subject is uncomfortable, reschedule rather than force it. A tired, squinting subject rarely produces a portrait worth using.
Metroplex Headshots: How We Approach Outdoor Sessions
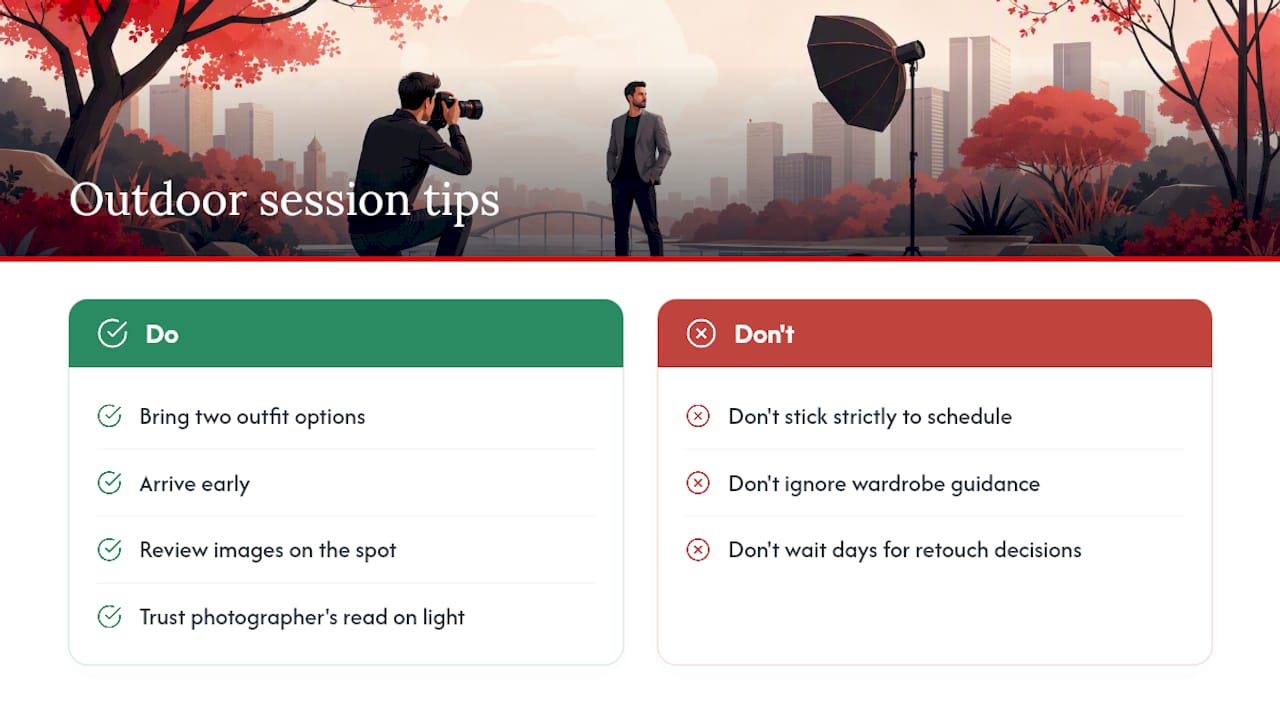
Outdoor and on-location sessions often include real-time image review, allowing clients to see shots on the spot and adjust pose or wardrobe before moving on. Some sessions may offer quick retouch previews and wardrobe guidance during the session itself, rather than days later. Clients often achieve better results by bringing two outfit options, arriving early, and trusting the photographer’s read on light and background rather than adhering strictly to the schedule.
Why a Professional Outdoor Headshot Is Worth the Investment
Getting the light, background, and expression right isn’t vanity. It’s the first impression a client, employer, or colleague forms before you ever speak. A portrait shot in flat midday sun with a cluttered background undercuts credibility no matter how sharp the résumé is behind it. Work through the checklist above before your next session, and treat the outdoor setting as an asset, not an obstacle.
— Traci Schowmeyer
Book an On-Location Session With Metroplex Headshots
Professional photographers can provide outdoor lighting and background advantages without clients needing to do the scouting, gear-hauling, or trial-and-error alone. Sessions may include mobile studio setups, real-time image review to see and adjust shots as they go, and fast turnaround on retouched files.

Whether you need a single executive portrait or a full team shot on location, the professional headshots versus portraits page breaks down what’s included and how sessions are structured. Book a consultation to lock in a time and location that works with the light, not against it.
Sources
For deeper technical grounding on the tips above, these sources cover the specifics in more detail:
- Golden Hour Photography: Complete Guide & Tips | LightScout
- Best Time To Take Photos Outside For A Natural Light Magic | Photoworkout
- Scouting locations for photographs | NYIP

