


The most reliable types of lighting for business portraits fall into four categories: single-light setups (Rembrandt, loop, and butterfly variants), two-light clamshell or key-plus-fill configurations, three-point triangle setups for executive portraits, and four-light specialty stacks for background separation and creative looks. Each serves a distinct purpose, and knowing which to reach for first saves setup time, reduces retouching, and gives your subject a result that actually reflects their professional brand.
Here is where to start based on your goal:
- LinkedIn headshot: Clamshell (key overhead + reflector fill) for clean, approachable light with minimal shadows
- Executive or board portrait: Three-point key-fill-kick setup for dimension, separation, and polished presence
- Creative or personal branding portrait: Rembrandt or split lighting for character and depth
- In-office team photos: One-light bounce off a matte wall or speedlight with a 24–36 in softbox for fast, consistent results
Metroplex Headshots uses all four categories depending on the client’s goal, industry, and the environment where the session takes place.
Table of Contents
- What are the main types of lighting for business portraits?
- How do two-light setups change the result for business portraits?
- Why does three-point lighting produce the best executive portraits?
- When does a fourth light actually improve a business portrait?
- Which modifiers and gear give you the most control over business portraits?
- What are the exact placement angles and camera settings to start with?
- How do you adapt lighting setups for on-location office sessions?
- Which lighting setup should you choose for your specific portrait goal?
- How Metroplex Headshots lights business portraits: studio workflow and client briefing
- How does your lighting setup affect post-processing?
- Key Takeaways
- The lighting choice most photographers get wrong
- Ready to see what the right lighting does for your portrait?
- Useful sources and further reading
What are the main types of lighting for business portraits?
A single light, placed correctly, can carry an entire business portrait session. The key is understanding how the angle and height of that one source change the mood and face modeling on your subject.
The one-light wonder
Position a large softbox or umbrella at roughly 45° off-axis and slightly above eye level. The light wraps around the face, creates a natural shadow on the far cheek, and produces a clean, professional look without any fill. A single speedlight bounced off a nearby matte wall or window blind can act as a giant improvised softbox, producing soft, wraparound key light without any extra gear. This technique works especially well in cramped offices where stands and modifiers are hard to position.
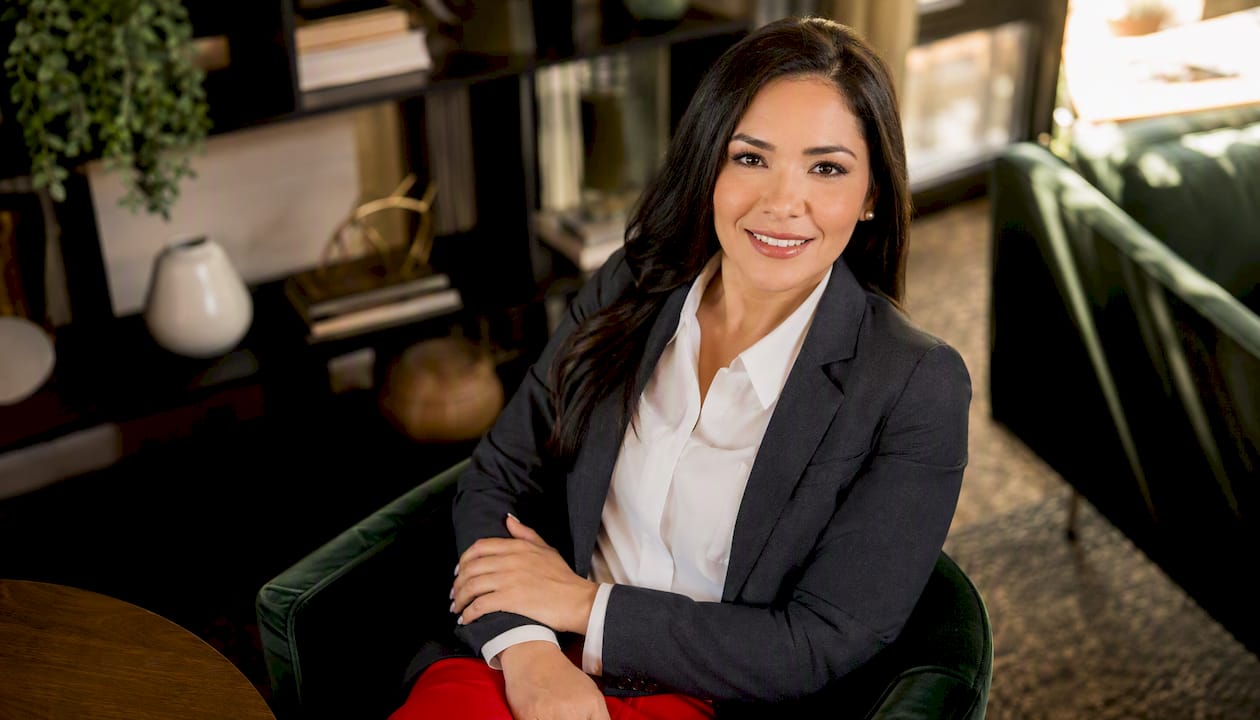
One caution: if the wall has a strong color, that color will contaminate your subject’s skin tones. Always choose a pale, matte surface or substitute a whiteboard or white sheet when the room’s walls are saturated.
Rembrandt, loop, and butterfly
These three variants all come from adjusting the height and horizontal angle of that single source:
Rembrandt lighting places the key at roughly 45° off-axis and high enough that a small triangle of light appears on the shadow-side cheek. It reads as authoritative and dimensional, which makes it a natural fit for attorneys, executives, and anyone whose brand calls for gravitas. Wider faces tend to look more sculpted under Rembrandt light.
Loop lighting drops the key slightly lower and moves it closer to the camera axis, producing a small shadow that loops down from the nose toward the corner of the mouth. It is the most universally flattering single-light pattern for business portraits because it works across a wide range of face shapes without looking dramatic.
Butterfly lighting positions the key directly in front of the subject and high, angling down 10°–20°. The shadow falls symmetrically under the nose in a butterfly shape. It is clean, glamorous, and works best for subjects with strong cheekbones. For rounder or flatter faces, it can flatten rather than sculpt.
Common single-light mistakes: raccoon eyes (key too high, no fill), harsh chin shadows (key too low and too close), and flat light (key too close to the camera axis). Fix raccoon eyes by lowering the key or adding a reflector beneath the subject’s chin. Fix chin shadows by raising the key slightly and moving it back.
How do two-light setups change the result for business portraits?
Two lights give you control over shadow depth, which is the single biggest variable in how approachable or authoritative a portrait reads.
Clamshell lighting
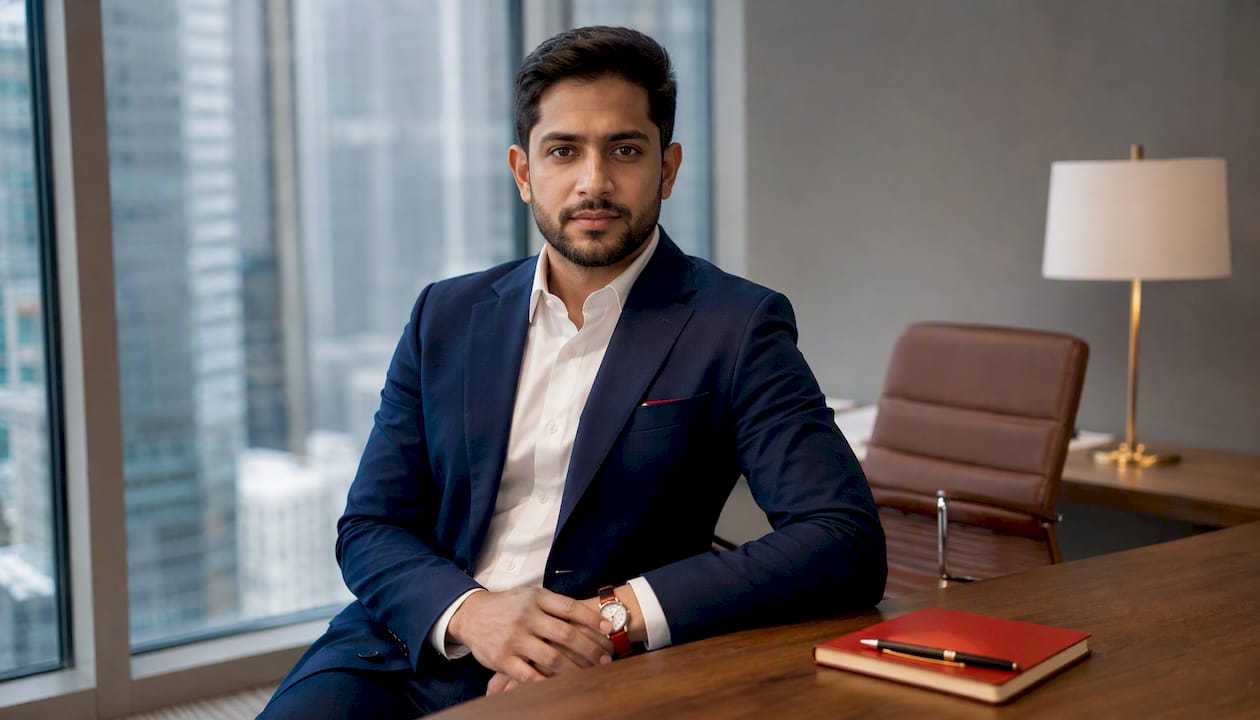
Clamshell is the workhorse of friendly, clean business portraits. The key light sits above the camera at roughly 45°, and a fill source (a second light or a reflector) sits below, angled up toward the subject’s face. Together they create a soft, even wrap that minimizes texture, reduces under-eye shadows, and produces a catchlight in both the upper and lower iris.
For most LinkedIn and corporate team headshots, start with a 2:1 power ratio (key at twice the output of the fill). That ratio preserves enough shadow to give the face dimension without creating the contrast that reads as dramatic or severe. Collapsible reflectors work well as the fill source on location; a second strobe with a small softbox gives you more control in studio.
Modifier choices for clamshell:
- Key: 36–47 in octabox for natural catchlight shape and even wrap
- Fill: 24–36 in softbox or a 42 in collapsible silver/white reflector
- Grid on the key to control spill onto the background when shooting in tight spaces
Key-plus-fill variants
When you want more modeling than clamshell provides, move the fill light to the side rather than below. A 3:1 ratio (key three times the fill) creates visible shadow on the far side of the face, which adds dimension without crossing into the dramatic territory of Rembrandt. For darker skin tones, a slightly wider ratio (3:1 or 4:1) often reads better because the shadow transitions are more gradual and less likely to block up in post-processing.
Before/after retouching note: clamshell setups at 2:1 typically require the least retouching because shadows are minimal and skin texture is softened by the wrap. Moving to a 3:1 or 4:1 key-fill ratio increases shadow depth and usually means more dodge-and-burn work in post, especially around the jaw and neck.
Why does three-point lighting produce the best executive portraits?
Three-point lighting remains the bedrock for controlled, reproducible executive portraits because it gives you full command over highlights, shadows, and subject separation from the background. The three lights are the key, the fill, and the kick (also called the hair or rim light).
| Light | Position | Starting Power | Purpose |
|---|---|---|---|
| Key | 45° off-axis, slightly above eye level | 1/4 power (strobe) | Primary illumination, face modeling |
| Fill | Opposite side, near camera axis | 1/8 power (strobe) | Reduce shadow depth, open up far side |
| Kick/Hair | Behind subject, aimed at hair/shoulder | 1/16 power with grid | Separate subject from background |
A starting ratio of key : fill : kick = 4:2:1 works well for most executive portraits on a mid-gray or white background. For a high-key corporate look, bring the fill up to 1/4 power (matching the key) and add a background light at 1/8. For a low-key, more dramatic executive portrait, drop the fill to 1/16 and let the shadows deepen.
Catchlights and hair/rim lights are small investments in setup that substantially improve perceived image quality for executive portraits. A subject without a catchlight looks flat; a subject without a rim light disappears into a dark background.
Three-light setup checklist for large team sessions:
- Mark the key light position on the floor with gaffer tape
- Record exact power settings on your phone before the first subject sits down
- Shoot a test frame, check the histogram, then lock settings
- Keep a reflector card at the subject’s lap level for quick fill adjustments between subjects
- Note the camera-to-subject distance so focal length and depth of field stay consistent
When does a fourth light actually improve a business portrait?
The fourth light almost always goes on the background. A key-fill-kick setup already handles the subject; the background light handles separation and mood.
A plain gray background lit evenly reads as neutral and corporate. Aim the background light from one side to create a gradient, and the background gains depth without looking theatrical. For branded portraits, a color gel on the background light can introduce a subtle brand-color wash. Keep the gel light at low power (1/16 or less) so the color reads as a tint rather than a statement.
Rim or kicker stacks are a second variation. Two rim lights placed symmetrically behind the subject at 45° create a halo effect that works well for dark suits against dark backgrounds. This is a common choice for financial services and legal professionals who want presence without softness.
Safety and comfort notes for subjects: background lights on boom arms or high stands should be secured with sandbags. Subjects seated near rim lights should be briefed that the lights will be bright in their peripheral vision. A short verbal heads-up before each test fire reduces flinching and keeps expressions natural.
Controlling spill and color temperature: all lights in a four-light setup should share the same color temperature (typically 5500K for daylight-balanced strobes). Mixing a tungsten practical light with daylight strobes creates a color-cast that is difficult to correct uniformly in post. Use gaffer tape or barn doors to control spill from the background light onto the subject’s shoulders.
Which modifiers and gear give you the most control over business portraits?
The modifier you choose shapes the quality of light more than the light source itself. A medium octabox in the 36–47 in range is the most versatile modifier for business portraits because it produces a natural, rounded catchlight and flattering wrap while remaining directional enough to control.
Modifier guide by use case:
- 36–47 in octabox: — studio key light, executive portraits, any situation where catchlight shape matters
Speedlight vs. strobe: you can build high-quality headshots with a single speedlite, a trigger, and a softbox when you pay attention to modifier size and distance. Speedlights are portable and battery-powered, which makes them ideal for office visits. Their limitation is recycle time during back-to-back team sessions; a monolight or pack-and-head strobe recycles faster and handles higher volumes without overheating.
Pro Tip: Modifier size relative to subject distance determines perceived softness. A 47 in octabox at 3 ft is dramatically softer than the same modifier at 8 ft. Move the light closer rather than buying a bigger modifier when you need more wrap.
Essential accessories: C-stands or heavy-duty light stands, a boom arm for overhead key placement, grids for kick and background lights, a 42 in collapsible reflector, gaffer tape, a light meter (optional but useful for locking ratios), and a padded rolling case for office bookings.
What are the exact placement angles and camera settings to start with?
Concrete starting values prevent wasted time on set and reduce the number of test frames before you lock a look.
- Key light position: 30°–45° off-axis horizontally, at or slightly above the subject’s eye level for loop lighting; raise to 6–8 ft and angle down 10°–20° for butterfly.
- Fill light position: opposite side of the key, near the camera axis, at roughly the subject’s eye level or slightly below.
- Kick/hair light: behind the subject at 45°, aimed at the top of the head and far shoulder; fit a grid to prevent lens flare.
- Camera starting settings: ISO 100–200, 85mm–105mm lens, f/4 for a clean background separation on a standard studio background, shutter at 1/125 for strobes (stay at or below sync speed).
- Adjust aperture to f/2.8 if you want a shallower depth of field for a more personal feel, or f/5.6 for group shots where multiple faces need to stay sharp.
- Troubleshoot raccoon eyes: lower the key light or add a reflector at the subject’s lap.
- Troubleshoot shiny skin: reduce key power slightly, add a diffusion panel, or flag the light to reduce direct specular reflection; address in wardrobe prep by recommending matte powder.
- Troubleshoot harsh nose shadow: move the key closer to the camera axis or raise it slightly.
- Troubleshoot inconsistent catchlights: standardize key and fill positions with gaffer tape marks and lock exact power settings before the first subject sits down.
- Mark everything: tape the subject’s chair position, the camera tripod feet, and each light stand foot so every subject in a team session gets identical light.
How do you adapt lighting setups for on-location office sessions?
On-location work rewards preparation. The goal is to replicate studio-grade results in a space you have never seen before, often in under 20 minutes.
Portable kit for office headshot days:
- 1–2 speedlights with radio triggers (PocketWizard or equivalent)
- 24–36 in collapsible softbox that mounts directly to the speedlight
- 42 in collapsible silver/white reflector for fill
- One C-stand or heavy-duty light stand with sandbag
- Gaffer tape, spare batteries (at least two sets per speedlight)
- Collapsible 5 ft x 7 ft background with a lightweight stand system
When a full softbox is impractical, aim the speedlight at the nearest matte white wall or a whiteboard. The wall becomes the light source, and the effective size of that source is the entire illuminated wall surface, which produces very soft, flattering light. Avoid colored walls; the color shift is visible on skin and difficult to correct uniformly across a team session.
For back-to-back corporate sessions, a monolight with a built-in battery pack (such as the Godox AD600 series) recycles faster than a speedlight and handles 30–50 subjects without power degradation. The trade-off is weight and pack size.
On-location setup flow:
- Scout the space 10–15 minutes before the first subject arrives
- Identify the best wall or corner for background placement
- Set anchor positions for the key light and camera, mark them with gaffer tape
- Shoot one test subject, review on a laptop or tethered display, adjust
- Lock power settings and do not change them unless the ambient light shifts significantly
Which lighting setup should you choose for your specific portrait goal?
The right setup depends on four variables: the desired tone, the subject’s face shape, clothing color and texture, and how much retouching you are willing to do afterward.
Decision checklist:
- Tone: approachable and friendly → clamshell at 2:1; authoritative and dimensional → three-point at 4:2:1; creative and character-driven → Rembrandt or split
- Face shape: round faces benefit from more contrast (Rembrandt, loop); angular faces can handle clamshell without looking flat
- Clothing: dark suits on dark backgrounds need a rim or kick light for separation; light clothing on white backgrounds need less separation light
- Retouch tolerance: minimal retouching budget → clamshell; willing to retouch → three-point or Rembrandt
Setup-to-goal mapping:
For a LinkedIn headshot, clamshell at 2:1 is the standard. It reads as warm and approachable, which is exactly the tone that performs well on professional networking platforms.
For executive and board portraits, the three-point key-fill-kick setup delivers the separation and dimension that signals authority. Pair it with a professional business portrait strategy to match the lighting to the subject’s industry and brand.
For creative professionals and personal branding portraits, Rembrandt or split lighting adds character. The shadow depth communicates confidence and individuality without sacrificing professionalism.
For in-office team photos, a single speedlight with a 24–36 in softbox or a wall bounce keeps setup fast and results consistent across 20–50 subjects.
Skin tone and clothing notes: darker skin tones often look best with a slightly wider power ratio (3:1 or 4:1) because the gradual shadow transition reads more naturally. Lighter skin tones can handle a tighter 2:1 ratio without losing dimension. Highly reflective fabrics (satin, polyester blends) pick up specular highlights from hard modifiers; switch to a larger softbox or add diffusion to soften those reflections.
How Metroplex Headshots lights business portraits: studio workflow and client briefing
A repeatable workflow is what separates a consistent studio from a one-off shoot. Here is the step-by-step process used at Metroplex Headshots for executive and corporate sessions.
- Pre-shoot consultation: confirm the intended use (LinkedIn, print, web, press kit), background preference, and tone (approachable vs. authoritative). Send the client a wardrobe guide covering color, pattern, and fabric recommendations.
- On-arrival scan: assess ambient light, ceiling height, and available wall surfaces for bounce options.
- Initial lighting lock: set the key (36–47 in octabox, 1/4 power), fill (small softbox or reflector, 1/8 power), and hair light (gridded strobe, 1/16 power). Record all settings.
- Sample settings for a standard executive setup: ISO 100, 85mm lens, f/4, shutter 1/125. Key at 1/4 power, fill at 1/8, hair light at 1/16 with a 40° grid.
- Test group: shoot two or three subjects, review on a tethered display, confirm catchlights and shadow depth match the brief.
- Mark positions: gaffer tape on the floor for the chair, camera tripod, and all light stands.
- Lock and shoot: keep power ratios consistent for the entire session. Adjust only if a subject’s clothing or skin tone creates a visible exposure shift.
Client briefing template items to prepare before the session:
- Wardrobe guidance (solid colors, avoid busy patterns, bring two outfit options)
- Background preference (white, gray, environmental)
- Intended use and required crop (square for LinkedIn, horizontal for press)
- Tone preference (approachable, authoritative, creative)
- Delivery timeline and retouching scope
Metroplex Headshots offers real-time image review during the session so clients can confirm the look before leaving. For large corporate team sessions, the mobile studio setup brings the full lighting rig to your office, reducing scheduling friction and keeping the team’s visual identity consistent across every portrait.
The role of lighting in shaping professional portraits goes beyond technical settings. It communicates brand alignment before the viewer reads a single word of a bio.
How does your lighting setup affect post-processing?
Lighting decisions made on set directly determine how much work happens in post. A well-lit portrait with controlled shadows and consistent catchlights requires minimal correction; a poorly lit one can take three times as long to retouch and still show the original problem.
Clamshell setups at 2:1 produce the cleanest files because shadow depth is low and skin texture is softened by the wrap. Three-point setups at 4:2:1 introduce more shadow, which means more dodge-and-burn work around the jaw, neck, and far cheek. Rembrandt and split lighting create the deepest shadows and require the most retouching investment, particularly for subjects with uneven skin texture.
Color temperature consistency across all lights matters as much as power ratios. A single light running at a different Kelvin value from the others creates a color cast that is visible on skin and difficult to correct without affecting the entire image. Shoot a gray card at the start of each session and set a custom white balance in post to neutralize any shift.
Catchlights added in camera are always preferable to painting them in post. A natural catchlight from a real modifier has a shape and position that reads as authentic; a painted one rarely does. Getting the light placement right on set saves retouching time and produces a more credible result.
Key Takeaways
The most effective approach to business portrait lighting is to match the setup to the portrait’s purpose: clamshell for approachable LinkedIn headshots, three-point for executive presence, and Rembrandt or split for creative depth.
| Point | Details |
|---|---|
| Start with clamshell at 2:1 | A key overhead plus fill below at half the power produces clean, flattering light for most LinkedIn and team portraits. |
| Three-point for executive work | Key, fill, and kick at a 4:2:1 ratio delivers dimension, catchlights, and background separation for polished executive portraits. |
| Modifier size determines softness | A 36–47 in octabox close to the subject produces more flattering wrap than a smaller modifier at the same distance. |
| Mark positions for team consistency | Gaffer tape on the floor for the chair, camera, and lights locks the lighting signature across every subject in a large session. |
| Metroplex Headshots brings the studio to you | In-studio and on-location sessions in Dallas–Fort Worth use the same controlled lighting workflow, with real-time review and professional retouching included. |
The lighting choice most photographers get wrong
There is a tendency in business portrait photography to default to the most technically impressive setup available, regardless of what the subject actually needs. A three-point rig with a background light and a rim stack looks great in a lighting diagram. On a nervous first-time subject in a cramped conference room, it can produce stiff, over-lit portraits that communicate stress rather than authority.
The most underrated variable in business portrait lighting is subject comfort. A subject who feels overwhelmed by equipment, blinded by multiple strobes, or rushed through a setup they do not understand will show it in every frame. The lighting setup that produces the best portrait is often the simplest one that still achieves the goal, because a simpler setup gives the photographer more time to direct the subject and less time managing gear.
Clamshell lighting is dismissed by some photographers as too simple for executive work. That is a mistake. A well-executed clamshell with a quality octabox and a properly placed fill produces portraits that hold up at any size, require minimal retouching, and communicate exactly the approachable authority that most business professionals want. The three-point setup earns its place for formal executive portraits where separation and dimension are non-negotiable. But the goal is always the portrait, not the setup.
The other thing worth saying plainly: natural light is not a shortcut. Window light can be beautiful, but it is inconsistent, changes throughout the session, and cannot be reproduced for a follow-up shoot six months later. For business portraits that need to match across a team or hold up as a brand asset over time, controlled artificial lighting is not a preference. It is a professional standard.
Ready to see what the right lighting does for your portrait?
Metroplex Headshots delivers executive, corporate, and team headshots in Dallas–Fort Worth with the same controlled lighting workflow described in this guide. Every session includes a pre-shoot consultation, real-time image review so you approve the look before you leave, and professional retouching on final selects. The mobile studio option brings the full lighting rig to your office, which means your team gets consistent, brand-aligned portraits without anyone losing a half-day to travel.
The difference between a portrait that builds trust and one that just documents your face is almost always the lighting. Whether you need a single polished executive headshot or portraits for an entire team, Metroplex Headshots has the setup, the workflow, and the experience to get it right. Book your session or request a quote for your next corporate headshot day.
Useful sources and further reading
These are the primary references behind the technical guidance in this guide, organized by topic:
- Speedlite Headshots: Studio Quality on a Budget (Fstoppers) — Detailed speedlite workflow for portable headshot setups with modifier and distance guidance.
- 3 Handy Lighting Setups for Headshot Photography (Digital Photography School) — Accessible breakdown of foundational setups for photographers building or expanding a headshot portfolio.
- Catchlight (Wikipedia) — Reference definition and technical background on catchlights and their role in portrait photography.

